

1.Site Preparation Errors
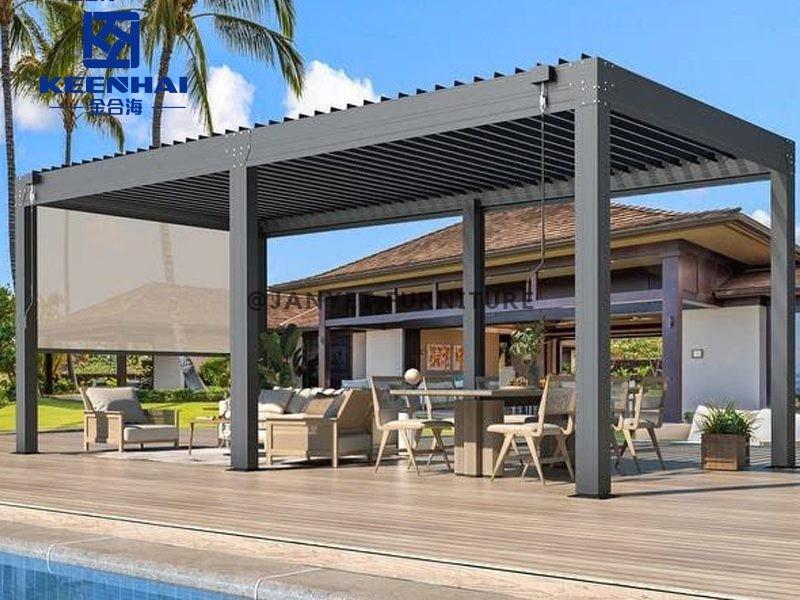
Before installing an Aluminum pergola house, ensuring the site is properly prepared is crucial. Neglecting this step can lead to structural instability, water pooling, or misaligned posts, which compromise both safety and longevity.
1.1 Failing to Level the Ground Properly
Uneven ground is one of the most common mistakes during pergola installation. If the surface isn’t level, posts may tilt, and roof alignment can suffer. To prevent this:-
Use a laser level or a long spirit level to check the site in multiple directions.
-
Remove excess soil or fill low spots to achieve a flat, stable surface.
-
Compact the soil thoroughly to prevent settling over time.
1.2 Ignoring Soil Stability and Drainage
Even a level site can fail if the soil isn’t stable or doesn’t drain well. Soft or loose soil can shift under the weight of an aluminum pergola. Proper drainage prevents water accumulation around posts, which can lead to corrosion or foundation weakening. Steps to ensure stability:-
Test soil firmness by pressing with a heavy object or using a soil penetrometer.
-
Install gravel or compacted sand under footings for added support.
-
Create slight slopes away from the pergola to guide rainwater safely.
1.3 Overlooking Nearby Obstacles or Utilities
Failing to account for underground pipes, electrical lines, or overhanging trees can cause serious issues. Check your site carefully before digging or anchoring posts:-
Contact local utility companies to mark underground services.
-
Measure distances from trees, fences, and structures to ensure enough clearance.
-
Plan for accessibility to the pergola once installed, including pathways for maintenance.
1.4 Neglecting Reference Points and Alignment
Without proper reference points, posts can end up misaligned. This affects both appearance and structural integrity. Use the following approach:-
Mark all post positions with stakes and string lines before installing footings.
-
Double-check diagonal measurements to confirm a perfect rectangle or square layout.
-
Adjust positions gradually rather than forcing posts into alignment, which can stress the aluminum framework.
For complex layouts, especially for louvered pergola designs or multi-section structures, consider laying out full-scale tape outlines on the ground to visualize spacing, roof overhangs, and furniture integration.
2.Incorrect Measurement and Layout
Accurate measurements and careful layout are essential to ensure your pergola fits the intended space and functions correctly. Mistakes in this stage can cause misaligned posts, uneven roofs, and drainage problems, which affect both appearance and longevity.
2.1 Miscalculating Pergola Dimensions
Measuring incorrectly is one of the most common mistakes. Many homeowners underestimate the space required for footings, roof overhangs, or furniture integration. To avoid this:-
Measure the length, width, and height of the installation area multiple times to confirm accuracy.
-
Include extra clearance for gutters, downspouts, or deck edges.
-
Double-check diagonal measurements to ensure the layout forms a perfect rectangle or square.
-
For adjustable or multi-section models like Aluminum automated pergola, consider spacing requirements for moving parts before finalizing measurements.
2.2 Improper Alignment with Outdoor Spaces
Failing to align the pergola with existing outdoor features can result in awkward gaps or obstructed pathways. Proper alignment enhances both usability and visual appeal. Steps to maintain alignment:-
Sketch a site plan including patios, walkways, garden beds, and outdoor furniture.
-
Use string lines to mark pergola corners and roof edges on the ground.
-
Adjust post placement gradually, ensuring the structure flows naturally with surrounding elements rather than forcing it into place.
2.3 Neglecting Roof Slope and Drainage Requirements
A flat roof or improper slope can cause water pooling, leaks, and long-term damage. Aluminum pergolas require careful planning for roof pitch and drainage. Ensure proper water runoff by:-
Maintaining a minimum slope of 2–3 degrees for fixed roofs.
-
Installing gutters or channels to direct rainwater away from footings.
-
Checking that adjustable or motorized roofs, like a Aluminum motorized pergola, operate smoothly without water buildup along joints.

3.Material Handling and Assembly Mistakes
Proper handling and assembly are crucial to maintain structural integrity and ensure long-term performance. Mistakes at this stage can lead to scratches, misaligned joints, or mechanical issues with moving parts.
3.1 Damaging Aluminum Components During Transport
Aluminum panels and posts are durable but can dent or scratch if mishandled. To prevent damage:-
Transport components in padded crates or with protective covers.
-
Avoid dragging panels across rough surfaces; lift them instead.
-
For heavier subtypes like Aluminum Modern Gazebo, use at least two people when moving large panels to prevent bending or warping.
3.2 Using Wrong Fasteners or Hardware
Fasteners directly affect the stability and longevity of the pergola. Using incorrect screws or bolts can loosen over time or corrode prematurely. Best practices include:-
Use stainless steel or manufacturer-recommended hardware for all aluminum joints.
-
Match bolt lengths and diameters exactly to avoid misalignment.
-
Check torque specifications to ensure fasteners are neither too tight nor too loose, especially for moving components on a Aluminum automated pergola.
3.3 Skipping Step-by-Step Assembly Instructions
Following the assembly guide step by step is non-negotiable. Skipping instructions increases the risk of structural errors or roof misalignment. Recommended approach:-
Lay out all components and identify each piece before beginning.
-
Assemble in logical order: frame first, then roof panels, followed by any motorized or retractable mechanisms.
-
Inspect each step to ensure joints are secure, panels are aligned, and moving parts operate smoothly.
4.Improper Anchoring and Foundation Issues
A solid foundation is essential for stability, especially for larger aluminum structures. Mistakes in anchoring can compromise safety, longevity, and resistance to environmental stress.
4.1 Weak Concrete Footings or Mounting Bases
Footings must be poured to proper depth and cured fully to support the pergola's weight. For typical aluminum pergolas:-
Excavate to at least 18–24 inches deep depending on soil type and local frost levels.
-
Pour concrete with a minimum strength of 3,000 PSI and allow at least 72 hours for initial curing before mounting posts.
-
Use embedded anchor bolts to secure posts firmly, preventing shifting over time.
4.2 Inadequate Securing of Posts and Beams
Posts and beams carry both the roof and lateral forces, so improper attachment can cause misalignment or structural failure. Best practices include:-
Use brackets and anchors rated for the specific aluminum pergola model, such as a louvered pergola.
-
Check that all bolts and fasteners are torqued according to manufacturer specifications.
-
Reinforce corners with additional cross-bracing if the site is prone to heavy winds or uneven settling.
4.3 Failing to Account for Wind Loads
Wind can exert significant force on an elevated structure. Ignoring wind loads can lead to tilting, detachment, or damage. Recommended measures:-
Consult local building codes for wind load requirements in your area.
-
Position pergola posts at calculated distances and use reinforced footings to resist uplift.
-
For motorized or retractable roof systems, ensure the roof is locked securely during storms to prevent movement.
5.Electrical and Accessory Installation Errors (If Applicable)
When aluminum pergolas include integrated lighting or motorized components, mistakes in installation can reduce lifespan, create hazards, or compromise usability.
5.1 Incorrect Wiring for Integrated Lighting or Motors
Wiring must follow local electrical codes and the pergola manufacturer's specifications. Steps to ensure proper installation:-
Verify the voltage and amperage requirements for all lights and motors before connecting.
-
Use weatherproof conduit and outdoor-rated cables to prevent water ingress.
-
Test each connection with a voltage meter before finalizing installation to avoid short circuits or overloads.
5.2 Installing Motorized Louvers or Retractable Roofs Incorrectly
Motorized systems require precise alignment and secure attachment. Mistakes can cause jamming, uneven movement, or premature wear. Key practices include:-
Level all louver tracks and ensure parallel alignment with posts.
-
Follow the manufacturer’s step-by-step installation instructions for motor units.
-
Double-check limit switch settings to prevent the roof or louvers from overextending.
5.3 Neglecting Maintenance Access and Safety Clearances
Integrated systems need room for future service and safe operation. Common errors include cramped wiring paths or blocked access to motors. Recommendations:-
Leave at least 12–18 inches around motors and control units for easy inspection.
-
Route cables away from moving parts and secure them with clips or conduit.
-
Clearly mark all emergency shutoff points for quick access during malfunctions.