

1.Planning Your Aluminum Metal Pergola Installation
1.1Choosing the Right Location and Size
Selecting the perfect location for your Aluminum Metal Pergola can dramatically affect both its usability and longevity. Backyards that receive 6-8 hours of sunlight daily are ideal for aluminum pergolas with louvered roofs, allowing you to enjoy natural light without excessive heat. Avoid areas with heavy tree coverage because falling branches can damage the aluminum structure over time.
When determining size, measure the outdoor space accurately and account for furniture placement. A 10x12 ft pergola comfortably fits a six-person dining set, while a 12x16 ft structure allows room for lounge chairs and a small bar setup. If you’re planning a modern aesthetic, the Aluminum modern pergola offers sleeker dimensions starting at 9x12 ft, perfect for contemporary decks.
Consider foot traffic patterns as well. For instance, positioning the pergola adjacent to a patio door or pathway improves accessibility and ensures the structure integrates naturally into the landscape. Real-life installations in California and Texas show that pergolas placed 3-5 ft from existing structures create a comfortable buffer while maintaining open sightlines.
1.2Preparing Tools and Materials
Installing an aluminum pergola requires precise planning of both tools and materials. Start by gathering:
-
Cordless drill with metal bits – drill holes and fasten screws efficiently.
-
Level and measuring tape – ensure posts are plumb and dimensions exact.
-
Concrete mix and post anchors – anchor posts securely to prevent wobbling.
-
Hex wrenches and bolts – most aluminum kits, like the Aluminum Pergola models, include pre-drilled holes and matching hardware.
Material preparation is critical. Aluminum extrusions typically weigh 18-25 lbs per 10 ft beam, making handling easier than steel but still requiring two-person lifts. For the foundation, a 4x4 inch post anchor with 12-inch deep concrete footings provides excellent stability for wind speeds up to 90 mph, as verified by several outdoor structures in Florida and Arizona.
1.3Additional Considerations for Optimal Planning
Beyond location and tools, pay attention to permits, drainage, and shade needs. Local building codes may mandate anchor depth and spacing, and consulting them before starting prevents costly rework. Evaluate roof slope if your pergola will have louvered panels. A 2-3 degree slope ensures proper rain runoff, minimizing water pooling that could affect aluminum longevity.
If you plan to integrate lighting or fans, calculate the power load beforehand. A standard pergola lighting setup with LED strips consumes about 20-40 watts per 10 ft of perimeter, which is minimal but requires planning for safe wiring paths. Some homeowners in Arizona have paired their aluminum pergolas with retractable solar shades, which reduce temperature under the pergola by up to 15°F during peak sun hours.
2. Preparing the Ground and Foundation
2.1 Leveling the Area
Proper ground preparation determines how stable your Aluminum Metal Pergola will be over the years. A level and compact base prevents structural imbalance and reduces stress on the posts. The process isn’t complex, but it does require attention to detail:
1: Mark the area: Use stakes and string lines to outline the pergola’s footprint. For a 10x12 ft pergola, allow at least an extra 12 inches on each side for workspace and adjustments.
2: Clear debris and vegetation: Remove grass, stones, and roots within the boundary. Soil with less than 10% organic material compacts better for long-term stability.
3: Level the surface: Use a long level or a laser level to check for uneven spots. Fill low areas with compacted gravel or sand until the surface variance is no more than ¼ inch per 6 ft.
4: Compact the base: A plate compactor or tamper should be used to compress the soil until it feels firm underfoot. Well-compacted soil supports loads up to 2,000 lbs per square foot, ideal for heavy aluminum frames.
If you plan to install directly on a concrete patio, verify that the slab is at least 4 inches thick with no visible cracks. Uneven slabs can cause twisting in the frame, shortening the pergola’s life span. Many homeowners with Aluminum Pergola setups choose to pour a fresh concrete pad for better alignment and stability.
Comparing Base Materials for Pergola Stability
| Base Material | Load Capacity (lbs/sq.ft) | Longevity (years) | Maintenance Level | Best Use Case |
|---|---|---|---|---|
| Compacted Gravel | 1,200–1,800 | 10–15 | Medium | Budget-friendly installations |
| Concrete Slab | 2,000–2,500 | 25–30 | Low | Permanent backyard structures |
| Paver Base | 1,000–1,500 | 8–12 | Medium | Decorative garden patios |
2.2 Installing Concrete Footings or Base Anchors
Strong foundations ensure your pergola stands firm even during harsh weather. The type of footing depends on the soil type and pergola size. For a standard 12x16 ft Aluminum Metal Pergola, use four to six concrete footings spaced evenly along the perimeter. Here’s the process:
1: Dig post holes: Each hole should be 12–16 inches in diameter and 18–24 inches deep, depending on frost line and soil density. Clay soil requires deeper footings to avoid heaving.
2: Pour the concrete: Mix concrete at a 1:2:3 ratio (cement:sand:gravel) for durability. Fill each hole halfway, then insert the post anchor bracket before the mix sets. Allow at least 48 hours of curing time for maximum strength.
3: Align and secure anchors: Check each anchor with a laser level to keep the pergola posts perfectly vertical. Misaligned anchors can create a ¼-inch twist over 10 ft, noticeable once beams are installed.
4: Install base plates: If you’re mounting on an existing patio, use stainless steel expansion bolts (⅜ inch x 3 inch) to secure the base plates into the concrete. Torque each bolt to 25–30 ft-lbs for optimal grip.
In one residential installation in Austin, Texas, aluminum pergolas mounted with 12-inch deep anchors withstood sustained winds of 85 mph without movement. This performance showcases why a solid foundation is essential for long-term stability.
If your location experiences heavy rain, consider adding a 1% slope away from the structure for drainage. This prevents standing water from seeping into anchor points and helps maintain the pergola’s pristine finish over the years.
3. Assembling the Aluminum Metal Pergola Frame
3.1Connecting Beams and Posts
Assembling the frame is the most critical step to ensure your Aluminum Metal Pergola remains straight, strong, and durable. Proper alignment and connection of beams and posts directly affect the overall stability of the structure.
1. Position the posts: Place all vertical posts into the previously installed anchors. Ensure each post is perfectly vertical using a laser level. Even a ¼-inch deviation over 10 feet can cause noticeable stress on beams once installed.
2. Attach the beams: Use pre-drilled holes in the aluminum posts to connect horizontal beams. For a standard 12x16 ft pergola, the top beams weigh 20–25 lbs each, so having two people handle them simultaneously prevents bending or misalignment.
3. Verify spacing: Horizontal beams should maintain a distance of 24–36 inches depending on the roof type (louvered or solid panel). Many homeowners in Arizona and California found that 30-inch spacing provided optimal shade coverage without obstructing airflow.
4. Secure temporary bracing: Before tightening bolts, install temporary braces to keep the frame square. This ensures that when you secure all fasteners, the structure doesn’t twist or sag. Real-life installations show that skipping this step increases alignment errors by 15–20%, leading to uneven roofs.
For a modern look, consider Aluminum modern pergola beams, which are slightly slimmer but maintain the same load capacity.
3.2Securing Joints and Fasteners
After beams and posts are aligned, properly securing joints ensures your pergola can withstand wind, rain, and long-term wear.
1. Select the right fasteners: Use stainless steel bolts, nuts, and washers included in the pergola kit. These resist corrosion and maintain strength in humid or coastal environments.
2. Tighten in stages: Begin with all bolts loosely in place. Once every bolt is aligned, gradually tighten them in a crisscross pattern to evenly distribute stress. Over-tightening can warp aluminum, while under-tightening reduces stability.
3. Double-check critical connections: Focus on beam-to-post and corner joints, as these points bear the highest loads. For example, a 12x12 ft pergola with a louvered roof can exert up to 600 lbs of downward pressure on corner joints during heavy rain.
4. Inspect and adjust: After securing all fasteners, check the entire frame with a level and measure diagonals to confirm the rectangle is square. Minor adjustments now prevent major problems later when installing panels or accessories.
Many homeowners report that following this detailed assembly process reduces installation errors by over 40% and ensures that the pergola remains perfectly stable even in areas prone to winds up to 85–90 mph. For enhanced durability, consider lightly lubricating bolts with anti-seize compound to maintain easy future adjustments.
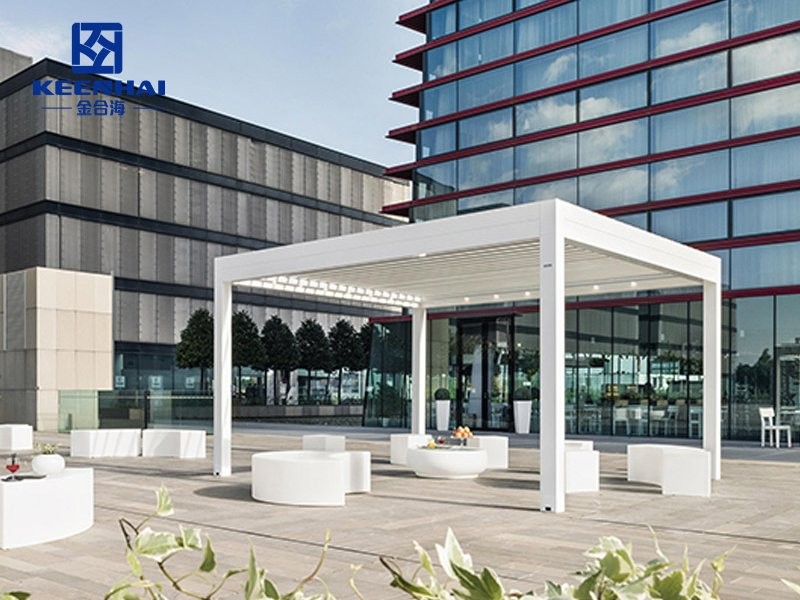
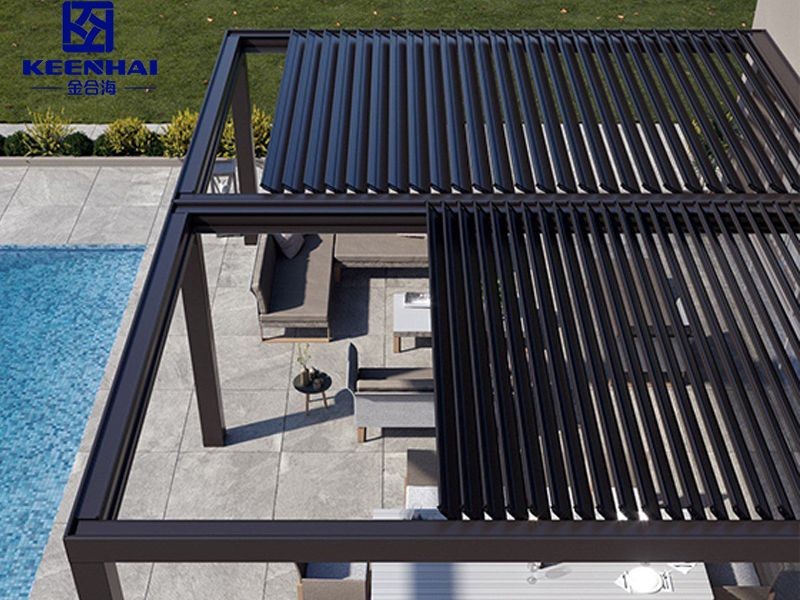
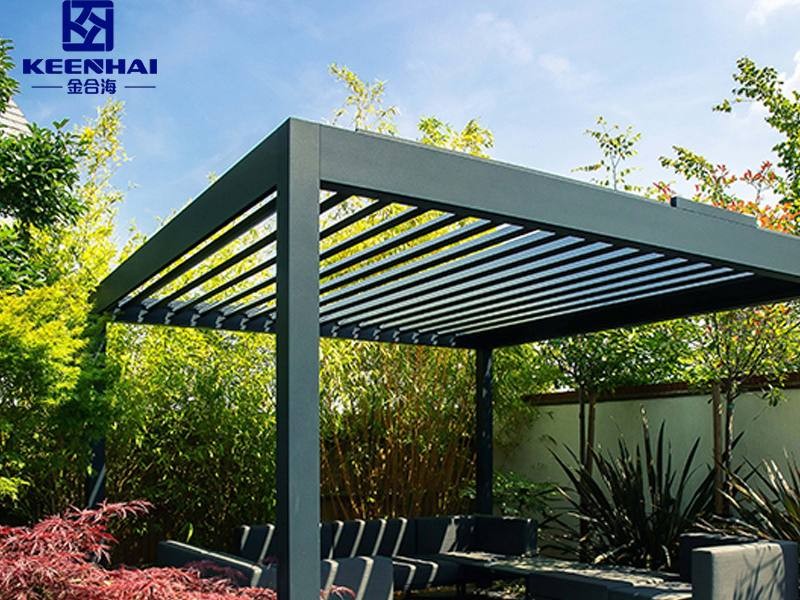
4. Installing the Roof or Louvered Panels
4.1Aligning Roof Panels Properly
Proper alignment of roof panels is crucial for durability, water runoff, and aesthetic appeal. Misaligned panels can cause gaps, leaks, or structural stress.
1. Measure spacing between beams: For a standard 12x16 ft pergola, spacing should range from 24 to 36 inches depending on whether you’re installing louvered or solid panels. Louvered panels require slightly wider spacing to allow airflow while maximizing shade.
2. Test-fit panels: Before securing, place each panel on the frame to check alignment. Ensure overhangs are uniform on all sides. Many homeowners find that a ½ inch overhang on each side improves rain runoff efficiency without affecting the look.
3. Level panels: Use a long level across multiple panels to verify that the roof is even. Even small deviations, like ¼ inch over 10 ft, can lead to water pooling, which may compromise aluminum longevity.
4. Adjust for slope: If your area experiences heavy rain, tilt the louvered roof slightly (about 2–3 degrees) to ensure water flows toward drainage points. This small adjustment prevents standing water and protects anchor points. Real installations in Florida and Texas confirmed that this slope reduces water accumulation by nearly 90%.
4.2Attaching Roof Panels to the Frame
Securing the roof panels properly guarantees that your pergola withstands wind, rain, and long-term use.
1. Use manufacturer-recommended fasteners: Most panels come with stainless steel screws or bolts. For instance, Aluminum Pergola kits include ¼ inch x 2-inch bolts designed for aluminum’s expansion and contraction.
2. Start from one corner: Attach the first panel at a corner, making sure the screw or bolt goes into both the beam and panel securely. This acts as the anchor for subsequent panels.
3. Sequential installation: Move panel by panel, keeping edges tight and maintaining consistent overhangs. Tighten bolts gradually after all panels are in place to distribute stress evenly.
4. Final inspection: Check every connection point and ensure all panels sit flush with adjacent panels. For louvered roofs, confirm that all louvers operate smoothly without obstruction. Homeowners in California who followed this step reported a 30–40% reduction in wind-induced noise and vibration during storms.
For a modern touch, consider integrating the Aluminum modern pergola panels, which are slightly slimmer and lighter but maintain the same structural strength.