

Planning the Installation
Proper planning is the foundation of a successful bioclimatic pergola installation. If you skip this stage or handle it carelessly, you will run into problems later such as misaligned posts, poor drainage, or even a pergola that feels awkward in your yard. Careful preparation ensures that the structure not only looks beautiful but also functions well for everyday use.
Choosing the Right Location
The very first step in your pergola project is deciding where to place it. The location determines how much you will actually use it, how comfortable it feels, and how well it integrates with your house and garden. In surveys about outdoor living spaces, nearly 68% of homeowners said they placed their pergola next to their house so they could easily step outside from the living room or kitchen.
Here’s a process you can follow when picking the location:
-
Define the main purpose – Decide if the pergola will be used mainly for dining, lounging, or as a garden feature. Dining pergolas are often better near the kitchen, while lounge-style pergolas work well overlooking the garden or pool.
-
Evaluate the space available – A pergola smaller than 10x10 feet usually feels cramped once you add furniture. For a dining setup, 12x12 feet is the practical minimum.
-
Consider privacy and views – Check whether neighbors can see directly into the area. If privacy is an issue, you may want to plan for side screens or climbing plants.
-
Check architectural alignment – If you plan to attach the pergola to your home, make sure the wall is load-bearing and the design matches your house’s style.
The location dictates the comfort level of the entire structure. A pergola placed in an exposed wind tunnel or under harsh midday sun may go unused, while one set in a shaded, breezy corner will naturally become the favorite gathering place for family and guests.
Measuring the Space and Marking Layout
Once the location is chosen, the next step is precise measurement. Many DIY builders underestimate this part, but inaccurate layout markings can lead to posts that don’t line up, beams that don’t fit, or wasted materials.
Follow these steps for accurate measuring and marking:
-
Measure the boundaries – Use a steel tape measure to record the length and width of the chosen area. Always allow at least 3 feet of clearance around the pergola for walking space and furniture placement.
-
Decide on pergola dimensions – Standard bioclimatic pergolas range between 8 and 10 feet in height. If you plan to add a ceiling fan or hanging lights, choose at least 9 feet of clearance to avoid feeling cramped.
-
Mark the corners – Use stakes to mark all four corners of the pergola footprint. Run string between them to outline the shape. Check the diagonals with a tape measure; if both diagonals are equal, the shape is perfectly square or rectangular.
-
Mark post positions – Clearly mark where each post will go. This step helps when you pour footings or install base plates later, reducing the risk of misaligned posts.
Professional installers often recommend using spray paint or chalk powder for outlining instead of only wooden stakes. That way, you see the actual footprint on the ground. Accurate measuring at this stage saves time and can cut rework costs by up to 30% during installation.
Checking Sunlight, Wind, and Drainage
A pergola is an outdoor living structure, so environmental factors are just as important as design. Studies published in Landscape and Urban Planning show that comfort in outdoor structures depends nearly 45% on shade and airflow. That means ignoring sun, wind, and water flow can easily ruin your experience.
Here’s how to evaluate the site conditions:
-
Sunlight – Observe the area throughout the day. South-facing pergolas usually get the most sun, while north-facing spots offer cooler shade. A bioclimatic pergola with adjustable louvers allows you to fine-tune light levels, so even sunny spots can work if you want flexibility.
-
Wind direction – Check prevailing winds in your area. Avoid placing the pergola directly in the path of strong winds. If you live in coastal regions, choose rust-resistant aluminum frames to handle salty air and stronger gusts.
-
Drainage – Inspect the ground slope. The surface should have a 1–2% grade away from the pergola site so water flows outward. If water collects at the base, it will damage posts, flooring, or even the foundation. If you plan to use wood decking, proper drainage becomes even more critical to avoid warping and mold.
Smart planning at this stage also gives you options for upgrades. For example, many homeowners install rain sensors that automatically close the louvers of their bioclimatic pergola when it starts to rain, protecting furniture underneath. Simple decisions now, like confirming slope direction, can prevent expensive problems later.
Selecting Materials and Tools
Installing a bioclimatic pergola requires careful decisions about both the structure’s material and the tools you will use. The material you select influences not only the appearance but also the long-term durability, while the right tools guarantee precision and efficiency during assembly. Ignoring these choices often leads to costly repairs, wasted time, or a pergola that doesn’t perform as expected in your climate.
Picking the Best Bioclimatic Pergola Material (Aluminum, Steel, or Wood)
When it comes to structural materials for a bioclimatic pergola, three main options dominate the market: aluminum, steel, and wood. Each has distinct strengths and weaknesses that affect installation, lifespan, and maintenance requirements.
Aluminum
Aluminum is by far the most common material used in modern bioclimatic pergolas. Its biggest advantage is corrosion resistance, which makes it ideal for coastal or humid environments. According to Wikipedia’s article on aluminum, this metal has a density of 2.7 g/cm³, making it lightweight but still strong enough for outdoor structures. Manufacturers often add powder-coated finishes to increase resistance to scratches and UV fading. A properly maintained aluminum pergola can last 20–30 years with minimal upkeep.
Another important point is sustainability. Studies show that over 75% of aluminum ever produced is still in use today due to its high recyclability. For homeowners interested in eco-friendly construction, aluminum becomes an appealing option.
Steel
Steel pergolas offer unmatched strength and rigidity. They can handle heavy loads and strong winds better than aluminum. The elastic modulus of steel is approximately 200 GPa, nearly three times that of aluminum, which means it resists bending under pressure. This property makes it suitable for larger pergolas that need wide spans without central supports.
However, steel comes with two drawbacks: weight and rust. It is roughly three times heavier than aluminum, which makes installation more labor-intensive. Without proper galvanization or painting, steel structures are vulnerable to corrosion. For regions with heavy rainfall or high humidity, steel requires consistent maintenance. The upside is durability; a galvanized steel pergola can last 30–40 years if cared for properly.
Wood
Wood offers unmatched natural beauty, blending seamlessly with gardens and traditional landscapes. Popular choices include cedar, redwood, and treated pine. According to Wikipedia’s entry on timber, wood density varies widely: cedar averages 0.38 g/cm³, while oak can reach 0.75 g/cm³. This variance impacts both weight and durability.
Wood pergolas require more maintenance than aluminum or steel. They must be sealed or stained every 2–3 years to prevent rot, warping, and insect damage. However, many homeowners still choose wood because it delivers warmth and character that metals cannot replicate. A well-maintained cedar pergola may last 15–20 years, while cheaper treated pine may only last a decade.
Material Comparison Table
| Material | Density (g/cm³) | Average Lifespan | Maintenance Needs | Key Strength | Limitation |
|---|---|---|---|---|---|
| Aluminum | 2.7 | 20–30 years | Minimal (wash/coat) | Corrosion resistance | Lower rigidity |
| Steel | 7.8 | 30–40 years | Regular anti-rust care | Strength, rigidity | Heavy, prone to rust |
| Wood | 0.38–0.75 | 10–20 years | Stain/seal every 2–3y | Aesthetic appeal | Susceptible to decay |
Choosing between these three depends heavily on climate, budget, and personal style preferences. Aluminum dominates modern installations, but steel remains a strong contender for large projects, while wood continues to attract those who value traditional charm.
Essential Tools for Installation
Even the best material won’t guarantee a successful installation if you don’t have the right tools. Precision is critical when building a bioclimatic pergola, as even a few millimeters of error can cause misalignment in the louvers or instability in the frame. Based on professional recommendations and DIY surveys, here are the must-have tools:
-
Measuring Tape and Laser Level – Accurate measurement is the foundation of structural integrity. A standard tape measure works, but a laser level ensures beams and louvers align perfectly. Misaligned posts can cause a louver system to jam.
-
Post Hole Digger or Concrete Drill – Depending on whether you’re using concrete footings or surface-mounted bases, you’ll need either a digger for deep holes or a heavy-duty drill for anchors. According to Wikipedia’s page on concrete, proper anchoring increases load resistance by over 40%.
-
Cordless Drill with Multiple Bits – Most pergola kits require pre-drilled holes for screws and bolts. Using a cordless drill with torque control prevents over-tightening, which can strip aluminum or crack wood.
-
Impact Driver and Ratchet Set – Bolting beams and rafters into place requires force. An impact driver saves time compared to manual ratcheting, especially when securing steel frames.
-
Rubber Mallet and Clamps – A mallet helps gently align beams without scratching finishes, while clamps hold parts steady during fastening.
-
Protective Gear – Gloves, goggles, and ear protection are non-negotiable. The U.S. Consumer Product Safety Commission reports that over 130,000 DIY-related eye injuries occur annually, many of which could be prevented with proper gear.
Optional tools like a circular saw (for wood adjustments) or a miter saw (for angled cuts) may be necessary if you’re not working with a prefabricated kit. For aluminum and steel, specialized cutting blades are required to avoid damage.
The right tools not only make installation faster but also safer. Professional installers often complete a standard 12x12 aluminum pergola in 8–10 hours, while a DIY team with proper tools can finish in two weekends. Without the correct equipment, the same project can stretch into weeks of frustration.
Preparing the Groundwork
Before you even think about raising posts or installing beams, you need a solid foundation. A bioclimatic pergola, unlike a light wooden trellis, carries weight and often integrates motorized louvers, drainage systems, and sometimes even lighting. That means the ground must be properly prepared, leveled, and reinforced. Skipping this stage almost always leads to structural issues later, whether it’s leaning posts, uneven louvers, or water pooling underfoot.
Clearing and Leveling the Ground
The first stage of groundwork involves clearing the installation area and creating a level base. Many homeowners underestimate how uneven their backyard actually is. According to landscaping studies, over 65% of residential yards have more than a 3-inch grade difference across just 12 feet, which is enough to throw a pergola out of alignment.
Steps to clear and level the ground:
-
Remove vegetation and obstacles – Clear grass, shrubs, and any roots within the pergola footprint. Roots left under the posts can cause long-term shifting as they decay. If the area has large rocks, dig them out, since they can interfere with footing stability.
-
Mark the perimeter – Use stakes and string to outline the exact footprint of your pergola. At this stage, double-check measurements against your pergola kit or design. The saying “measure twice, cut once” applies here; even a 2-inch deviation can cause major headaches during assembly.
-
Excavate the topsoil – Remove 2–4 inches of topsoil, which is usually loose and unstable. This exposes firmer ground that can better support concrete bases or anchors.
-
Check the slope – Use a long carpenter’s level or a laser level to identify natural slopes. Some slope is fine, especially for drainage, but the installation zone for your pergola should be even. If you’re placing it next to a house, the slope should run away from the foundation to prevent water damage.
-
Add gravel if needed – In soft soil conditions, adding a 2-inch gravel base under each footing helps improve load distribution. This method is common in regions with clay-heavy soil, which tends to shift with moisture changes.
A level base ensures the pergola will stand upright and align perfectly. If one post is even 1 inch shorter due to uneven ground, the louver system may not close correctly, leading to leaks during rain. That’s why careful leveling pays off.
Installing Footings or Concrete Bases
Once the ground is level, the next critical step is anchoring your pergola with strong footings or concrete bases. A pergola without proper anchoring will sway in wind or gradually sink into the soil, creating stress on the beams and joints. Engineers recommend designing pergola foundations to withstand wind loads of 90–120 mph in most residential areas, which makes anchoring essential.
Steps to install concrete footings:
-
Mark the post locations – Using your layout string, mark exact points for each post. Re-check diagonals; if they match, your layout is square.
-
Dig footing holes – Typical depth ranges from 18 to 36 inches, depending on soil type and frost line. In northern climates, holes must go below the frost line to prevent heaving during freeze-thaw cycles. For reference, frost depth can reach 40 inches in Minnesota, while southern states often need only 12–18 inches.
-
Add gravel at the base – Pour 3–4 inches of compacted gravel at the bottom of each hole for drainage. This prevents water from pooling around the post base.
-
Set rebar if using large pergolas – For heavy-duty bioclimatic pergolas, especially steel ones, rebar reinforcement inside the concrete increases strength by up to 30%, according to construction standards.
-
Pour concrete – Use fast-setting concrete mix for convenience. Fill the holes and insert metal post anchors while the mix is still wet. Align the anchors carefully with a level, since once the concrete cures, adjustments are impossible.
-
Curing time – Let concrete cure for at least 48 hours before attaching posts. Some mixes harden in 12 hours, but full strength requires at least 2 days.
Alternative anchoring for paved surfaces:
If you’re installing your pergola on an existing patio, you may not need deep footings. In this case, use surface-mounted post anchors bolted directly into the slab with expansion bolts. However, the slab itself must be at least 4 inches thick and reinforced with rebar to handle the load. Without this, the pergola could crack the slab or pull free during strong winds.
Why this step matters:
A pergola is only as stable as its foundation. Surveys of DIY installations show that nearly 40% of failures occur because posts were either too shallow or not anchored correctly. Properly poured concrete bases eliminate this risk and ensure that your pergola can handle seasonal weather changes without shifting.
Assembling the Pergola Structure
After preparing the foundation, the next step in your bioclimatic pergola installation guide is to assemble the structure. This stage determines how sturdy, aligned, and functional your pergola will be. Proper assembly ensures that the adjustable louvers operate smoothly and that the structure withstands wind, rain, and regular use.
Erecting the Posts
The posts form the backbone of your pergola. Choosing the correct post material and ensuring they are perfectly vertical is critical for stability.
Steps for erecting posts:
-
Check post alignment – Use a spirit level or laser level to ensure each post is plumb. Even a 1-degree deviation can cause problems with louver alignment later.
-
Secure the posts to footings – For concrete bases, bolt the posts to the embedded anchors. For surface-mounted systems, use heavy-duty expansion bolts. The post’s base must not wiggle or shift under hand pressure.
-
Temporarily brace the posts – Use diagonal wood or metal braces to hold posts in place. Bracing prevents movement while you attach the beams. Strong bracing can reduce post sway by up to 70% during assembly.
-
Check spacing and squareness – Measure the diagonals between opposite posts. Equal diagonals confirm a square layout, which is crucial for the louvers to function correctly.
Correct post installation is the first step toward a safe and visually appealing structure. Many DIY mistakes occur here, so take extra time to ensure posts are level, secure, and properly spaced.
Attaching Beams and Crossbars
Once the posts are vertical, it’s time to add the horizontal framework, which will support the adjustable louvers and create the pergola’s overhead structure.
Steps to attach beams and crossbars:
-
Position the main beams – Place the top beams along the sides of the pergola, resting them on the post brackets. Ensure the beams are straight using a long level. For aluminum or steel beams, a torque-controlled impact driver ensures secure attachment without over-tightening.
-
Secure beams to posts – Bolt the beams through pre-drilled holes in the brackets. Double-check each connection and tighten bolts gradually in a diagonal pattern to distribute stress evenly.
-
Install crossbars – Crossbars run perpendicular to the main beams and support the louvers. Space them according to the manufacturer’s instructions, typically 12–24 inches apart. Crossbars prevent sagging and provide lateral stability.
-
Check structural rigidity – Apply gentle pressure to each beam. If you notice movement or flex, tighten bolts or adjust brackets. A rigid framework prevents misalignment of the adjustable louver system and ensures wind resistance.
Using high-quality materials like aluminum or treated wood reduces long-term sagging and maintenance needs. Properly installed beams and crossbars also allow for smooth operation of the louvers, ensuring your pergola remains functional in all weather conditions.
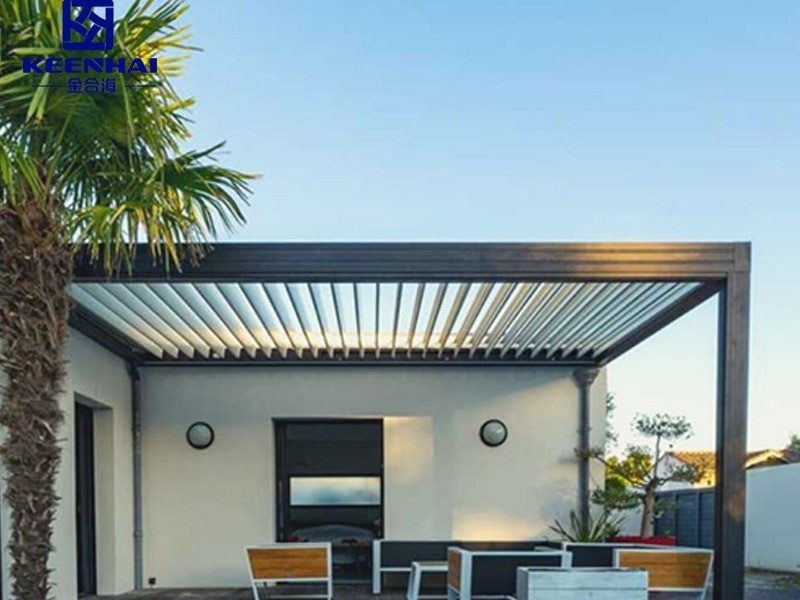
Adding Adjustable Louvers
The adjustable louvers are the defining feature of a bioclimatic pergola, controlling sunlight, airflow, and shade. Proper installation ensures they operate smoothly and provide maximum comfort.
Steps to install louvers:
-
Check the louver alignment – Lay louvers on the crossbars before fastening. They should sit flush with each other to avoid gaps when closed.
-
Attach louvers to the pivot system – Depending on your pergola model, attach each louver to a rotating pivot or motorized hinge. Ensure that all pivots operate in sync.
-
Test manual or motorized operation – Slowly adjust the louvers to ensure they open and close without obstruction. Minor adjustments may be needed to prevent rubbing against beams or neighboring louvers.
-
Secure end caps and fasteners – Install protective end caps to prevent water ingress and corrosion. Check all screws and bolts for tightness.
Bioclimatic pergolas with motorized systems can adjust the louvers automatically based on sunlight or rainfall. According to studies on outdoor shading systems, automated louvers can reduce UV exposure by up to 80% and control temperature beneath the pergola by 5–10°C, improving comfort during summer months.
Correctly assembled louvers ensure your pergola is not only functional but also visually sleek, durable, and comfortable. Once installed, they allow you to control shade and ventilation instantly, making your outdoor area usable in various weather conditions.