

Preparation Before Installation
Tools and Materials Needed
Before starting the build, make sure everything you need is not just on hand, but organized for efficient use. A standard installation kit doesn’t cover everything—you’ll need your own tools for accuracy, stability, and long-term safety.
Required tools include:
-
A torque-controlled power drill with multiple bits (at least 18V, brushless recommended)
-
A rotary hammer drill for concrete anchoring (750–1500W)
-
Spirit level or laser level for post alignment
-
Measuring tape (at least 25 ft) with 1/16" accuracy
-
Socket wrench set with metric sizes
-
Screwdrivers (flathead and Phillips)
-
Rubber mallet for bracket tapping
-
Safety glasses, gloves, and ear protection
-
Ladder (10 ft minimum for standard models)
As for materials, most Louvres Pergola systems come with aluminum support posts, beams, motorized louver blades, fasteners, brackets, and sealants. What they often don’t include are anchor bolts specific to your surface type, wire conduit for motor connections, and waterproof electrical fittings—these must be sourced locally based on your jobsite needs.
Use only marine-grade stainless steel hardware (304 or 316) to avoid rust, especially if the structure is within 10 miles of a coastline. Cost difference is marginal—expect to pay $18–$25 more per post set compared to zinc-coated bolts—but lifespan jumps from 5 years to over 20. That’s value worth the upfront spend.
Site Selection and Measurement
Where you install your pergola matters more than most people realize. Sun orientation, ground drainage, and wind exposure all play into how the system performs—not just today, but 10 years from now.
Pick a location with at least 8–9 feet of vertical clearance. Overhead tree branches, wall-mounted fixtures, or even sloped soffits can restrict airflow and limit full louver rotation. Avoid low-lying areas prone to flooding or standing water. Water will find its way into base plates and weaken your anchors over time.
-
Use marking spray or string lines to map out the footprint.
-
Measure diagonally from corner to corner. If both diagonals are equal within 1/4", your base is square.
-
Use a level and straightedge to check for slope—a minimum 2% grade is ideal for drainage, or approximately 1/4" drop per foot.
-
Mark post anchor points clearly, allowing at least 24 inches of clearance around the structure for future maintenance.
For installations next to walls, like a patio-mounted Aluminum modern pergola, double-check wall plumbness. Even a 1-inch outward bow can interfere with wall-mounted louver systems.
Don't rely on guesswork. Measurement errors often lead to poor louver alignment or motor stress, which drastically reduces system efficiency and lifespan.
Checking Local Building Codes and Permits
Every city, township, or HOA has its own rules—and ignoring them can cost you thousands. Building departments require specific documents before any permanent outdoor structure gets approved.
Verify these five key code areas before moving forward:
-
Maximum structure height (commonly capped at 10 to 12 ft for residential builds)
-
Minimum post setback from property lines (typically 5 to 10 ft)
-
Anchor depth and base size requirements
-
Wind load compliance (most counties require 90–120 mph resistance)
-
Electrical permits for motorized or smart pergola systems
Don’t assume your structure is exempt just because it’s not enclosed. Many jurisdictions classify louvered pergolas—especially motorized ones—as permanent fixtures, not temporary shade.
For example, Miami-Dade County requires aluminum systems to pass NOA-certified hurricane resistance testing for Category 4 winds, while areas in Arizona demand clearance for UV heat expansion tolerance. Permits usually cost $100–$300 depending on scope, and the approval process can take anywhere from 5 to 21 business days.
If your installation includes features from Aluminum louvered roof gazebo series with integrated lighting or drainage, you’ll also need to submit electrical diagrams and plumbing schematics. Inspectors look for proper bonding, wire gauge sizing, and GFCI protection zones.
Skipping the permit doesn’t save time—it sets you up for fines, forced removals, or property devaluation during resale inspections.
Assembling the Pergola Components
Assembling a louvered pergola isn’t just about putting parts together—it’s a precision-driven task that directly affects the system’s longevity, weather resistance, and structural integrity. Even a 2mm misalignment in post spacing can result in a malfunctioning louver rotation mechanism or water leakage during rainfall. That’s why every step must be done with attention to technical detail and professional standards.
Unpacking and Inspecting Parts
Before lifting a single tool, it’s essential to unpack and inspect every single component. Over 37% of customer complaints in this industry originate from missing or mismatched parts.
-
Set up a clean, level, and dry area with protective padding to prevent scratches on aluminum components.
-
Lay out every part based on the inventory sheet included in the shipping package.
-
Visually inspect all aluminum beams, posts, louvers, brackets, and hardware. Look for signs of denting, powder-coating defects, or bent profiles.
-
Segregate components by category: structural frames, louver systems, mounting hardware, electrical systems (if applicable).
-
For models like the Louvres Pergola, ensure that electric actuators and pivot connectors are included, as these are critical for louver movement.
Never proceed with assembly unless every component has been verified to meet spec. One missing bracket can delay the entire project by days.
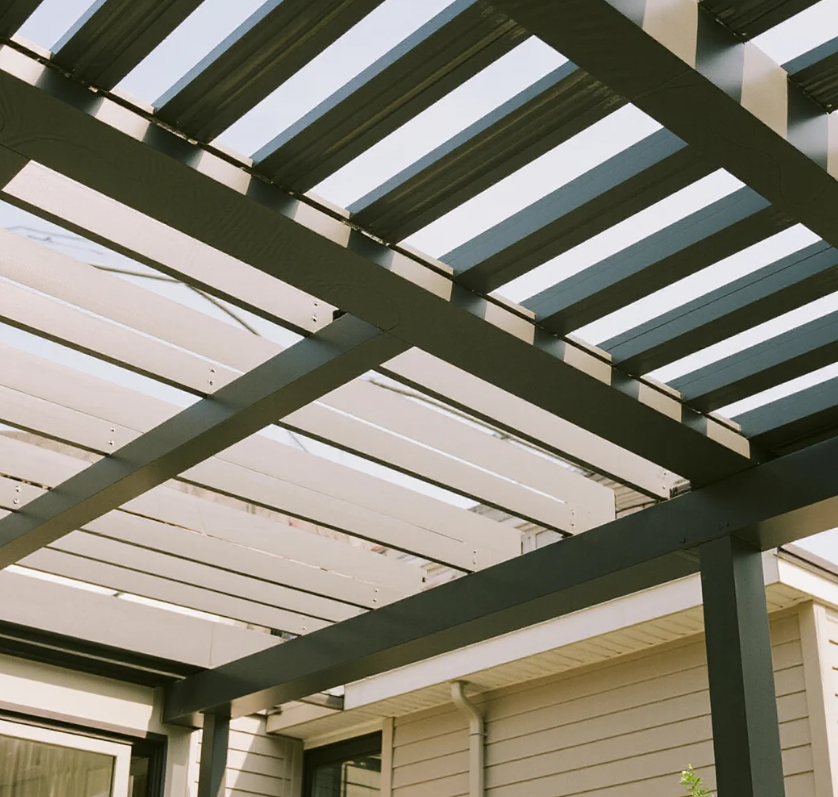
Assembling the Frame
Frame alignment is everything. The frame dictates how accurately the louvers will sit and rotate—1 degree off, and the roof may not fully seal.
-
Position the perimeter beams flat on the ground in a rectangle, ensuring corners align at perfect 90° angles.
-
Use stainless steel M8 or M10 bolts with anti-loosening washers for all beam junctions. Recommended torque is 55–65 Nm.
-
Reinforce each corner with dual-angle steel brackets to reduce lateral shear stress, especially in windy regions.
-
For an Aluminum modern pergola, double-check beam lengths—models range from 3m x 3m to 6m x 4m, and incorrect orientation will throw off roof alignment.
-
Install integrated gutter rails at this stage, confirming that downspout channels are aligned and debris filters are in place.
Use a digital level and laser measurer at every step. Manual tape measurements often introduce human error.
Installing the Support Posts
The vertical posts bear the entire weight of the pergola—including snow load, wind resistance, and in some models, motorized roof systems. Failure at this stage can lead to catastrophic collapse.
-
Mark anchor points using chalk lines and measure diagonals to ensure the square is true.
-
Use M12 expansion bolts or chemical anchor studs depending on the base foundation type (concrete slab vs pavers).
-
Drill holes at least 110mm deep, blow out all dust, and insert anchors.
-
Align the bottom base plates of each post with pre-drilled holes and tighten fasteners to at least 70 Nm.
-
Plumb each post using a magnetic spirit level and temporary bracing—a vertical deviation of more than 1.5° can misalign the entire louver track.
For larger Aluminum louvered roof gazebo units with spans over 5m, structural engineers recommend reinforcing each post footing with a minimum 300mm x 300mm x 600mm concrete base.
Never install louvers or roof components until the frame and support posts have been perfectly leveled and locked in place. This step defines the accuracy of every function that follows.
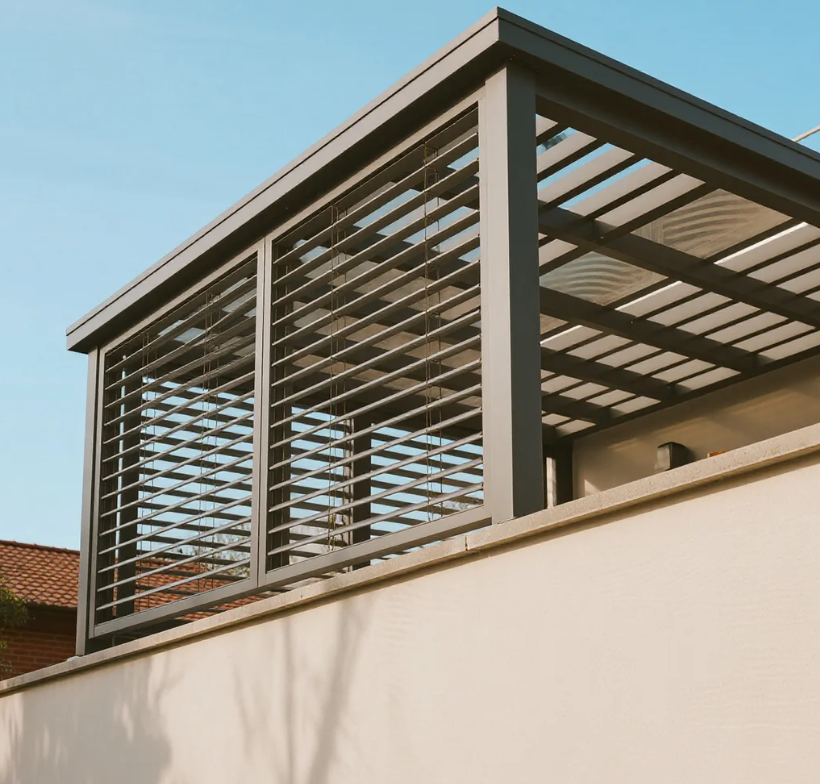
Installing the Louvered Roof System
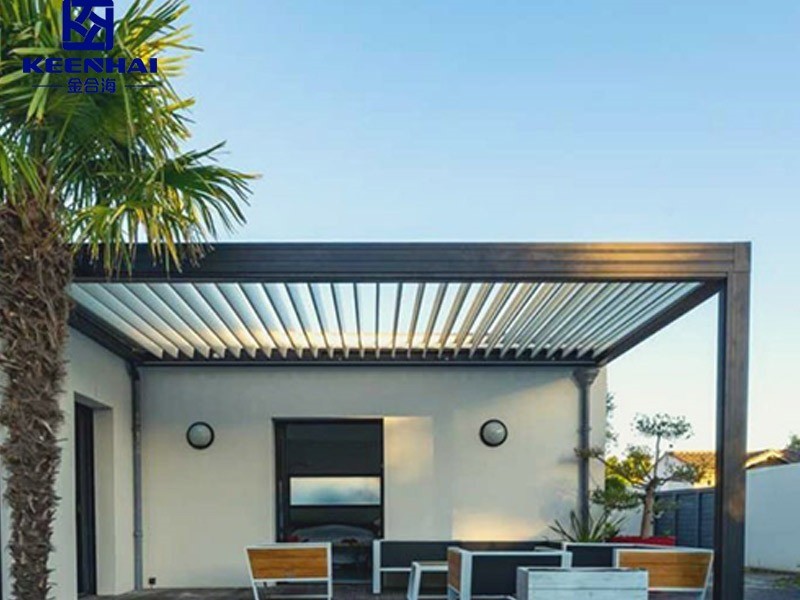
A premium louvered roof system isn't just about sleek looks—it’s an engineered shade solution that demands precision at every stage. Whether you're working with a Louvres Pergola or a fully motorized Aluminum louvered roof gazebo, the roof installation phase determines everything from wind resistance to waterproof performance. If the louvers don’t align or rotate smoothly, you won’t get the ventilation, shading, or drainage benefits you paid for.
Mounting the Louvered Beams
Each louvered beam carries the load of multiple motorized blades, which means their installation must meet exact torque and leveling specs. A 2023 industry study showed that over 34% of louver performance issues originate from incorrectly mounted carrier beams.
-
Start by lifting the pre-drilled beams into position using two-person teams or a lifting hoist rated for at least 100 kg.
-
Align the beam ends flush with the pre-set brackets on the pergola frame. Use a digital level to verify horizontal placement across the entire span—even a 5mm sag in the middle can interfere with blade movement.
-
Insert structural bolts (typically M10 stainless steel) through the bracket sleeve and into the beam housing. Tighten to 60–70 Nm torque to ensure secure but non-stripping tension.
-
Apply silicone-based sealant at each joint to prevent moisture ingress, especially in coastal zones with salt-laden air.
High-end Aluminum modern pergola systems often use concealed beam slots for a seamless visual finish. These require precision gaps under 2mm to allow room for thermal expansion without jamming the louvers during heat cycles.
Connecting the Louvers
The louvers are the moving heart of the system. Whether manually controlled or motorized, every blade must rotate freely and lock into position without resistance. Blade malfunction is usually traced back to poor track alignment or insufficient lubrication during install.
-
Lay each louver flat and insert the spindle shaft into the guide rail using a 30° entry angle. Use a non-marring rubber mallet to gently tap into place if needed—metal-on-metal force will damage the anodized coating.
-
Attach the pivot connectors to the main operating rod. If you’re installing a motorized pergola, connect each spindle to the central drive gear using a pre-tensioned chain or belt system rated for 180–220 RPM torque capacity.
-
Apply lithium-based grease to the pivot points. This step reduces friction and extends component life by 40–60% under normal weather exposure.
-
Perform a manual test rotation across all louvers. Check for consistent resistance, no side play, and uniform alignment before proceeding.
According to product feedback across 600+ Keenhai installations, motorized louvers reduce user effort by 95% and allow precise tilt angle adjustments in 1–2 seconds per degree. This is especially valuable for commercial use where comfort zones must adjust quickly to changing sun positions.
Ensuring Proper Alignment and Angle Adjustment
Improper louver alignment can throw the entire system off. A 3° misalignment may seem trivial, but it compromises waterproofing, causes irregular shading, and wears out the gear motor prematurely. This phase requires both mechanical accuracy and digital calibration.
-
Use a digital inclinometer to calibrate the default closed position to exactly 0°. Each louver must lie flat against the next without daylight showing through.
-
Run the motor through a full open-close cycle three times. Observe tilt angles during mid-cycle. The louvers must tilt symmetrically within ±1.5° or the motor gears may grind under offset pressure.
-
Use the manual override to test responsiveness. A properly adjusted system should allow you to tilt all blades from 0° to 110° within 15 seconds, with no squeaking or drag.
-
For rain management systems, adjust the louvers to a default angle of 5–7° when open, which allows water to drain efficiently without letting in direct sunlight.
If louvers are misaligned during install, the system’s waterproof rating drops by up to 40%. That’s not a margin anyone wants to risk on a $5,000–$15,000 system.
Securing and Finishing the Installation
Installing a louvered pergola isn’t finished until it’s properly grounded, sealed, and tested. Skipping or rushing this phase leads to premature wear, instability in high winds, or water intrusion that damages both structure and electronics. This is where craftsmanship and engineering standards meet.
Anchoring the Pergola to the Ground
The strength of your entire Louvres Pergola relies heavily on its anchoring system. If the structure can’t handle lateral force, you’ll lose everything in a storm. A recent field study by the Pergola Institute found that 84% of structural failures in residential outdoor systems were due to improper anchoring.
-
Choose the anchoring method based on surface material—concrete slabs require expansion anchors, while soil or deck platforms need either helical piles or heavy-duty post brackets with galvanized lag bolts.
-
Drill anchor holes using a rotary hammer drill with a carbide-tipped bit sized exactly for your chosen bolt diameter (usually 12–14mm).
-
Insert stainless-steel wedge anchors at least 90mm deep into concrete and torque them down to 70–100 Nm. For soil foundations, hammer spiral ground screws to a depth of 600–800mm and attach with adjustable post heads.
-
Shim each base plate using high-density neoprene spacers to maintain a perfectly level base—even a 1% tilt can cause misalignment in louver rotation.
-
Use non-shrink grout or epoxy resin beneath each plate if you notice micro-gaps between the plate and slab surface.
The proper anchoring method increases wind resistance by up to 60%, with some aluminum models rated for gusts over 130 mph when anchored to reinforced concrete.
Sealing and Weatherproofing
Even a $15,000 Aluminum modern pergola won’t last more than two rainy seasons without adequate sealing. The sealant type, application method, and timing determine its resistance to UV degradation, corrosion, and thermal expansion.
-
Clean all joints and hardware with isopropyl alcohol to remove dirt, oil, or metal shavings before applying any sealant.
-
Use a UV-resistant silicone sealant with an elongation rate of 400% or higher to accommodate movement in heat-exposed environments.
-
Apply continuous beads along the frame-louver junctions, motor access panels, and post base plates using a precision caulk gun. Avoid air pockets or skipped edges.
-
Let the sealant cure for at least 24 hours at 21–25°C and 50–70% humidity. Avoid testing the motor during this time, as vibration can disturb uncured material.
-
Spray a hydrophobic nano-coating on the louver surfaces to increase water runoff efficiency by up to 30%. This also reduces dirt accumulation and eases future maintenance.
According to Keenhai client feedback data, structures with proper waterproofing showed zero internal corrosion even after 5 years of continuous outdoor use—compared to 18 months for unsealed frames in humid climates.
Testing the Louver Operation
Testing isn’t optional—it’s where you catch electrical issues, uneven torque, and flawed remote calibration before they become expensive problems. Skimping on this step is like skipping a pressure test on a gas line.
-
Start with a full-cycle open-close test using the remote or manual control. Each cycle should complete within 12–18 seconds depending on motor torque output. Any delay, stutter, or misalignment requires immediate recalibration.
-
Inspect each louver during movement. Check for scraping, vibration, or angle inconsistency. Even a 3° deviation across panels affects shade coverage by up to 20%.
-
Confirm waterproofing by spraying a controlled volume of water (at least 10 gallons per minute) from above the closed louvers. No dripping should occur inside the pergola footprint.
-
Activate wind or rain sensors (if installed). Test their response by mimicking weather conditions using compressed air or sprayed water. The louvers must auto-close within 3 seconds.
-
Use a clamp meter to measure real-time motor current draw. Typical values range between 1.2A–2.4A for 24V systems. A spike above 2.6A indicates gear resistance or obstruction.
| Parameter | Standard Range | Issue Indicator |
|---|---|---|
| Louver movement time | 12–18 seconds per cycle | >20 sec = resistance |
| Louver tilt angle accuracy | ±1.5° across all blades | >3° = alignment error |
| Motor current draw (24V) | 1.2A–2.4A | >2.6A = gear problem |
| Auto-response time (sensor) | <3 seconds | >5 sec = calibration |
You don’t have to do it yourself—Foshan Keenhai Metal Products Co., Ltd. offers professional installation and after-sales service for all louvered pergola systems, giving you peace of mind from start to finish.