

Installing a premium slatted fence starts with precise measurement and a solid plan. Mark your fence line accurately and check the ground slope before digging post holes. Using durable aluminum or treated wood ensures long-term stability and a clean, modern look.
1. Preparing for Installation
Before starting your fence project, proper preparation is key to a clean, strong, and long-lasting structure. Whether you’re upgrading a backyard boundary or framing a modern garden, the setup process for a Premium Slatted Fence defines how professional your final result will look. A good installation always starts with careful planning, the right tools, and an understanding of the site conditions.
1.1 Choosing the Right Fence Material and Tools
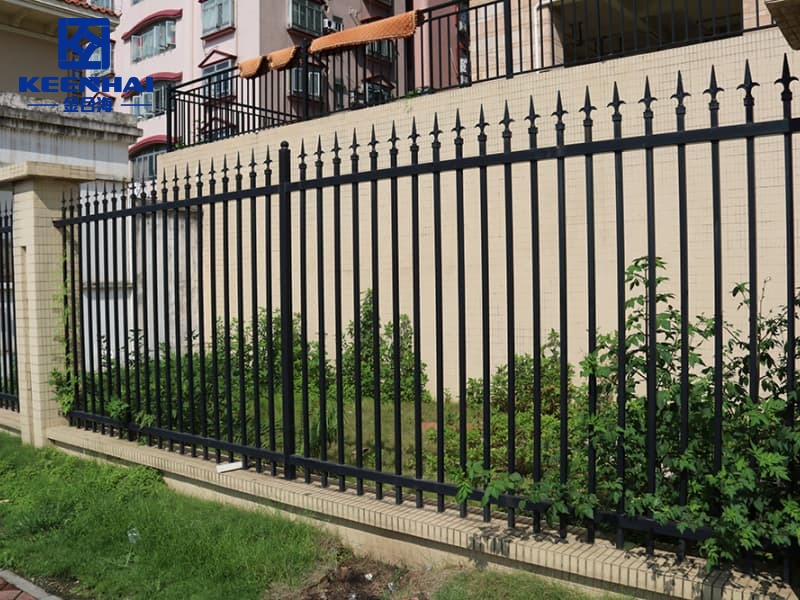
The first step is to select materials that match both your design vision and local weather conditions. Aluminum slatted fences are increasingly popular because they don’t rust, warp, or fade like timber, offering a cleaner and more durable finish. If you prefer a lighter, more classic look, a Classic Slatted Fence can blend perfectly with contemporary landscaping styles.
Here’s a quick comparison of the most common options used by homeowners and contractors:
| Material Type | Durability (Years) | Maintenance Level | Appearance | Cost Range (per meter) |
|---|---|---|---|---|
| Aluminum | 20–30 | Low | Modern, sleek | $$ |
| Timber | 10–15 | High | Natural, warm | $ |
| Composite | 15–20 | Medium | Consistent, textured | $$ |
For tools, make sure you have a post-hole digger, a level, measuring tape, string line, and a reliable power drill. Professionals often use laser levels for accuracy — this small step ensures your fence lines stay straight, even over long distances.
1.2 Measuring the Fence Line and Marking Post Positions
Precise measurements make or break the overall look. Start by marking both ends of the area with stakes and run a taut string line between them — this defines your main fence alignment. Measure the total distance and divide it by your panel width to calculate the number of posts required. Always add an extra post or two in your count for stability and layout flexibility.
Follow these steps for accurate spacing:
-
Drive stakes at each corner and along changes in direction.
-
Pull a string line tightly between them, ensuring it stays level.
-
Use spray paint or marking chalk to identify each post location at equal intervals.
Avoid rushing this part. A well-marked foundation saves hours of correction later and keeps your fence panels aligned visually from any angle.
1.3 Checking Ground Conditions and Local Slope
Before digging, inspect your soil type. Sandy or clay-heavy soil might require deeper post holes or concrete reinforcement. In areas with slopes, each post height must be measured individually to maintain a consistent top line. Instead of forcing the fence to match uneven ground, step the panels gradually — this creates a clean, tiered visual and improves stability.
If your installation site has soft or shifting ground, consider upgrading to a Durable Aluminum Slatted Fence system, which offers stronger anchoring and structural rigidity compared to lighter materials. Once all checks are done, you can proceed confidently to digging and setting your fence posts, knowing the base work has been done right.
2. Setting Fence Posts Securely
Before you build panels, focus on a rock-solid post layout — that’s the spine of any good slatted fence. Accurate post placement and secure anchoring determine whether your fence stays straight and stable for decades. Below I expand each key step so you can act like a pro and avoid rework.
2.1 Digging Post Holes to the Correct Depth
Digging correct-depth holes prevents leaning and frost heave. Follow these actionable rules:
-
For non-frost regions, dig holes at least 600 mm (24 in) deep.
-
For frost-prone regions, dig below frost line — typically 900–1200 mm (36–48 in), depending on local climate.
-
For loose or sandy soil, increase hole diameter to 300–400 mm (12–16 in) and consider a concrete collar.
-
For standard installations, use a 1:3 cement:sand concrete mix and pour a 100 mm (4 in) concrete pad at the bottom before setting the post.
Recommended post depth & concrete guidance (quick reference):
| Soil/Climate | Recommended Hole Depth | Hole Diameter | Concrete Mix (by volume) |
|---|---|---|---|
| Stable clay/loam (no frost) | 600 mm / 24 in | 200–250 mm / 8–10 in | 1 cement : 3 sand |
| Frost-prone | 900–1200 mm / 36–48 in | 250–300 mm / 10–12 in | 1 cement : 3 sand + gravel |
| Sandy/soft ground | 900 mm / 36 in (deeper preferred) | 300–400 mm / 12–16 in | 1 cement : 3 sand + gravel |
2.2 Aligning and Leveling the Posts
Accurate alignment makes your fence look custom-built. Do this:
-
Snap a straight string line along the outside edge at the post tops — check from both directions.
-
Place each post in the hole and use a spirit level to get plumb in two planes (front-to-back and side-to-side).
-
Temporarily brace each post with stakes and 2x4s before pouring concrete — this preserves your alignment while the concrete cures.
-
After bracing, re-check the string line and level; adjust shims under the post if needed.
set and brace posts so they stay plumb while concrete cures; don’t skip bracing.
2.3 Fixing Posts with Concrete or Ground Anchors
Choose your fixing method by soil and budget. Concrete provides the strongest permanent hold; galvanized ground anchors or screw piles speed up installation and reduce concrete work. Follow these steps when using concrete:
-
Pour a 75–100 mm (3–4 in) gravel base and tamp it.
-
Mix concrete to the recommended ratio, pour around the post until it fills the hole, and slope the top to shed water.
-
Maintain bracing for at least 24–48 hours for initial set; allow 7 days for partial cure before hanging heavy panels, and 28 days for full strength if loads are critical.
If you prefer a faster install, screw-in ground anchors work well on compacted soils — they reduce cure time and let you mount panels within a day. For slatted fence jobs that require long runs and minimal disturbance, consider mechanical anchors or precast concrete posts. Finally, inspect each post after curing and tighten any anchor bolts before you attach rails and slats.
3. Installing the Base and Support Rails
Once the posts are secure, it’s time to build the structural backbone that supports the slats. This step determines how straight, sturdy, and seamless your fence will look once completed. Precision matters more than speed—especially for modern designs like the Premium Slatted Fence, where even a few millimeters of misalignment can throw off the entire aesthetic.
3.1 Attaching the Bottom Rails for Stability
Start by measuring the height for your bottom rails—most contractors set them 100–150 mm (4–6 in) above the ground to prevent water damage and improve air circulation. Use a level and mark the same height on each post. Then:
-
Clamp the rail temporarily between two posts.
-
Confirm it’s perfectly level using a long spirit level or laser guide.
-
Drill pilot holes to avoid splitting the rail ends.
-
Fix the rail using stainless screws or heavy-duty brackets for long-term rigidity.
For long runs or uneven terrain, install the rails in sections of no more than 2.4 m (8 ft) to limit sagging. Never join two rails mid-span without a supporting post—it’s a common DIY mistake that leads to structural weakness later.
3.2 Ensuring Equal Spacing and Straight Alignment
Consistent spacing gives your fence that high-end, professional finish. Use a spacer block (typically 10–15 mm thick) to maintain uniform gaps between rails. Check the straightness visually along the entire line—what looks “barely off” now will stand out after all panels are installed.
When installing multiple fence sections, run a continuous string line across the tops of all posts and rails to confirm perfect alignment. Even a 3–5 mm deviation per panel can create visible wave patterns when viewed across 10 meters or more. For sites that slope slightly, use the “stepped rail method,” adjusting each rail by the same vertical offset to keep a neat, geometric rhythm.
3.3 Fastening Rails with Brackets or Screws
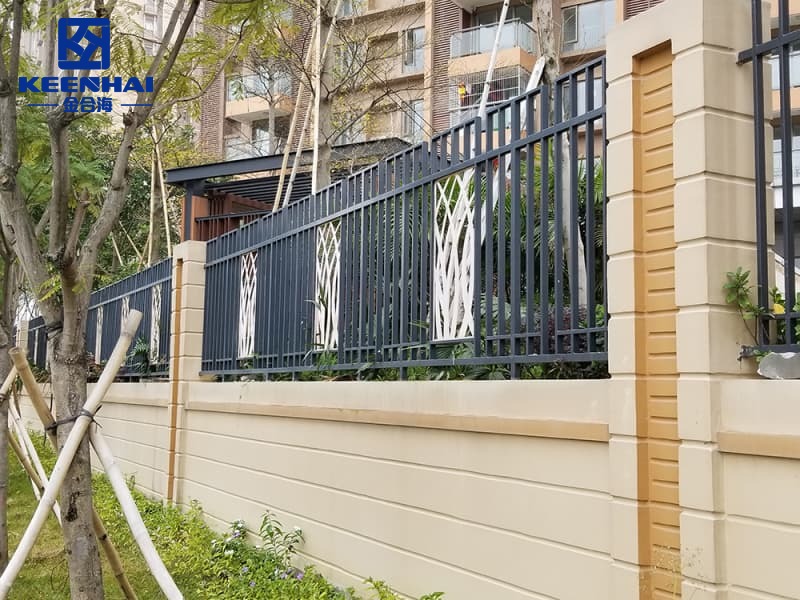
Now fix your rails permanently. Use galvanized or stainless steel brackets, depending on whether your region experiences coastal humidity or frequent rain. Aluminum fence systems pair best with anti-corrosion screws and rigid L-brackets designed for Custom Slatted Fence Panels like those found on this page.
Steps for fastening rails securely:
-
Position brackets at both rail ends, 20–30 mm from the post edge.
-
Pre-drill mounting holes with a 3 mm bit to prevent cracking.
-
Use two screws per side, tightening until snug but not over-torqued.
-
After all rails are fastened, recheck that your string line remains straight before moving on to slat installation.
Work from one end to the other, tightening progressively—this keeps stress even and prevents the rails from twisting under pressure.
4. Mounting the Slats and Panels
Once your frame is solid and perfectly aligned, the real visual work begins. Mounting slats requires patience and accuracy — every gap and screw line affects how modern and balanced your finished Premium Slatted Fence looks. Work slowly, measure twice, and fix once — this is where craftsmanship shows.
4.1 Spacing the Slats for a Consistent Look
Before fastening any slat, measure and mark your spacing guides on both end posts. The most common spacing for aluminum or composite slats is 10–20 mm (⅜–¾ in), depending on your privacy preference. To keep everything uniform, use pre-cut spacer blocks between each slat rather than eyeballing it.
If you’re going for a minimal privacy style, a Slatted Fence design with wider gaps (around 25 mm) creates a lighter, more open appearance while maintaining structure. Always measure from the bottom up, not top down — small cumulative errors can push your last slat off-level by several millimeters, ruining the visual flow.
Measure, check, and align every five slats using your laser or spirit level before continuing.
4.2 Securing Slats to Rails Without Warping
Material expansion is real — even aluminum expands slightly under heat. To avoid warping, leave a 1–2 mm expansion gap at each end of the slat. For composite or wood options, leave 3–5 mm. Use corrosion-resistant screws, ideally self-tapping stainless types, and drive them at a consistent angle.
Here’s a simple performance comparison for reference:
| Material | Expansion Gap | Recommended Fastener | Surface Finish Longevity |
|---|---|---|---|
| Aluminum | 1–2 mm | Stainless self-tapping screw | 20+ years |
| Composite | 3–5 mm | Coated decking screw | 10–15 years |
| Timber | 4–6 mm | Galvanized wood screw | 8–10 years |
When securing each slat, do not overtighten — this compresses the gap and restricts movement, leading to bowing. Start from one corner, check level, and fasten gradually from the center outward to maintain a clean, consistent surface.
4.3 Checking Alignment and Adjusting Gaps
After every few slats, step back and visually inspect from different angles. Slight variances can occur as the rails settle or the screws draw in. Adjust spacing on the next few slats to correct these deviations. If you notice consistent misalignment along the run, use a straightedge or taut string line to realign the midpoint before continuing.
For long fencing runs, you can check both horizontal and vertical alignment using a cross-line laser — this ensures your Durable Aluminum Slatted Fence maintains a perfect grid-like symmetry even under bright light or side shadows. Don’t rush the finishing steps; a perfectly straight line of slats turns a simple fence into a precision-built architectural feature.
5. Finishing Touches and Maintenance Tips
This final stage gives your fence its finished, professional look — and ensures it stays that way for years. Small details like caps, trims, and cleaning routines don’t just enhance aesthetics; they directly affect durability and lifespan. Treat this step as your fence’s long-term insurance plan, not an optional afterthought.
5.1 Adding Fence Caps and Decorative Trims
Fence caps seal the post tops, keeping out moisture and preventing internal rust or corrosion. Choose aluminum or stainless-steel caps for modern systems like the Premium Slatted Fence, or powder-coated finishes if your fence color follows a custom palette.
Installation is simple:
-
Clean each post top to remove dust or concrete residue.
-
Apply silicone adhesive or use press-fit caps for snug mounting.
-
For decorative trims, measure each section and cut precisely with a miter saw for tight, seamless joints.
Always match trim and cap finishes with your slats to maintain a unified, intentional design language.
5.2 Cleaning and Surface Treatment for Longevity
A clean surface keeps the finish intact and prevents micro-corrosion — especially important for metal fences exposed to coastal air or rain. For aluminum models, wipe down panels every 3–4 months using mild detergent and a microfiber cloth. Avoid high-pressure washers as they can force water into joints.
For fences such as the Classic Slatted Fence or other powder-coated finishes, apply a non-abrasive wax or protective coating twice a year to retain color depth and UV resistance.
| Fence Type | Cleaning Frequency | Coating Type | Lifespan (Well-Maintained) |
|---|---|---|---|
| Aluminum | Every 3–4 months | Neutral soap + soft cloth | 20–30 years |
| Composite | Every 6 months | UV-protective oil | 15–20 years |
| Wood | Every 3 months | Stain + sealer | 10–15 years |
Never use solvents or acidic cleaners — they degrade coatings and void warranties faster than you’d think.
5.3 Regular Maintenance to Prevent Damage
Inspect your fence every 6–12 months for loose screws, rust spots, or panel shifts. Tighten hardware as needed and clean dirt from rail gaps to prevent trapped moisture. If you live in an area with high humidity or frequent storms, consider upgrading to a Durable Aluminum Slatted Fence for better long-term structural stability and less upkeep.
Small checks prevent big repairs later. Walk along the fence line after strong winds or heavy rain, ensuring all posts remain plumb and base plates are firm. For fences near gardens, trim plants away from panels — direct contact traps water and shortens lifespan.
A few hours of upkeep each year can easily double the lifespan of your slatted fence, keeping it sleek and solid long after installation.