

Installing an aluminum four season sunroom begins with precise site preparation, including leveling the ground, ensuring drainage, and pouring a solid foundation. Accurate measurements and anchor placement guarantee long-term stability, while planning orientation maximizes natural light and energy efficiency. Following these steps carefully prevents misalignment and structural issues, ensuring your sunroom performs as a comfortable, year-round living space.
1. Site Preparation and Foundation Setup
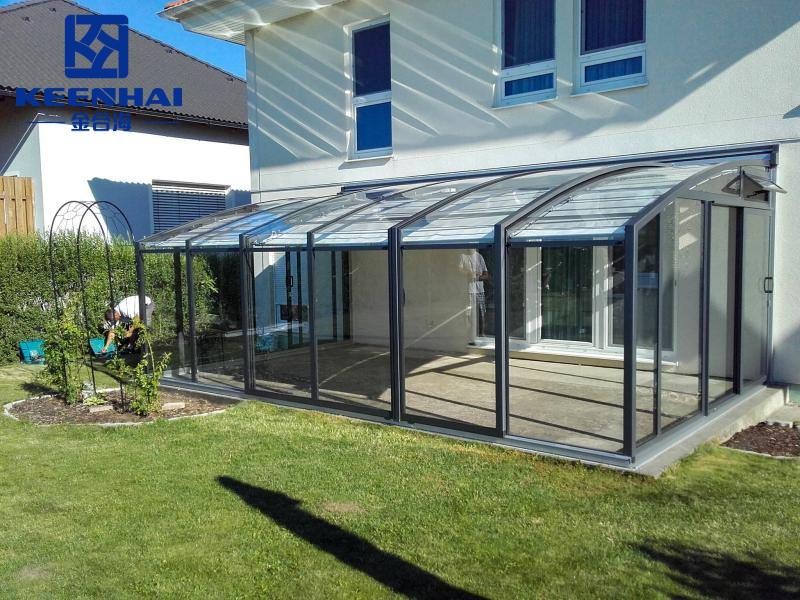
Installing an Aluminum Four Season Sunroom begins long before any panels or frames go up. The foundation and ground preparation define how stable, level, and weatherproof your entire structure will be. Whether you’re building on a backyard patio or attaching to a house wall, the prep phase ensures your sunroom stands solid through every season.
1.1 Choosing the Right Location and Orientation
Selecting the proper site is more than just picking where the sun hits best. You’ll need to consider sun exposure, wind direction, and drainage slope. South-facing orientations typically provide the most natural light and passive heat, ideal for colder regions. However, in hotter climates, positioning the structure slightly southeast helps reduce afternoon heat gain.
Contractors often start with a 3D layout plan or mark the footprint directly on the ground to verify spacing against existing architecture. For homes with existing patios, verifying that the concrete is level within ¼ inch tolerance is critical to ensure the aluminum frame locks in perfectly without warping or leaks.
1.2 Ground Leveling and Drainage Planning
Even a small dip or uneven slope can cause water to collect under the sunroom, leading to corrosion and long-term instability. Before any concrete is poured, professionals:
-
Excavate and compact the soil base to remove organic material and roots.
-
Add a 4–6 inch gravel sub-base, allowing proper drainage.
-
Use a laser level or string line to maintain perfect grade alignment.
For homes in wet climates, integrating a French drain system or sloped foundation edge prevents water pooling near the structure. A well-leveled ground also guarantees smooth door and window operation later on. Homeowners planning to install a modern aluminum sunroom directly over an old patio should inspect for cracks or settling first—reinforcement may be required before installation.
1.3 Pouring or Anchoring the Concrete Foundation
This is where precision truly matters. A strong, flat concrete base gives your sunroom structural integrity and ensures that panels align tightly. Depending on soil condition and climate, you can choose between two foundation types:
| Foundation Type | Typical Thickness | Ideal Use Case | Key Advantage |
|---|---|---|---|
| Reinforced Concrete Slab | 4–6 inches | Permanent installations | Maximum strength & insulation |
| Anchored Deck Foundation | Varies by frame | Temporary or raised decks | Easier installation & drainage control |
During pouring, contractors embed anchor bolts or aluminum base tracks while the mix is still wet. This ensures the frame system locks directly to the slab, resisting wind uplift and movement. Once the foundation cures, waterproofing membranes and expansion joints are applied to prevent future cracking.
For homeowners opting for Aluminum Outdoor Sun Rooms, adjustable anchor systems make it easier to mount on existing decks or composite flooring without full excavation—ideal for homes where concrete work isn’t possible.
Pro Tip: Always allow the foundation to cure for at least 48–72 hours before starting frame assembly. Rushing this step can lead to misalignment that affects the entire installation.
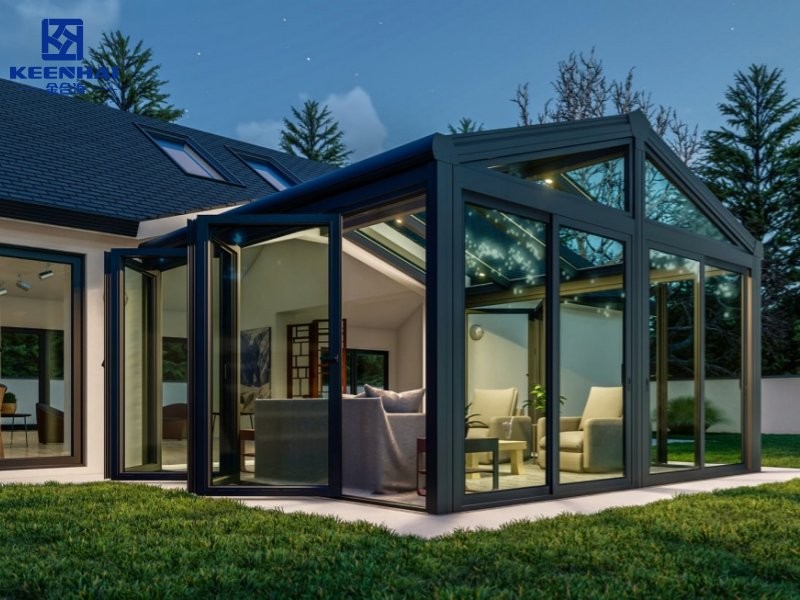
2. Assembling the Aluminum Frame Structure
Once the foundation is set and leveled, it’s time to begin assembling the Aluminum Four Season Sunroom frame. This stage defines the structural strength and geometry of the enclosure, so accuracy in every joint and connection is essential. The framing process involves identifying all labeled components, anchoring the base tracks, and securing the roof beams for a watertight, rigid build.
2.1 Identifying and Organizing Frame Components
Before lifting any part, all frame pieces should be unpacked and categorized. Aluminum profiles typically include base channels, vertical posts, roof beams, corner connectors, and door frames. Each section is factory-cut with pre-drilled holes or slots to ensure fast installation on-site.
A simple way to stay organized is to lay components in assembly order, from floor level to roof peak. This helps avoid mix-ups, especially in large custom designs. Most modern aluminum systems come with numbered stickers or laser-engraved codes for quick reference. Checking all hardware kits—bolts, brackets, silicone seals—before starting prevents delays later on.
2.2 Installing Base Tracks and Vertical Posts
The base tracks act as the skeleton’s foundation, so their alignment determines the final wall stability.
-
Begin by marking the perimeter on the cured concrete slab.
-
Apply a thin line of waterproof sealant under each base rail to block moisture seepage.
-
Drill and anchor the tracks using stainless steel expansion bolts, ensuring every section is perfectly level.
Once the base rails are secured, insert the vertical aluminum posts into the channels and fix them temporarily using support braces. Each post should be plumb within a 1/8 inch tolerance, checked by a digital level or plumb bob. Skipping this precision often results in uneven glass or polycarbonate panel fits.
For customized extensions like Aluminum Garden Sun Rooms, extra corner supports or diagonal braces might be added to manage wind load or extended roof spans, keeping the structure rigid without adding unnecessary weight.
2.3 Securing the Roof Beams and Connectors
After the wall frames are upright and secured, roof assembly follows. The roof beams lock the structure together and distribute weight evenly across the posts. Depending on the model, beams may come with integrated gutters or hidden wiring channels for lighting or fans.
Each beam is aligned to the top rail using heavy-duty aluminum brackets and tightened gradually to prevent torsion. Once connected, cross-connectors and ridge beams are installed to form the top grid. At this stage, most installers prefer to check roof pitch—typically around 5–10 degrees—to ensure proper rain runoff.
When the roof structure is complete, seal all junctions with UV-resistant silicone to prevent leaks and air infiltration. A properly sealed and aligned frame not only enhances structural integrity but also improves insulation once wall and roof panels are added.
A well-installed frame gives the aluminum sunroom a precise architectural fit, blending seamlessly with the main building line while providing long-term durability through every season.
3. Installing Wall Panels and Windows
When wall panels and windows go in, precision determines thermal performance and weather resistance. For an aluminum sunroom, panels must seat evenly in their grooves, seals must compress correctly, and window units must operate without binding. Poor panel alignment causes drafts, rattles, and water ingress, so take time here—this stage makes the sunroom feel like a finished room rather than an add-on.
3.1 Measuring and Positioning the Panels
-
Measure each opening twice: first for the rough opening, then for the final panel size, allowing a 3–6 mm (1/8–1/4 in) clearance for thermal expansion.
-
Dry-fit the panel to verify edge gaps and reveal; if a panel sits proud or low, shim the base track until it sits flush.
-
For glass panels, handle with suction lifters and position them from the exterior so glazing beads compress evenly.
-
After positioning, fasten panels using the specified stainless steel screws into pre-drilled holes, but do not fully tighten until all adjacent panels are in place—this prevents warping.
Bold note: measure twice and dry-fit once; that small delay prevents expensive rework later.
3.2 Sealing Joints for Thermal Efficiency
A single continuous seal at every horizontal and vertical joint keeps heat where you want it. Use a combination of closed-cell foam gaskets in the frame and UV-resistant silicone on exterior seams. For best results, follow this foil-backed tape + sealant sequence: apply tape to the frame, seat the panel, then run a continuous bead of silicone over the outer joint and tool it smooth.
| Seal Strategy | Thermal Benefit | Typical Lifespan |
|---|---|---|
| Foam gasket + tape + single bead silicone | High — minimizes convective leaks | 10–15 years |
| Butyl tape only | Moderate — good for temporary fixes | 5–8 years |
| No gasket, sealant only | Low — higher chance of air/water leaks | <5 years |
3.3 Adding Sliding or Fixed Window Units
-
Install window frames into pre-set jambs, ensuring the sill slopes slightly outward (about 5–10 mm over 1 m) to shed water.
-
Level the window, shim at the hinge and latch points, then fasten through the jamb into the vertical posts.
-
Check operation: sliding sashes should glide with light finger pressure; casement handles must close fully without scraping.
-
Finally, seal the exterior perimeter with a backer rod and a smooth bead of silicone, then apply interior trim for a clean finish.
Important: always test each window for smooth operation and water-tightness before finishing trim. Properly installed panels and windows will keep HVAC loads low and make the room behave like any other conditioned space.
4. Roof Installation and Insulation
The roof defines both the durability and year-round comfort of an aluminum four season sunroom. A properly built roof prevents leaks, reduces heat loss, and supports optional features like skylights or polycarbonate inserts. Each step—attaching panels, sealing seams, and insulating cavities—must be precise to achieve structural rigidity and energy efficiency comparable to a permanent home addition.
4.1 Attaching the Roof Panels and Supports
-
Start by positioning the roof beam supports at even intervals, typically every 600–900 mm (24–36 in) depending on the span. Verify all beams sit level using a laser or string line.
-
Lift the aluminum roof panels into place from one end to the other, engaging the interlocking seams tightly. A rubber mallet can help snap them into the groove without bending.
-
Secure panels using self-tapping stainless screws with neoprene washers every 300 mm (12 in) along the seams.
-
Apply butyl tape or sealant strips along the panel joints before tightening to ensure a watertight fit.
Tip worth remembering: never overtighten screws—it can crush the insulation core or distort the aluminum skin, causing leaks during heavy rain.
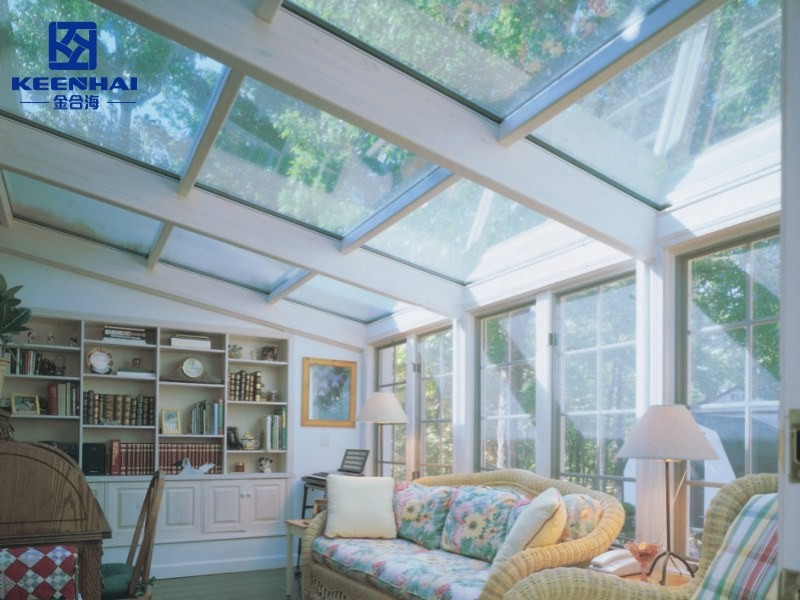
4.2 Integrating Skylights or Polycarbonate Sheets
Adding skylights or polycarbonate sheets brings in natural light without compromising insulation. Use multiwall polycarbonate at least 10 mm thick, with a UV-protected outer layer.
-
Cut openings only after roof panels are secured and aligned.
-
Frame the skylight perimeter using aluminum H-channel connectors and rubber gaskets.
-
Insert the polycarbonate sheet, allowing a 3 mm gap around all sides for thermal movement.
-
Seal edges with clear silicone and install aluminum capping profiles for a clean finish.
This method prevents condensation buildup while maintaining a high R-value comparable to insulated aluminum panels.
4.3 Applying Insulation and Waterproof Coatings
To create true four-season comfort, insulate both above and below the roof deck.
-
Lay rigid foam insulation boards (R-10 to R-20) between the roof beams before applying the interior ceiling layer.
-
Tape all insulation seams with foil-backed aluminum tape to form a continuous vapor barrier.
-
On the exterior, coat all roof seams and screw heads with elastomeric waterproof coating—two layers ensure maximum resistance against UV and thermal stress.
-
Inspect the roof slope (minimum 2% gradient) to verify proper drainage before sealing the final joints.
A fully insulated and sealed roof can reduce indoor temperature fluctuation by up to 40%, ensuring the aluminum sunroom stays comfortable in both summer and winter.
5. Electrical, Lighting, and Ventilation Setup
Adding electrical, lighting, and ventilation features transforms an aluminum sunroom from a simple glass-and-metal enclosure into a fully functional living space. Proper planning ensures safety, maximizes comfort, and supports year-round usability without compromising the structure or aesthetics.
5.1 Installing Ceiling Fans and Light Fixtures
-
Determine the center of the ceiling grid for optimal airflow and even light distribution.
-
Use aluminum-compatible mounting brackets to secure fixtures to roof beams or cross supports, making sure all screws engage solid metal rather than thin panels.
-
Check that all electrical boxes are rated for outdoor or damp locations to prevent corrosion or short circuits.
5.2 Routing Electrical Wiring Safely
All wiring should follow local codes, routed inside conduit or cable trays attached to the roof beams. Avoid direct contact with the aluminum frame to reduce the risk of galvanic corrosion. Label circuits clearly for lights, fans, and any future additions to simplify maintenance. Use GFCI outlets for all power points to maintain safety near windows and moisture-prone areas.
5.3 Adding Vents or Climate Control Features
-
Install roof vents or wall louvers to encourage cross-ventilation, reducing heat buildup during sunny days.
-
For homes in colder climates, consider integrating a small ducted heater or mini-split system; make sure units do not interfere with the structural beams.
-
Test airflow and fixture operation before sealing any trim or panel gaps to ensure proper performance.
At this stage, the aluminum four season sunroom is nearly complete. Carefully checking each installation detail ensures long-term reliability. For homeowners who want inspiration or examples of finished setups, the full range of Aluminum Sunroom options can provide guidance on layouts, electrical placements, and ventilation strategies.