

1.Site Selection and Preparation
Proper site selection and preparation is critical for a durable and visually appealing aluminum 12x20 pergola. Choosing the right location ensures stability, optimal sunlight, and effective drainage, which all affect the longevity and functionality of your pergola. We recently installed a spacious 12x20 aluminum model on a concrete patio, which allowed precise leveling and sturdy anchoring.
1.1 Measuring the Installation Area
-
First, measure the total area where you plan to place the pergola. For a 12x20 model, ensure at least 14x22 feet of clearance around for footings, furniture, and easy access.
-
Next, mark the exact corners using stakes or spray paint. Double-check measurements diagonally to ensure a true rectangle. Misalignment at this stage can compromise structural integrity.
-
Consider surrounding obstacles, such as trees, overhead wires, or slopes, which might interfere with installation or require extra adjustments.
1.2 Ground Leveling and Surface Preparation
Surface preparation is crucial for a stable pergola. Depending on your site:
-
Concrete or patio: Ensure the surface is clean and level. Minor unevenness can be corrected using shims or adjustable post anchors.
-
Grass or soil: Level the ground by removing high spots and filling low areas with compacted gravel. For softer soil, consider concrete footings for extra support.
-
Sloped terrain: Create a gentle slope away from structures to ensure water runoff, preventing pooling around the pergola posts.
| Surface Type | Preparation Method | Estimated Cost | Stability Notes |
|---|---|---|---|
| Concrete | Clean & level, shim as needed | $50–$150 | Very stable, minimal settling |
| Grass/Soil | Remove debris, level, compact gravel | $150–$300 | Medium stability, may require concrete footings |
| Sloped Site | Excavate, level, pour footings | $300–$600 | High stability, requires precise leveling |
This table helps compare preparation methods based on cost and site type.
1.3 Marking Anchor Points
-
Identify exact post locations based on pergola dimensions (12x20 feet). Posts should be positioned precisely at corners and any mid-span supports for additional louvers or crossbeams.
-
Mark anchor points clearly with paint or stakes to guide drilling or footing placement.
-
Double-check alignment using a laser level or measuring tape. Ensuring posts are square before installation is critical for smooth assembly of crossbeams and louver systems.
-
Optional step: For heavy aluminum structures or high-wind areas, plan for deeper footings or reinforced anchors to prevent shifting.

2.Post Installation and Anchoring
Installing the posts correctly is the backbone of a sturdy aluminum 12x20 pergola. Improper placement or alignment can compromise the entire structure, causing misaligned beams and uneven louvers. For example, we recently set up a spacious 12x20 aluminum pergola on a backyard patio, and precise post installation ensured that the louvers rotated smoothly without any sagging.
2.1 Positioning Aluminum Posts
-
First, place the posts at the marked anchor points from the site preparation stage. Make sure each post is aligned with the layout lines.
-
Use temporary supports or clamps to hold posts upright before securing. This is especially important for large structures like a 12x20 model to prevent shifting during installation.
-
Measure diagonal distances between posts to ensure the rectangle is perfect. Even a 0.5-inch misalignment can cause issues when attaching crossbeams or louvers.
2.2 Securing Posts with Concrete or Anchors
Depending on the site surface, there are two main methods:
-
Concrete Footings:
-
Dig holes at least 24 inches deep and 12 inches wide for standard posts.
-
Place posts in the holes, ensuring vertical alignment.
-
Pour concrete and allow 48–72 hours for curing. This provides maximum stability, especially for areas with high wind loads.
-
-
Pre-Made Anchors:
-
Use heavy-duty metal post anchors bolted to concrete patios.
-
Slide the aluminum post into the anchor and secure with provided hardware.
-
Check torque specifications to avoid loose fittings over time.
-
Tip: For subcategories like Aluminum Pergolas,smaller models like 12x16 or 12x12 can also follow this method, but the hole depth and anchor size can be reduced.
2.3 Ensuring Vertical Alignment
-
Use a high-quality spirit level or laser level to check that each post is perfectly vertical.
-
Adjust with shims or temporary wedges before the concrete fully sets or before tightening anchor bolts.
-
Re-check diagonals and corner angles after securing all posts. A well-aligned base ensures smooth crossbeam installation and prevents future wobbling or structural stress.
-
Important: For large aluminum structures exposed to wind, slightly deeper footings or reinforced anchors can prevent post movement over time.
3.Crossbeam and Frame Assembly
Once the posts are securely anchored, the next step is assembling the crossbeams and frame, which forms the skeleton of your aluminum 12x20 pergola. Proper assembly ensures stability, supports the louver system, and prevents sagging over time. On a recent project, our team installed a spacious 12x20 aluminum pergola on a backyard patio, and careful beam alignment allowed the louvers to operate smoothly without friction.
3.1 Attaching Horizontal Beams
-
Lift each horizontal beam into place using a helper or temporary supports to avoid bending.
-
Align beams with posts according to the manufacturer’s dimensions, typically 12-foot spans for 12x20 pergolas.
-
Secure beams using heavy-duty bolts and brackets, ensuring that the torque meets specifications for aluminum structures.
-
Measure diagonals after installation to confirm that the frame remains a perfect rectangle. Even minor deviations can cause louver misalignment or structural stress.
3.2 Reinforcing Corners and Brackets
Corners are the most critical points for structural stability:
-
Install metal corner brackets at all junctions, tightening bolts progressively in a crisscross pattern to ensure even pressure.
-
For high-wind areas, consider additional gusset plates for reinforcement.
-
Smaller subcategories like Aluminum 12x16 pergola or Aluminum 12x12 pergola follow the same reinforcement principle, but bracket size can be slightly smaller.
| Beam Type | Typical Span | Recommended Bolt Size | Notes |
|---|---|---|---|
| 12-foot Aluminum Beam | 12x20 pergola | 3/8" x 3" stainless steel | Standard for main frame |
| 8-foot Aluminum Beam | 12x12 or 12x16 pergola | 5/16" x 2.5" | Smaller subcategories |
| Cross Supports | All sizes | 1/4" x 2" | Add for extra rigidity in windy regions |
This table helps compare beam options for different pergola sizes and reinforces installation choices.
3.3 Checking Structural Stability
-
After all beams are installed, perform a physical inspection: gently push each corner and mid-span to check for wobble or movement.
-
Tighten all bolts and brackets progressively, making sure the frame remains square.
-
Use a level across beams to ensure horizontal alignment. Any tilt can affect louver rotation and overall stability.
-
Optionally, add temporary diagonal supports until the louver system is installed, especially for larger spans like a 12x20 pergola.
4.Roof and Louver System Setup
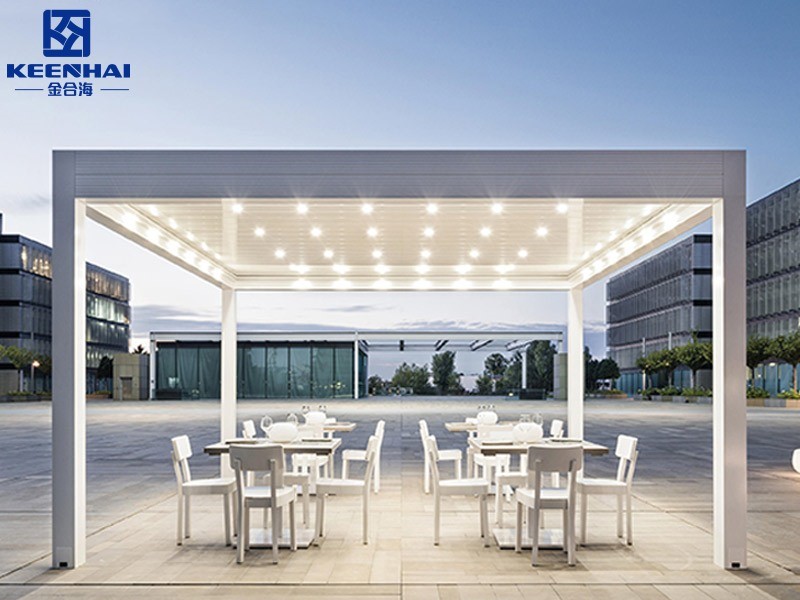
With the frame and crossbeams securely in place, it’s time to install the roof and louver system, which provides shade, ventilation, and weather protection for your aluminum 12x20 pergola. Proper installation ensures smooth louver operation and prevents leaks. On a recent project, our team installed a spacious 12x20 aluminum model on a concrete patio, and precise louver alignment allowed the motorized system to function without friction.
4.1 Installing Louvers or Roof Panels
-
Lift each louver carefully to prevent bending. For a 12x20 pergola, louvers typically span 12 feet each.
-
Slide louvers into the track system, starting from one end and moving sequentially to the other.
-
Secure each louver with provided brackets or clips, making sure the edges are flush and evenly spaced.
-
Check the spacing and rotation manually to ensure smooth movement before final tightening.
4.2 Connecting Motorized Mechanism (if applicable)
-
Mount the motor unit to the designated bracket according to the manufacturer’s instructions.
-
Connect the motor to the louver system with the provided linkages or cables.
-
Wire the motor to the switch or smart controller, following electrical safety guidelines.
-
Test the rotation: open and close the louvers fully to confirm smooth operation without any friction or binding.
Tip: Even for smaller subcategories like Aluminum 12x16 pergola, the same installation principles apply, but the louvers may be shorter and lighter, making manual handling easier.
4.3 Adjusting Louver Angles for Proper Drainage
-
Set the louvers at an initial 5–10° angle toward the drainage direction. This ensures rainwater flows off efficiently.
-
Check alignment along the full span, adjusting individual louvers if necessary.
-
Ensure louvers close tightly when fully horizontal to prevent water leakage into the pergola interior.
-
For motorized systems, program the louver angles for automated rain response if supported by the controller.
Important: Correct angle adjustment not only prevents standing water but also prolongs the louver lifespan and reduces wear on the motor system.
5.Finishing Touches and Inspection
After the roof and louver system is installed, the final step is finishing touches and inspection. This step ensures your aluminum 12x20 pergola is fully secure, visually appealing, and ready for daily use. On a recent backyard project, we completed a spacious 12x20 aluminum pergola setup on a level concrete patio, and the thorough inspection prevented minor issues before they could affect long-term durability.
5.1 Securing Screws, Caps, and Hardware
-
Walk around the pergola and check all previously installed bolts, brackets, and clips.
-
Tighten screws where necessary using a torque wrench, following the manufacturer’s specifications.
-
Install protective caps or covers over exposed screws to prevent corrosion and enhance the pergola’s visual finish.
-
Ensure all brackets and connectors are flush with surfaces and aligned with posts and beams for uniform appearance and stability.
5.2 Cleaning the Aluminum Surface
-
Use a soft cloth or sponge with mild detergent to wipe down all aluminum surfaces. Avoid abrasive pads that can scratch the finish.
-
Rinse with clean water to remove soap residue and prevent streaks.
-
Dry thoroughly with a microfiber towel to prevent water spots and maintain the shiny PVD finish.
-
For areas prone to dust or pollen, repeat cleaning every 3–6 months, ensuring the pergola stays visually appealing and corrosion-free.
5.3 Testing Stability and Operation
-
Push and pull gently on each corner and beam to check for wobble or movement.
-
Operate the louver system multiple times (if motorized) to confirm smooth rotation and proper alignment.
-
Verify water drainage during a light sprinkle or hose test, ensuring louvers direct water efficiently without leaks.
-
Adjust hardware or louver angles if any misalignment or binding occurs.
By following these 5 steps carefully, your 12x20 aluminum pergola will stand strong, look sleek, and provide years of reliable outdoor comfort. From precise site leveling to properly adjusted louvers, each detail ensures stability, smooth operation, and efficient water drainage. With regular checks and maintenance, your pergola becomes a durable, low-maintenance centerpiece for any backyard.