

1. Planning Your Aluminum Outdoor Sunroom
Planning an Aluminum Outdoor Sunroom starts with assessing your outdoor space to ensure the structure complements your property. Begin by measuring the exact footprint available, noting any slopes, drainage patterns, or overhead obstacles. Then, determine the sunroom orientation to maximize natural light while minimizing excessive heat gain. Consider nearby structures, garden elements, and accessibility for construction equipment. Proper planning at this stage reduces costly adjustments later and ensures a seamless integration with your backyard design.
1.1 Site Selection and Measurements
Choosing the ideal location for an aluminum sunroom involves several factors:
-
Sun Exposure – Identify the areas with the most sunlight during peak hours.
-
Wind and Weather – Check prevailing wind directions to decide where reinforcement or windbreaks may be necessary.
-
Ground Stability – Ensure the soil can support a reinforced foundation, especially for larger sunrooms.
-
Accessibility – Leave room for delivery and assembly of aluminum panels and glass or polycarbonate sheets.
Precise measurements are crucial: measure width, length, and height three times for accuracy. Record any irregularities in the ground or wall structures, as they will affect frame customization. Following these steps ensures your Aluminum Sunroom Outdoor fits perfectly and avoids alignment issues during installation.
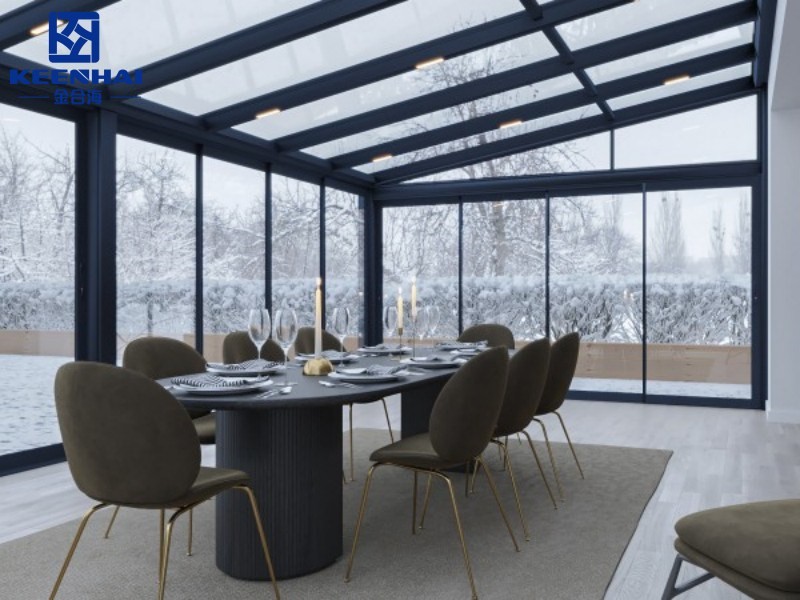
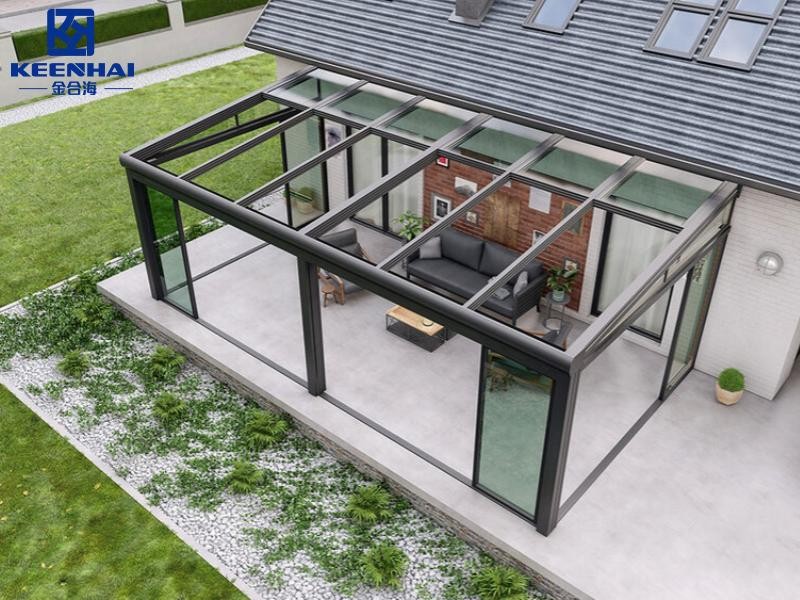
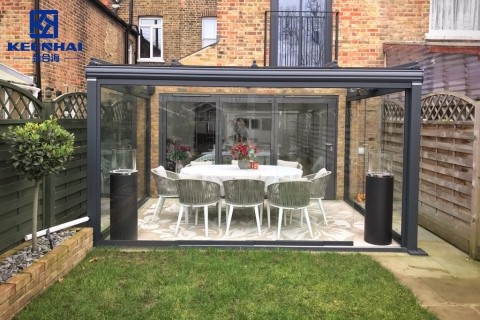
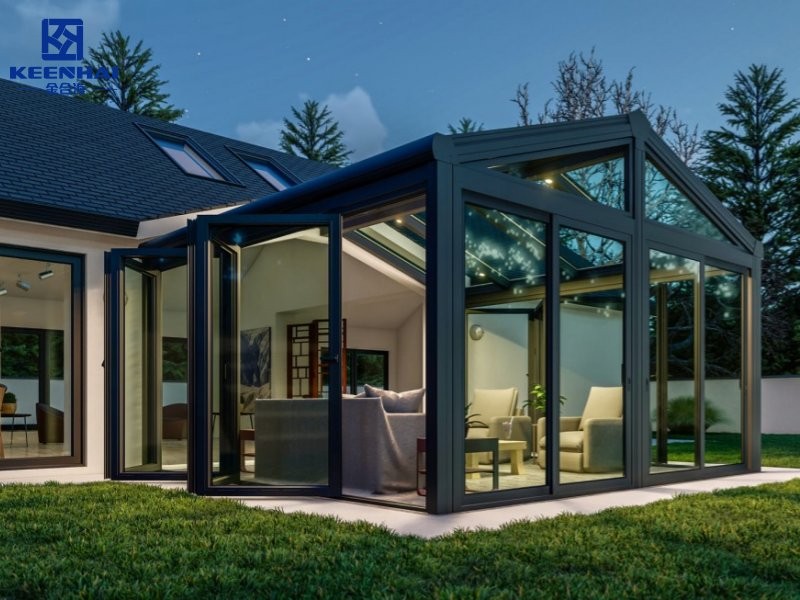
1.2 Choosing the Right Sunroom Style and Layout
Selecting a style and layout affects both aesthetics and functionality. Popular aluminum sunroom designs include gable, lean-to, and conservatory styles. Evaluate your intended use—dining, lounging, or greenhouse functions—to determine layout:
-
Gable: High ceilings, spacious feel, excellent for natural ventilation.
-
Lean-to: Economical, fits against existing walls, ideal for smaller yards.
-
Conservatory: Maximal glazing for light, ideal for garden views.
Combine multiple styles for custom configurations if your outdoor area allows. This approach ensures a balance between visual appeal, thermal performance, and spatial efficiency while enhancing your property's outdoor living space.
1.3 Budgeting and Material Selection
Budgeting effectively requires evaluating both materials and long-term maintenance costs. Aluminum frames, although initially more expensive than wood, offer corrosion resistance and minimal upkeep, extending lifespan. Compare glazing options—glass vs polycarbonate sheets—considering insulation, UV protection, and durability.
| Component | Aluminum Option | Cost Consideration | Longevity/Benefit |
|---|---|---|---|
| Frame | Powder-coated or anodized aluminum | Higher initial cost | Corrosion-resistant, low maintenance |
| Panels | Tempered glass / Multiwall polycarbonate | Glass higher upfront, polycarbonate lighter | Glass offers clarity, polycarbonate insulates better |
| Accessories | Ventilation, shades, gutters | Moderate additional cost | Enhances comfort and reduces wear |
Step-by-step planning:
-
List all required materials with estimated costs.
-
Factor in shipping, labor, and potential customization fees.
-
Allocate contingency for unexpected site modifications.
Following these steps ensures your Aluminum Outdoor Sunroom meets both functional and aesthetic goals without breaking your budget.
2. Aluminum Frame and Panel Options
When building a high-performance aluminum sunroom, frame and panel selection directly impacts durability, energy efficiency, and overall comfort. Start with the frame, as alloy choice, wall thickness, and finish determine strength and weather resistance. Then, select the glazing—tempered glass or multiwall polycarbonate—to balance light transmission, insulation, and impact resistance. Combining optimal materials ensures your aluminum sunroom performs reliably for decades while maintaining a sleek, modern appearance.
2.1 Selecting Aluminum Alloys and Finishes
Aluminum frames vary by alloy type, commonly 6061-T6 or 6063-T5, which offer excellent tensile strength, corrosion resistance, and workability. 6061-T6 is ideal for larger spans or heavier glazing, while 6063-T5 works for standard residential applications. Frame finishes include:
-
Powder-coating: Thick, durable, available in custom colors, resistant to scratches and fading.
-
Anodizing: Enhances corrosion resistance, natural metallic finish, low maintenance.
Step-by-step selection process:
-
Identify load requirements and structural span.
-
Choose alloy type based on strength needs.
-
Select finish based on aesthetic preference and long-term durability.
Table – Aluminum Frame Options Overview
| Alloy Type | Typical Use | Finish Options | Benefits |
|---|---|---|---|
| 6061-T6 | Large spans, commercial sunrooms | Powder-coated, anodized | High strength, excellent corrosion resistance |
| 6063-T5 | Residential sunrooms | Powder-coated, anodized | Lightweight, easy fabrication, cost-effective |
2.2 Glass vs Polycarbonate Panels
Choosing between glass and polycarbonate panels affects insulation, safety, and aesthetics. Glass provides superior clarity, scratch resistance, and sound insulation, while multiwall polycarbonate offers lightweight durability, UV protection, and higher impact resistance. For high-performance sunrooms, many homeowners combine materials: tempered glass for large windows or doors and polycarbonate sheets for roof sections to reduce weight and increase energy efficiency.
Installation tips:
-
Ensure panels fit frame profiles precisely.
-
Use high-quality gaskets to prevent air or water leaks.
-
Confirm that glazing thickness meets local building codes for wind and snow loads.
Using the right combination ensures your Aluminum Sunroom Outdoor maintains thermal comfort, clarity, and safety while minimizing maintenance.
2.3 Energy Efficiency and Insulation Considerations
Energy performance depends on panel type, frame thermal break, and sealing. Multiwall polycarbonate offers R-values up to 2.4 per inch, reducing heat transfer, while double or triple-glazed tempered glass achieves U-values as low as 0.25 W/m²·K. Proper installation of gaskets and silicone seals prevents drafts and moisture intrusion, ensuring year-round comfort.
Step-by-step approach to enhance insulation:
-
Select panels with high R-value or low U-value.
-
Verify frame includes thermal break strips.
-
Seal all edges, corners, and panel joints meticulously.
-
Install optional shades or blinds to improve solar heat control.
Optimizing these factors creates a sunroom that maintains consistent indoor temperatures, reduces energy bills, and provides a comfortable space regardless of external weather.
3. Step-by-Step Installation Process
Installing a high-quality Aluminum Outdoor Sunroom requires meticulous planning and precise execution. Every step—from foundation prep to sealing—affects durability, comfort, and energy efficiency. Properly following installation steps ensures your sunroom performs optimally while maintaining aesthetic appeal.
3.1 Foundation Preparation and Support Structure
A solid foundation is the backbone of any sunroom. Step-by-step foundation setup:
-
Measure and mark the site to ensure a level, square layout.
-
Excavate and pour concrete footings or install reinforced piers capable of supporting the sunroom weight.
-
Install anchor bolts or base plates accurately to match frame dimensions.
-
Check for level and alignment using a laser or spirit level before proceeding.
Properly prepared foundations reduce structural stress, prevent water pooling, and extend the life of your aluminum sunroom outdoor. Using reinforced concrete or composite base systems adds stability, especially in regions with heavy snow or wind loads.
3.2 Frame Assembly and Securing Panels
Frame assembly is critical for both structural integrity and aesthetic alignment. Recommended assembly steps:
-
Lay out aluminum profiles and identify corresponding joints.
-
Secure the base frame to anchors, checking for perfect squareness.
-
Attach vertical posts and roof beams sequentially, tightening fasteners according to manufacturer torque specs.
-
Insert glass or polycarbonate panels carefully, starting from the bottom and working upwards. Use protective gloves to avoid scratches and ensure proper panel alignment.
This step determines the sunroom’s rigidity and long-term reliability. Proper panel placement and frame fastening prevent rattling, misalignment, or potential thermal bridging.
3.3 Sealing, Weatherproofing, and Final Adjustments
Sealing and finishing are often overlooked but essential for energy efficiency and weather resistance. Step-by-step sealing process:
-
Apply high-quality silicone or EPDM gaskets along all panel edges and joints.
-
Inspect corners and vertical seams to ensure no gaps remain.
-
Install optional trim covers or flashing to prevent water ingress.
-
Test windows, sliding doors, and ventilation features for smooth operation.
-
Perform a final inspection to confirm all panels sit flush, the frame is square, and seals are airtight.
Correct weatherproofing ensures your Aluminum Sunroom Outdoor stays dry, energy-efficient, and comfortable year-round. This step also protects the structure from thermal expansion issues and minimizes long-term maintenance needs.
4. Interior and Exterior Enhancements
Enhancing your Aluminum Outdoor Sunroom involves more than structural installation—it’s about creating a seamless blend between functionality, comfort, and visual appeal. Thoughtful interior and exterior improvements maximize usability while preserving energy efficiency and aesthetic harmony.
4.1 Flooring, Lighting, and Furniture Integration
Choosing the right flooring, lighting, and furniture ensures your sunroom is both practical and stylish. Step-by-step integration tips:
-
Select moisture-resistant flooring such as porcelain tiles, composite decking, or treated hardwood to withstand temperature variations.
-
Plan layered lighting: ambient ceiling lights, task lighting near seating areas, and accent LEDs along structural beams enhance usability and atmosphere.
-
Integrate furniture with a balance of comfort and space efficiency, ensuring pathways remain clear and items are resistant to UV and humidity exposure.
This integration strategy supports long-term usability while emphasizing visual continuity with surrounding architecture. Proper planning prevents retrofitting headaches and ensures the sunroom feels cohesive with the home’s interior.
4.2 Shade, Blinds, and Ventilation Solutions
Effective shade, blinds, and ventilation solutions maintain comfort throughout seasonal changes. Implementation steps:
-
Install retractable blinds or motorized shades that adjust light intensity without obstructing outdoor views.
-
Position ceiling or wall-mounted fans strategically to encourage cross-ventilation and reduce reliance on air conditioning.
-
Ensure operable windows or vent panels allow controlled airflow, minimizing humidity and preventing heat buildup.
By addressing both natural light control and airflow, your aluminum sunroom outdoor remains comfortable year-round, reducing energy consumption and enhancing user experience.
4.3 Outdoor Landscaping and Aesthetic Integration
Seamless exterior integration strengthens the connection between your sunroom and outdoor space. Practical landscaping strategies:
-
Align planters, shrubs, or trellises along the perimeter to soften the structural edges and create natural shade.
-
Use paths, decking, or patio extensions to link the sunroom with the garden or backyard.
-
Incorporate water features, lighting, or decorative elements that reflect the sunroom’s modern aluminum design while complementing the home’s architecture.
These enhancements enhance both curb appeal and the experiential quality of the sunroom, ensuring that your Aluminum Outdoor Sunroom is a visually integrated, functional, and inviting space for all seasons.
5. Maintenance and Longevity Tips
Maximizing the lifespan and performance of your Aluminum Outdoor Sunroom requires a structured approach to maintenance. Proactive care prevents costly repairs, preserves aesthetics, and ensures energy efficiency. Regular attention to both structural components and panels enhances durability while keeping the sunroom inviting throughout the year.
5.1 Regular Cleaning and Preventive Care
Routine cleaning prevents dirt, debris, and environmental buildup from damaging your sunroom. Follow these steps:
-
Use a soft microfiber cloth or sponge with mild, non-abrasive soap to clean aluminum frames weekly.
-
Rinse glass or polycarbonate panels gently with clean water to avoid scratches, and remove hard water deposits using a vinegar solution.
-
Inspect sealants, weatherstripping, and fasteners monthly for signs of wear or loosening, tightening screws and refreshing caulk as needed.
Proactive preventive care not only maintains visual appeal but also extends structural integrity, minimizing risks of corrosion or panel discoloration over time.
5.2 Seasonal Maintenance Tasks
Different seasons demand targeted maintenance to keep the sunroom fully functional. Recommended seasonal actions:
-
Spring: Check drainage channels and gutters to prevent clogs, and lubricate moving parts like sliding windows or doors.
-
Summer: Inspect UV-protective coatings on panels, and clean solar shades or blinds to maintain heat control.
-
Fall: Clear accumulated leaves around the foundation, and tighten anchor bolts before winter storms.
-
Winter: Ensure snow and ice do not overload the roof, and monitor seals to prevent drafts or water infiltration.
Following these tasks enhances comfort, energy efficiency, and long-term durability, keeping your aluminum sunroom outdoor in top condition year-round.
5.3 Troubleshooting Common Issues
Addressing common problems early prevents costly interventions. Typical concerns include leaks, frame warping, or panel scratches. Step-by-step troubleshooting:
-
Identify the source of leaks by inspecting window and roof seams, then apply fresh sealant where gaps exist.
-
For minor frame warping, loosen adjacent fasteners, realign the section, and retighten while maintaining level alignment.
-
Surface scratches on panels can often be buffed with a fine automotive polish, while deep cracks may require panel replacement.
Regular monitoring combined with timely corrective actions ensures that your Aluminum Outdoor Sunroom continues to deliver optimal performance and aesthetic value for decades.
Building and enjoying your Aluminum Outdoor Sunroom is straightforward when you follow a structured approach. Start with careful planning of site, style, and materials. Choose high-quality aluminum frames and panels for long-term durability, then follow a precise installation process including foundation preparation, frame assembly, and proper sealing. Integrate interior and exterior enhancements for comfort and style, and maintain your sunroom with regular cleaning and seasonal checks. For more inspiration and complete product options, you can explore our full range at keenhaipergola, where every sunroom is designed for lasting performance and aesthetic appeal.