

1. Planning Your Louvered Pergola Project
Proper planning is the foundation of a successful louvered pergola installation. By carefully considering location, size, materials, and louver types, you ensure your pergola not only looks stunning but also performs optimally year-round.
1.1 Selecting the Ideal Location
Choosing the right spot is critical for maximizing sunlight, shade, and usability. Start by observing your outdoor space throughout the day: note where sunlight hits, where shadows fall, and how wind moves. Avoid low drainage areas to prevent water pooling, and make sure there’s enough clearance around existing landscaping or furniture.
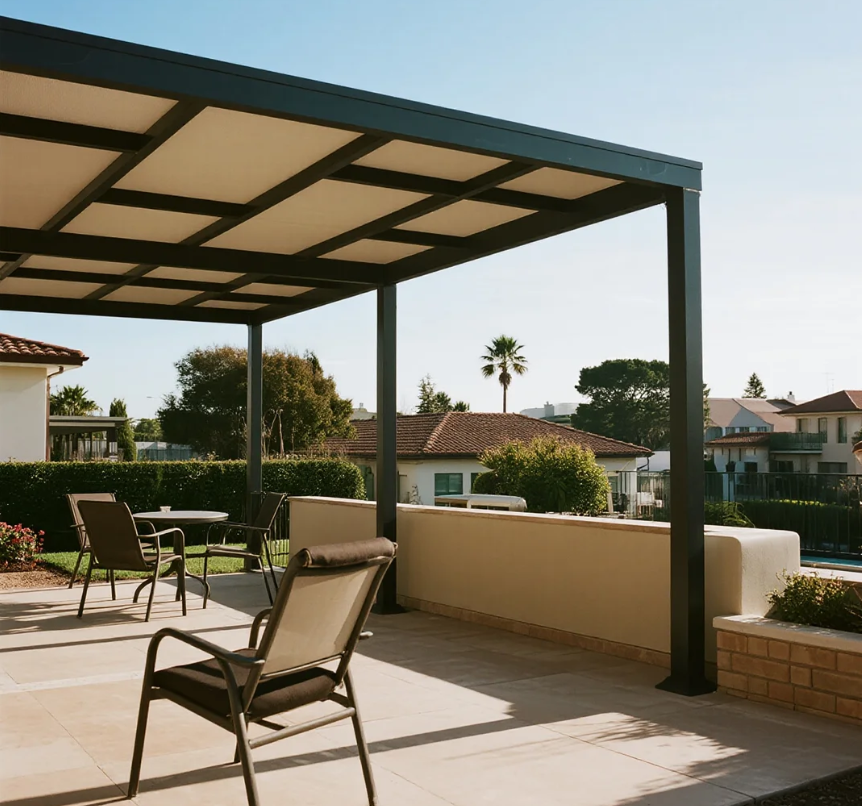
For homes with modern outdoor designs, many property owners integrate Aluminum pergola house structures along patios or poolside terraces, creating a seamless extension of living space while maintaining easy access and flow. Selecting a location that aligns with pathways and outdoor activities ensures that your pergola becomes a practical hub for gatherings.
1.2 Determining Size and Shape
The size of your pergola should match both your available space and intended use. Consider these steps:
-
Measure the area carefully, accounting for overhangs and clearances.
-
Decide if the pergola will cover a seating area, dining space, or walkway.
-
Choose a shape that complements your property’s architecture—square, rectangular, or L-shaped layouts are common.
Here’s a quick comparison of typical pergola sizes and their common uses:
| Size (ft) | Typical Use | Notes |
|---|---|---|
| 10x10 | Small seating area | Fits compact patios or balcony extensions |
| 12x16 | Medium patio | Suitable for dining tables and loungers |
| 20x20+ | Large entertainment area | Ideal for outdoor kitchens, multiple seating zones |
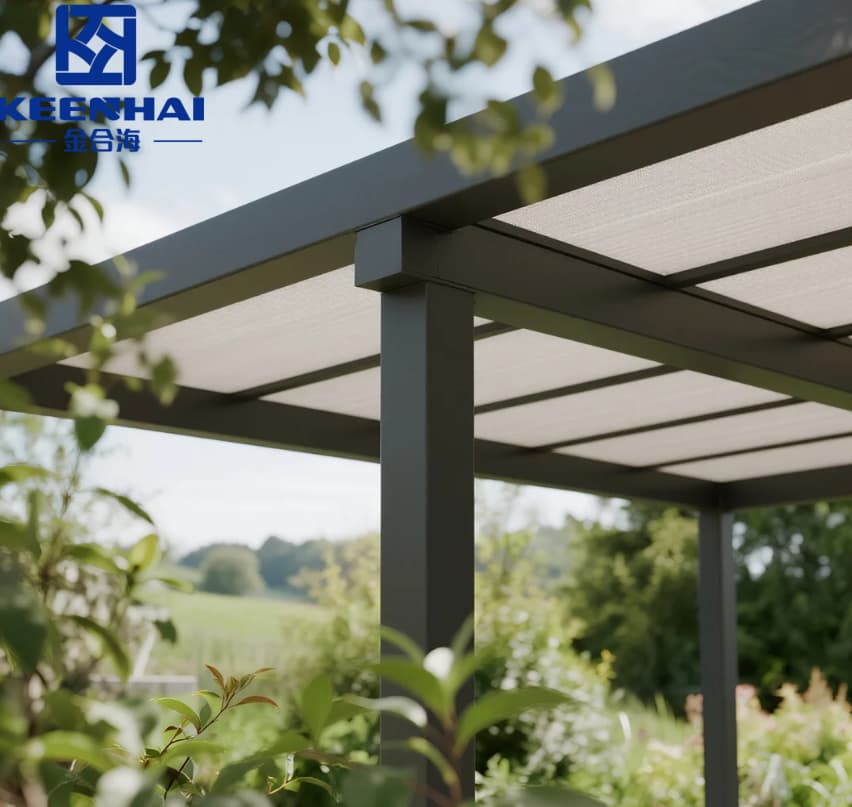
1.3 Choosing Materials and Louver Types
Material selection significantly impacts durability, maintenance, and appearance. Aluminum is popular for its corrosion resistance and minimal upkeep, while wood offers natural aesthetics but requires periodic sealing or staining. Many homeowners opt for modern solutions such as Aluminum motorized pergola systems, which combine long-lasting frames with automated louver adjustments for effortless sunlight control.
When selecting louver types, consider:
-
Manual vs Motorized: Motorized louvers offer convenience, especially for larger installations.
-
Fixed vs Adjustable: Adjustable louvers allow you to control sunlight and rain exposure dynamically.
-
Blade Material and Finish: Powder-coated aluminum or treated wood blades provide both durability and style.
By planning these elements carefully before construction, you lay the groundwork for a pergola that balances aesthetic appeal, usability, and long-term value. Proper preparation ensures smoother installation and reduces costly adjustments later on.
2. Gathering Tools and Materials
Before starting construction, gathering the right tools and materials ensures your louvered pergola project proceeds efficiently and safely. Being fully prepared reduces delays, mistakes, and unnecessary trips to hardware stores.
2.1 Essential Tools for Construction
Having the proper tools is critical for accurate measurements, secure assembly, and smooth installation. Commonly required tools include:
-
Measuring tape and laser level – ensures precise post placement and alignment.
-
Power drill with various bits – for pre-drilling holes and driving screws.
-
Wrenches and socket sets – critical for tightening bolts and fasteners securely.
-
Hammer and rubber mallet – for minor adjustments and positioning components.
-
Ladders or scaffolding – necessary for safely reaching elevated beams and louvers.
For projects that incorporate motorized or automated systems, such as Aluminum automated pergola models, additional tools like wire strippers, voltage testers, and conduit materials are required to integrate electrical components safely. Ensuring all tools are on hand before beginning saves time and reduces errors.
2.2 Material Selection and Quality Check
Choosing high-quality materials directly impacts durability, longevity, and performance of your pergola. Key considerations include:
-
Structural Frames: Aluminum frames resist corrosion and require minimal maintenance, while wood offers classic aesthetics but needs periodic sealing.
-
Louvers: Opt for powder-coated aluminum or treated wood for long-term resilience.
-
Fasteners and Anchors: Use stainless steel or weather-resistant hardware to prevent rusting and loosening over time.
Here’s a quick material comparison for planning purposes:
| Material | Durability | Maintenance | Best Use Case |
|---|---|---|---|
| Aluminum | 20+ years | Minimal | Modern patios, poolside decks |
| Treated Wood | 15–25 years | Annual sealing | Traditional backyard, natural look |
| Composite | 15–20 years | Occasional cleaning | Eco-friendly, low-maintenance |
A careful inspection before purchase ensures each component is free from defects, warping, or corrosion. This step minimizes the risk of structural issues during installation.
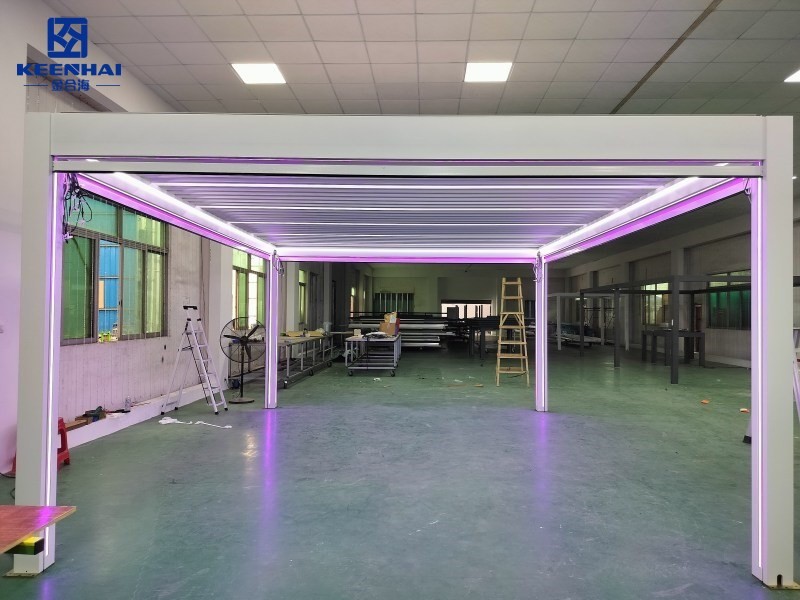
2.3 Optional Accessories (Lighting, Rain Sensors, etc.)
Enhancing your louvered pergola with optional features increases functionality and comfort:
-
Integrated Lighting: LED strips or recessed lights provide evening ambiance and extend usability after sunset.
-
Rain Sensors: Automatically close motorized louvers during rainfall, protecting furniture and flooring.
-
Ceiling Fans or Heaters: Offer additional climate control for year-round comfort.
-
Shade Screens or Side Panels: Enhance privacy and block wind when needed.
For aluminum pergolas or modern outdoor setups, adding these accessories is straightforward when planned in advance, especially if wiring and mounting points are accounted for during construction. Proper integration ensures a polished, professional finish without compromising the pergola’s structural integrity.

3. Preparing the Site
Proper site preparation is essential for a sturdy and long-lasting louvered pergola. Skipping this step can lead to misalignment, instability, and water pooling issues. By carefully measuring, leveling, and ensuring proper drainage, you set a solid foundation for the entire project.
3.1 Measuring and Marking the Installation Area
Accurate measurements guarantee your pergola fits perfectly into your outdoor space. Follow these steps:
-
Use a measuring tape and chalk line to outline the exact perimeter of your pergola.
-
Double-check diagonal measurements to confirm the space forms a perfect rectangle or square.
-
Mark post locations clearly, allowing at least 2–3 inches clearance from edges or existing structures.
For larger setups, like a poolside or patio extension, ensuring symmetry improves both aesthetics and functionality. A well-marked site reduces errors during frame assembly and makes later adjustments much easier.
3.2 Leveling Ground and Installing Foundations
A stable foundation is critical, especially for aluminum or motorized pergolas. Follow these practical steps:
-
Clear the area of grass, debris, or loose soil.
-
Use a spirit level and string lines to check for uneven terrain.
-
Excavate post holes to the recommended depth, usually 24–36 inches, depending on pergola height and local frost lines.
-
Fill holes with concrete anchors or footings and allow 24–48 hours to cure before installing posts.
For louvered pergola installations, this step ensures that adjustable louvers operate smoothly without tilting or obstruction, even in heavy wind or rain conditions. Properly anchored posts also prevent long-term sagging and misalignment.
3.3 Ensuring Proper Drainage and Space Clearance
Water management is critical for outdoor structures. Improper drainage can lead to soil erosion, foundation instability, and damage to pergola components. Follow these guidelines:
-
Check the slope of the ground; ideally, it should drain away from your home at a gradient of 1–2%.
-
Avoid placing pergolas over low-lying areas where water naturally pools.
-
Maintain at least 12–18 inches of clearance around the pergola for easy movement, cleaning, and potential accessory installation.
Additionally, consider the surrounding landscaping and pathways. Leaving sufficient space ensures that you can add furniture, planters, or lighting without obstruction, while also providing proper airflow and sunlight exposure for both the pergola and nearby plants.
4. Constructing the Pergola Frame
Building a sturdy pergola frame is the backbone of a successful project. Proper installation ensures that your louvered pergola remains stable, functional, and visually appealing for years. Accuracy, the right tools, and following a systematic approach are key.
4.1 Installing Posts and Support Beams
The posts serve as the main structural support. Follow these precise steps:
-
Position each post in the pre-installed concrete footings, checking alignment with a spirit level.
-
Temporarily brace posts with adjustable clamps or wooden supports to maintain vertical alignment.
-
Secure posts with stainless steel bolts or anchor brackets, ensuring they are tight but not over-torqued.
-
Attach horizontal support beams at the desired height, verifying they remain level across all posts.
For larger setups or modern outdoor spaces, louvered pergola frames may use reinforced aluminum posts to support motorized louver systems. These posts provide exceptional stability and resist warping over time, even in areas with heavy wind loads.
4.2 Assembling the Lintel and Cross Beams
Lintels and cross beams provide rigidity and define the pergola’s roof structure. Installation steps include:
-
Measure the span between posts and pre-drill holes in beams for secure attachment.
-
Lift beams into place using ladders or scaffolding, ensuring no sagging occurs.
-
Fasten beams to the posts using corrosion-resistant brackets or screws, checking level alignment continuously.
-
Install intermediate cross beams as necessary to evenly distribute load and support the louver assembly.
Proper spacing of cross beams ensures louvers operate smoothly, prevents deflection under weight, and allows for uniform sun shading.
4.3 Securing Frame with Anchors and Fasteners
Final anchoring guarantees long-term stability. Key steps:
-
Double-check that all posts remain vertical and beams remain level.
-
Use high-strength stainless steel bolts, nuts, and washers to secure all junctions.
-
Tighten fasteners in a systematic sequence to evenly distribute tension.
-
Inspect the entire frame for wobble or movement, adjusting braces as needed before installing louvers.
For pergolas with optional motorized or automated louver systems, a secure frame prevents misalignment and ensures reliable operation over time. Ensuring that all fasteners are properly torqued also minimizes maintenance needs and maximizes durability.
5. Installing Louvers and Adjustable Components
The louvers are the defining feature of a louvered pergola, providing adjustable shade, ventilation, and weather protection. Correct installation ensures smooth operation, longevity, and a visually polished finish.
5.1 Attaching Louvers to the Frame
Properly mounting the louvers ensures stability and consistent movement. Follow these steps:
-
Confirm that the frame is perfectly level and all beams are securely anchored.
-
Position each louver on the designated cross beams, maintaining consistent spacing according to manufacturer recommendations.
-
Use corrosion-resistant screws or brackets to attach louvers to the support beams.
-
Temporarily hold louvers in place with clamps while installing adjacent components to prevent misalignment.
For high-end outdoor setups, Aluminum motorized pergola models often include pre-drilled louvers and integrated attachment hardware, streamlining installation and ensuring uniform movement across all panels.
5.2 Installing Manual or Motorized Adjustment Mechanisms
Adjustment mechanisms allow louvers to tilt for optimal sun and rain control. Steps for installation:
-
For manual systems, attach tilt rods or crank handles following the manufacturer’s orientation instructions.
-
For motorized systems, connect the electric actuator or motor to each louver, ensuring alignment with control wiring.
-
Verify all electrical connections are insulated and secured according to local codes.
-
Test the mechanism without load first to ensure smooth rotation before final tightening of fasteners.
Using precise measurements and alignment ensures that louvers open and close evenly, preventing mechanical strain and prolonging the life of the system.
5.3 Testing Movement and Alignment
Once installed, thoroughly testing all louvers is critical for safety and functionality:
-
Open and close the louvers fully in multiple cycles to check for sticking, uneven spacing, or obstruction.
-
Adjust tilt angles to confirm that shading and ventilation meet your requirements.
-
Inspect all fasteners and anchors, tightening any that may have loosened during installation.
-
Check for smooth operation under wind or light load conditions to ensure long-term reliability.
Proper testing and adjustment guarantee that your louvered pergola functions as intended, providing flexible shade control and maintaining aesthetic appeal over years of use.
Building a louvered pergola from start to finish is a rewarding project that transforms your outdoor space into a versatile, functional, and visually appealing retreat. By carefully planning, preparing the site, constructing a sturdy frame, and installing adjustable louvers with precision, you ensure long-lasting performance, smooth operation, and customizable shade control. Following a step-by-step approach not only saves time and reduces errors but also gives you confidence that your pergola will stand the test of time while enhancing both comfort and outdoor aesthetics.