

Installing a DIY louvered pergola starts with precise measurement and planning. Ensure posts are level, beams are squared, and spacing between columns is 10–12 ft for stability. Use quality fasteners and aluminum components to withstand winds up to 120 km/h. Proper groundwork and frame alignment reduce rework and guarantee smooth louver operation. Adding an adjustable louvered pergola enhances light control and patio usability year-round.
1. Planning and Preparation
Before you even start assembling your pergola, a clear plan can save hours of rework. Many homeowners begin by measuring the outdoor area where the pergola will stand, ensuring that sunlight, wind direction, and furniture placement are all considered. For instance, positioning the louvers east–west can help block the harsh afternoon sun while maintaining a pleasant morning glow. A well-thought layout doesn’t just look better — it determines how efficiently your outdoor aluminum pergola functions for years.
1.1 Choosing the Right Pergola Type and Size
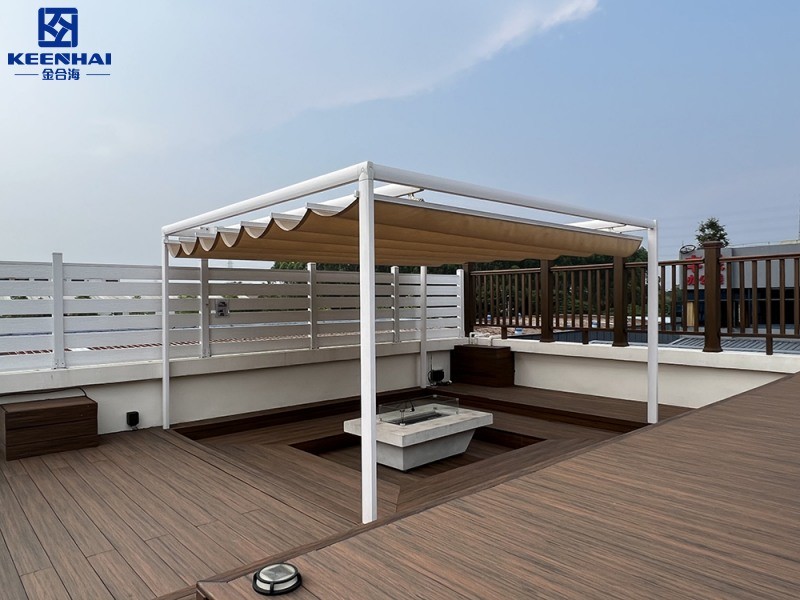
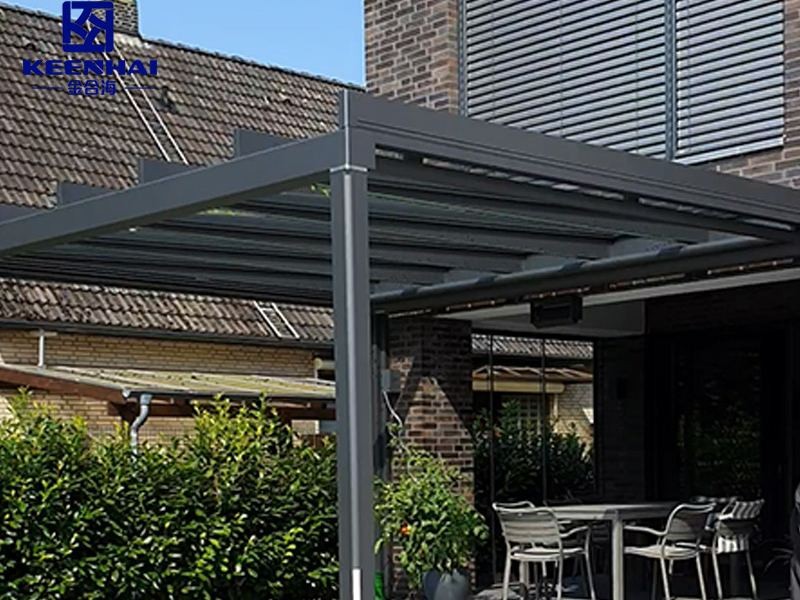
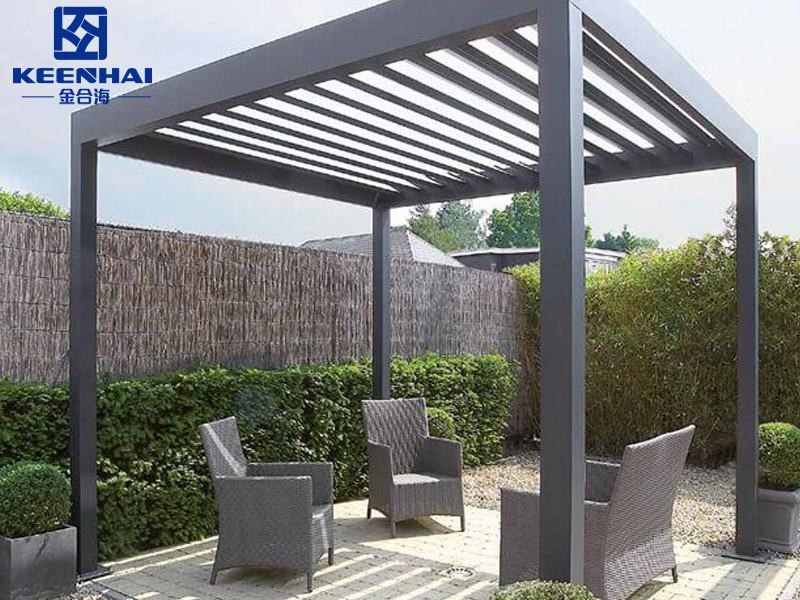
Finding the right structure starts with accurate sizing and realistic expectations. For small patios or balconies, a 10×10 ft frame works well, while family dining zones often require at least 12×16 ft to accommodate seating and open walking paths. When durability and low upkeep matter most, an outdoor aluminum pergola offers the ideal balance between strength and elegance. Each post usually supports 35–50 kg, enough to withstand winds up to 120 km/h when installed properly.
| Pergola Material | Lifespan (Years) | Maintenance Interval | Average Cost per m² |
|---|---|---|---|
| Aluminum | 20–25 | Once a year | $120–$180 |
| Wood | 8–12 | Every 6 months | $100–$150 |
| Vinyl | 10–15 | Every 1–2 years | $90–$130 |
As shown above, aluminum remains the top performer due to its resistance to corrosion and shape stability. It also gives your patio a modern, sleek appearance that fits both traditional gardens and minimalist decks.
To pick the best size:
-
Measure your usable outdoor space and ensure at least 2 ft of clearance on each side.
-
Account for post spacing, usually 8–12 ft apart depending on beam strength.
-
Estimate roof height, ideally 8–9 ft for single-deck patios and up to 10 ft for open gardens.
1.2 Selecting Suitable Installation Location
Your chosen spot determines structural stability, light balance, and long-term usability. For solid performance, pick a flat area with a reinforced concrete base no thinner than 100 mm. Avoid installing near trees or gutters where debris and moisture accumulate. When integrated into a wall or facade, an aluminum pergola house design creates a continuous outdoor living space that transitions naturally from the home interior to the patio.
Follow these steps to evaluate your location:
-
Check the ground slope using a laser level — anything over 3° incline needs adjustment.
-
Mark the footprint using chalk lines; ensure your posts align precisely to avoid misfitting roof panels.
-
Plan drainage direction by sloping the concrete slightly away from the main entrance or seating zone.
Pro installers often recommend leaving 300–400 mm of space behind the frame for water runoff or maintenance access. This attention to minor details ensures your pergola stays level, dry, and stable through seasonal changes.
1.3 Preparing Tools and Materials Checklist
Having every tool ready before assembly avoids unnecessary delays. A professional-grade toolkit should include:
-
Hammer drill with 10 mm masonry bit
-
Spirit level and laser guide for column alignment
-
Stainless-steel anchor bolts (M10 or higher)
-
Adjustable wrench and torque meter
-
Silicone sealant for roof joints and edge trims
-
Protective gloves and eye goggles
Most adjustable louvered pergolas like modern louvers system include labeled parts for easy setup, but you should still verify each beam, bracket, and louver panel before mounting. A quick inspection prevents warped components or incorrect placements later.
Once every measurement, foundation check, and tool setup are complete, you’ll have a clear, safe, and efficient workspace ready for the main frame assembly. Thorough planning always pays off in fewer errors, cleaner finishes, and long-lasting performance.
2. Site Measurement and Foundation Setup
Before you drill or pour concrete, accurate site measurement and a solid foundation determine whether the pergola stays straight and safe for years. Walk the site at least twice at different times of day to note sun paths and wind exposure, then mark the exact footprint with chalk or spray paint. Use a laser level and tape measure to record corner coordinates and diagonal distances — if the two diagonals differ by more than 10 mm on a 4 m span, adjust the layout until the frame will sit square.
2.1 Ground Leveling and Marking Layout
Get the ground flat and firm before you set posts. For soil installs, compact the base to a minimum 95% Proctor density or place a 100–150 mm crushed stone layer under the concrete pad to avoid settlement. For deck installs, confirm the deck joists support at least 2.5 kN point loads where posts will sit. Mark the layout like this:
-
Measure and mark the outer footprint with chalk lines.
-
Measure and mark post centers, keeping post spacing consistent (typically 2.4–3.6 m / 8–12 ft).
-
Check both diagonals and adjust until you get square within 10 mm.
A level, square footprint prevents racking and roof misalignment once louvers or beams go on.
2.2 Anchoring Options: Concrete vs Deck Mounts
Choose an anchoring method that matches your substrate and local load requirements. Below is a direct comparison to help decide:
| Anchor Type | Base Requirement | Typical Anchor Hardware | Recommended Pad/Embed | Approx. Installed Cost (USD) |
|---|---|---|---|---|
| Concrete Footing | Soil or slab-on-grade | M12 or M16 chemical anchors; 100 mm embed | 100–200 mm concrete pad; 28-day cure | $150–$400 per post |
| Bolt-on Deck Mount | Structural timber or concrete deck | M10 stainless anchor bolts with backing plates | Reinforced deck joists; metal plate under joist | $80–$200 per post |
| Post Base with Sleeve | Existing slab with saw-cut hole | Sleeve base + grout; M12 anchor | 80–100 mm depth saw-cut, grout-fill | $120–$300 per post |
Concrete footings give the highest lateral capacity and longevity, while bolt-on deck mounts work if your deck structure meets load specs and you add a metal backing plate. For windy sites, specify M16 stainless anchors and 200 mm pads to meet local wind-load requirements.
2.3 Checking for Alignment and Stability
After anchors sit or footings cure, install temporary posts to verify alignment before permanently bolting beams. Follow these steps:
-
Install temporary posts and plumb each within 2 mm using a spirit level.
-
Place a straight 3–5 m timber across post tops, then measure gap at midspan to confirm level within 3 mm.
-
Pre-tighten all anchor bolts to finger-tight, then re-check diagonals and plank alignment.
Tighten bolts in a star pattern to specified torque (e.g., 40–60 Nm for M12 stainless anchors) to avoid uneven stresses. Finally, load-test by applying a lateral force (about 200–300 N) to the frame; if the frame moves visibly, reinforce footings or add cross-bracing before proceeding.
3. Frame Assembly and Structural Setup
3.1 Installing Posts and Beams Securely
Start by positioning and temporarily clamping your posts so you can check everything before final fastening. For typical DIY aluminum systems use square posts 90×90 mm to 120×120 mm with wall thickness 2.5–3.0 mm; these sizes give a good balance of stiffness and weight. Set posts into anchors and tighten anchor nuts to the manufacturer torque spec (usually 40–60 Nm for M12, 80–100 Nm for M16) to avoid loosening under load. When you lift beams into place:
-
Lift beams with help from two helpers and rest them on temporary blocks at correct height.
-
Align beam centerlines with post centerlines, then insert stainless-steel through-bolts (recommended: A4 / 316 grade) with spring washers.
-
Tighten bolts in stages — finger tight first, then torque in a star pattern to specified values.
Always check that each post carries load without visible deflection; a well-fastened post-beam connection prevents roof sag and reduces stress on louvers later.
3.2 Aligning Crossbars and Support Brackets
Crossbars transfer roof loads and keep the frame square, so alignment matters. Use a straightedge (3–5 m) and a laser line to control camber and runout; the allowable deflection for crossbars under temporary load is typically ≤ 3 mm per 3 m span. When fitting support brackets:
-
Place brackets at specified intervals (commonly 600–800 mm for light-duty crossbars, 400–600 mm for heavy-duty).
-
Verify bracket face is flush with beam using a feeler gauge; gaps over 1 mm indicate misalignment.
-
Lock bracket bolts progressively, alternating sides to avoid twisting the beam.
Good alignment reduces wind noise, improves louver action, and prevents premature hardware wear. If you spot a bent crossbar, replace it rather than forcing it into line.
3.3 Ensuring Proper Frame Squareness
Frame squareness keeps louvers parallel and ensures smooth roof operation. Use diagonal checks and shimming to get square within tight tolerances:
-
Measure both diagonals; adjust until difference ≤ 10 mm for a 3–4 m frame.
-
Temporarily brace the frame with timber or metal struts while you make fine adjustments.
-
Re-check plumb on each post (aim for ≤ 2 mm variance over full height) and tighten anchor bolts to final torque.
Then perform a simple lateral test: push the top rail with about 200–300 N of force; movement greater than 5 mm signals the need for cross-bracing or larger footings. A square, rigid frame equals fewer alignment issues during louver installation and far less noise in windy conditions, so invest the time here — it pays off when you operate or motorize the roof.
4.Louver Blade Installation and Adjustment
When installing a louvered pergola, precise louver placement defines both sunlight control and weather protection. Imagine a backyard where sunlight streams in the morning at a gentle angle while providing full shade by noon; that effect comes from carefully installed adjustable blades. Before mounting any louver, check that your frame is completely level and all crossbars are securely fastened, as misalignment can cause uneven rotation or binding over time.
4.1 Mounting Louver Tracks or Pivots
-
Measure each span between the support beams to ensure a uniform fit. For most aluminum louvers, a track spacing of 50–60 mm ensures smooth rotation and structural stability.
-
Secure pivot brackets using stainless steel screws or bolts rated for outdoor use, ensuring they can handle the blade weight, typically 7–12 kg per louver.
-
Install tracks along the perimeter or centerline of the pergola, depending on the design. Double-check horizontal alignment with a spirit level to avoid uneven operation that can lead to early wear.
4.2 Adjusting Louver Angles for Smooth Operation
Once louvers are mounted, adjustable rotation mechanisms allow precise control of sunlight and airflow. Typical louvers rotate 0–150°, letting you customize shade intensity. Start by:
-
Rotating each louver manually to check clearance at both ends.
-
Ensuring uniform spacing of 2–3 mm between adjacent louvers to avoid friction.
-
Lubricating pivot points lightly with a silicone-based spray to maintain smooth motion under varying weather conditions.
4.3 Sealing and Waterproofing Key Joints
Waterproofing extends pergola lifespan and prevents water damage to your patio or decking. For each joint:
-
Apply outdoor-grade silicone sealant along the edges where louvers meet frame beams.
-
Check that overlapping sections of louvers align to direct water runoff toward gutters or drainage points.
-
Inspect all sealant and fasteners after initial rain; gaps as small as 2–3 mm can allow water penetration.
If you’re installing an adjustable louvered pergola, consider checking this modern louvers system for design ideas that combine smooth operation with weatherproof performance.
5.Motorization or Manual Control Setup
Deciding between motorized and manual control affects convenience, speed, and maintenance. Picture a patio where a single button opens or closes your pergola blades in seconds versus rotating a crank manually—it’s all about lifestyle needs and budget. Before installing any system, ensure your frame is fully squared and all louvers are aligned to prevent binding or uneven wear.
5.1 Installing Motor Kit and Remote System (Optional)
-
Select a motor kit compatible with your pergola size; most kits support up to 6 m width and 2–3 m projection.
-
Mount the motor to the pergola’s central beam or designated motor housing using stainless steel brackets.
-
Connect power following the manufacturer’s guidelines—typical motor power ranges from 60–120 W, allowing smooth rotation at 3–6 seconds per louver sweep.
-
Pair remote controls or wall switches, then run a full test cycle to confirm all louvers open and close uniformly.
5.2 Manual Crank Setup and Testing Functionality
-
Insert the crank into the manual drive socket; confirm that the engagement is snug and rotates freely.
-
Rotate slowly to move all louvers through full 0–150° range, noting any friction points.
-
Adjust tensioning screws on the pivots if resistance exceeds 5–10 N, ensuring smooth operation.
5.3 Troubleshooting Common Movement Issues
-
If louvers stick or misalign, check that tracks are clean and pivot bolts are correctly tightened.
-
Ensure motors or cranks are not under excessive load; reduce blade weight or improve alignment if necessary.
-
Verify that waterproofing or sealant does not obstruct louver movement.
Many users upgrading to motorized operation still rely on manual override for safety, especially during power outages. For modern solutions and complete Aluminum Pergolas, check the Keenhai pergola system to see how integrated motorized setups can enhance both functionality and style.