

Begin with precise planning and measurement. Mark the backyard space for your aluminum sunroom, confirm level ground, and select the layout that fits your lifestyle. Accurate planning reduces costly mistakes and ensures the frame fits perfectly.
1.Planning and Design Considerations
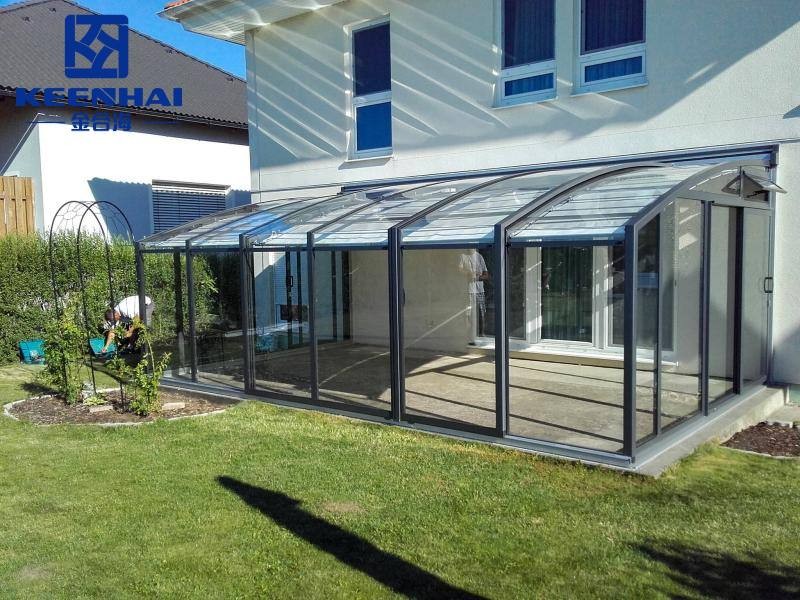
When planning an Aluminum Sunroom In Backyard, the first step is to thoroughly assess your available space and your family's needs. Start by measuring the backyard dimensions, including any obstacles like trees, fences, or uneven terrain. Accurate measurements help determine whether a rectangular, L-shaped, or multi-level design works best. Consider sunlight exposure as well, since orientation affects both heating and natural lighting. Many homeowners opt for south-facing sunrooms to maximize daylight and reduce heating costs.
1.1 Measuring Your Backyard Space
-
Measure the width and length of the proposed area, including setbacks from property lines.
-
Note any permanent structures, slopes, or drainage issues.
-
Sketch the layout on graph paper or use a digital planner to visualize the final footprint.
Tip: Leaving 1–2 feet around the perimeter for maintenance ensures easy access to exterior walls and windows, especially if you plan to install a custom Aluminum Sunroom with integrated lighting or heating units.
1.2 Choosing the Right Sunroom Layout
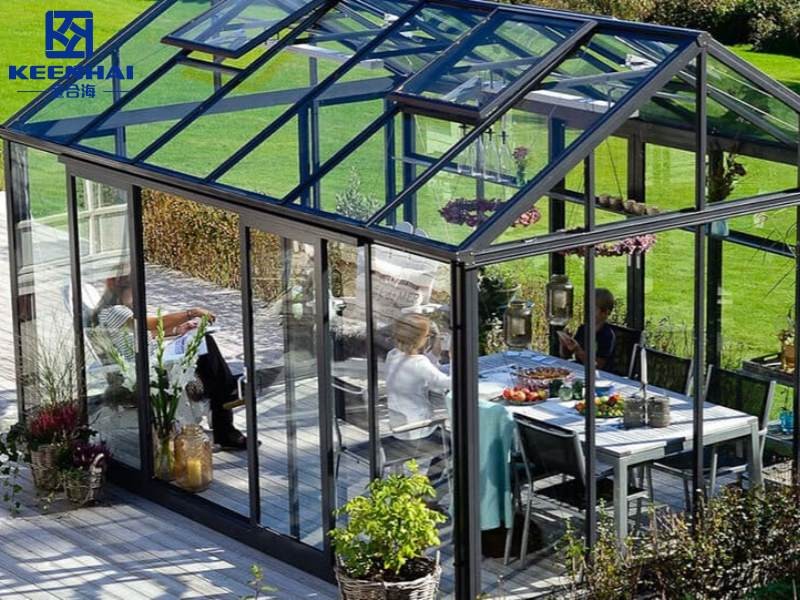
Selecting the ideal layout depends on how you plan to use the space. Rectangular or square sunrooms work well for standard patios, while L-shaped or corner layouts can integrate seamlessly with gardens or pools. Multi-level designs are excellent for splitting lounging and dining areas, creating natural separation. Here’s a quick comparison of common layouts for decision-making:
| Layout Type | Best For | Pros | Cons |
|---|---|---|---|
| Rectangular/Square | Standard patios | Easy to furnish, cost-effective | Limited design flexibility |
| L-Shaped/Corner | Maximize corner or garden spaces | Flexible usage, integrates with landscaping | Slightly higher cost |
| Multi-Level | Separate activity zones | Distinct areas for lounging & dining | More complex construction |
1.3 Selecting Materials and Aluminum Frame Types
Frame quality is key—powder-coated aluminum offers durability, low maintenance, and resistance to rust. Consider whether you want custom colors or textures to match your home exterior. Double or triple-pane glass enhances insulation, reducing heating and cooling costs. For example, imagine a 12x16 ft Aluminum Backyard Sunroom with triple-pane glazing and powder-coated frames, offering cozy warmth in winter and cool ventilation in summer. Prioritize materials that balance aesthetics, durability, and energy efficiency, especially for a high-use space connected to the backyard.
Additional Considerations:
-
Think about roof style, ventilation, and natural light entry while planning.
-
Decide early if you want integrated heating, lighting, or even storage solutions, as these impact both design and cost.
-
Check local building codes and permits before finalizing your layout to avoid costly modifications later.
2.Foundation and Site Preparation
A solid foundation is the backbone of any Aluminum Sunroom In Backyard installation. Start by evaluating the soil quality—sandy, clay, or loamy soil affects stability and drainage. Proper preparation prevents structural issues like shifting frames or water pooling.
2.1 Clearing and Leveling the Ground
-
Remove all debris, rocks, and vegetation from the planned footprint.
-
Level the ground using a spirit level or laser level, ensuring a flat base. Uneven surfaces can cause stress on aluminum frames, leading to long-term maintenance issues.
-
For larger backyard sunrooms, consider hiring a professional grader to guarantee uniformity. Tip: If integrating with a deck or patio, leave space for seamless alignment with the surrounding hardscape.
2.2 Pouring Concrete or Installing Deck Base
Choosing between concrete and a deck base depends on sunroom type and usage. Concrete slabs provide maximum stability, ideal for fully enclosed sunrooms with heavy glass panels. A deck base can be used for semi-enclosed sunrooms, offering flexibility and a lighter footprint.
| Base Type | Best For | Pros | Cons |
|---|---|---|---|
| Concrete Slab | Fully enclosed, high-use rooms | Extremely stable, durable, supports heavy glass | Higher cost, longer curing time |
| Deck Base | Semi-enclosed, light structures | Faster installation, easier modifications | Less stable for heavy structures |
2.3 Ensuring Proper Drainage and Support
Proper drainage is crucial to prevent water damage to both frames and foundation.
-
Slope the ground slightly away from the sunroom (1/4 inch per foot) to guide rainwater.
-
Install gravel or drainage pipes where necessary.
-
Consider using adjustable post supports for elevated deck bases to maintain level alignment over uneven terrain. This step ensures long-term durability and prevents warping or pooling issues under aluminum frames.
By carefully preparing the site, you create a strong foundation that supports both functional longevity and aesthetic appeal, making your backyard sunroom a durable and inviting extension of your home.
3.Frame Assembly and Installation
Assembling the Aluminum Sunroom frame correctly is critical for structural integrity and long-term performance. Aluminum frames are lightweight but rigid, and precise installation prevents misalignment and leaks.
3.1 Assembling Aluminum Frame Components
-
Lay out all aluminum components on a flat surface, separating wall panels, roof beams, and corner posts.
-
Follow manufacturer specifications to connect each section using stainless steel screws or bolts—tighten securely but avoid over-torquing, which can deform the frame.
-
Pre-assemble wall sections on the ground to verify dimensions and fit before lifting them onto the foundation.
-
For multi-panel designs, use temporary clamps to hold pieces in place, ensuring smooth alignment during final assembly.
3.2 Securing Frames to the Foundation
-
Position the base frame on the prepared concrete slab or deck base.
-
Anchor the frame using expansion bolts for concrete or adjustable post brackets for deck installations.
-
Check for level in all directions using a laser or spirit level; even small deviations can cause gaps in glazing or roof panels later.
-
Reinforce corner joints with brackets or gussets when necessary, especially for larger backyard sunrooms where wind loads are higher.
3.3 Checking Alignment and Stability
-
Inspect every vertical post and horizontal beam to ensure plumb and level alignment.
-
Shake gently to detect any movement; tighten fasteners if necessary.
-
Verify that roof beams sit flush and interlock correctly with wall frames.
-
Install temporary supports if needed until the glazing and roof panels are fully secured.
Following these steps guarantees your Aluminum Sunroom stands strong, with proper alignment ensuring seamless panel installation, excellent weather resistance, and long-term durability.
4.Roof and Glazing Installation
Installing the roof and glazing is where your Aluminum Sunroom In Backyard starts to take shape. Proper selection and installation ensure energy efficiency, durability, and comfort.
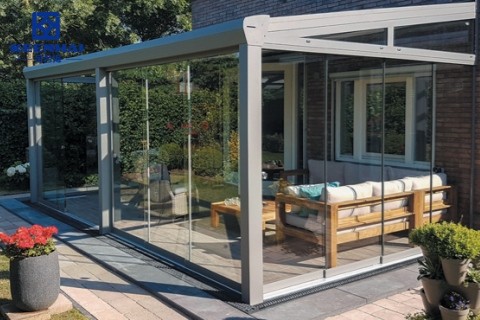
4.1 Choosing Roof Type: Lean-To, Gable, or Flat
-
Lean-to roofs are simple, cost-effective, and ideal for attaching to existing structures.
-
Gable roofs provide higher ceilings and better water runoff, perfect for larger backyard sunrooms.
-
Flat or slightly sloped roofs are modern and minimalistic but require high-quality waterproof membranes.
-
Consider your climate: gable or sloped roofs perform better in heavy rain or snow, while lean-to is sufficient for mild weather.
4.2 Installing Glass Panels: Single, Double, or Triple-Pane
-
Start with the roof frame, ensuring all beams are level and securely fastened.
-
Lift each glass panel carefully; use suction cups to avoid scratches or breakage.
-
Insert panels into tracks with rubber gaskets to prevent leaks.
-
Double- or triple-pane panels improve insulation and reduce condensation, which is crucial for year-round comfort.
| Roof Type | Typical Installation Time | Insulation Performance | Best Use Case |
|---|---|---|---|
| Lean-To | 1–2 days | Moderate | Small backyard additions |
| Gable | 2–4 days | High | Large sunrooms, high rainfall areas |
| Flat | 2–3 days | Moderate | Modern aesthetic, low snow regions |
4.3 Sealing and Weatherproofing
-
Apply silicone or EPDM seals along all joints and edges.
-
Check corners and panel overlaps to ensure no gaps remain.
-
Use flashing at roof-wall intersections to prevent water infiltration.
-
Inspect after the first rain to confirm all seals are effective—early adjustments save long-term maintenance costs.
Following these steps ensures your Aluminum Sunroom is weather-tight, energy-efficient, and visually seamless, ready for finishing touches and functional features.
5.Interior Finishing and Functional Features
Finishing the interior of your Aluminum Sunroom In Backyard turns it from a simple structure into a fully functional living space. Thoughtful choices here enhance comfort, aesthetics, and usability.
5.1 Flooring, Insulation, and Wall Treatments
-
Choose flooring that balances style and durability—porcelain tiles, engineered wood, or composite decking work well.
-
Install insulation in walls and roof to maintain temperature and reduce energy costs.
-
Apply moisture-resistant wall treatments or panels to prevent condensation damage in humid climates.
-
Tip: Lighter wall colors make the space feel bigger and maximize natural sunlight.
5.2 Adding Heating, Cooling, and Ventilation Systems
-
Plan for at least one efficient heating source—underfloor heating or wall-mounted units work best.
-
Install ceiling fans or small HVAC systems for air circulation.
-
Ensure windows or sliding panels can open for passive ventilation during warmer months.
-
Pro tip: Position thermostats away from direct sunlight to get accurate temperature readings.
5.3 Integrated Lighting, Electrical, and Furniture Options
-
Include layered lighting—overhead, task, and accent lights—to adapt to different activities.
-
Plan outlets and USB ports strategically for convenience and flexibility.
-
Consider built-in benches, shelving, or multifunctional furniture for maximum space efficiency.
-
For a polished, ready-to-use space, check out the full range of design options on Aluminum Sunroom you can find setups that combine lighting, electrical, and storage seamlessly.