

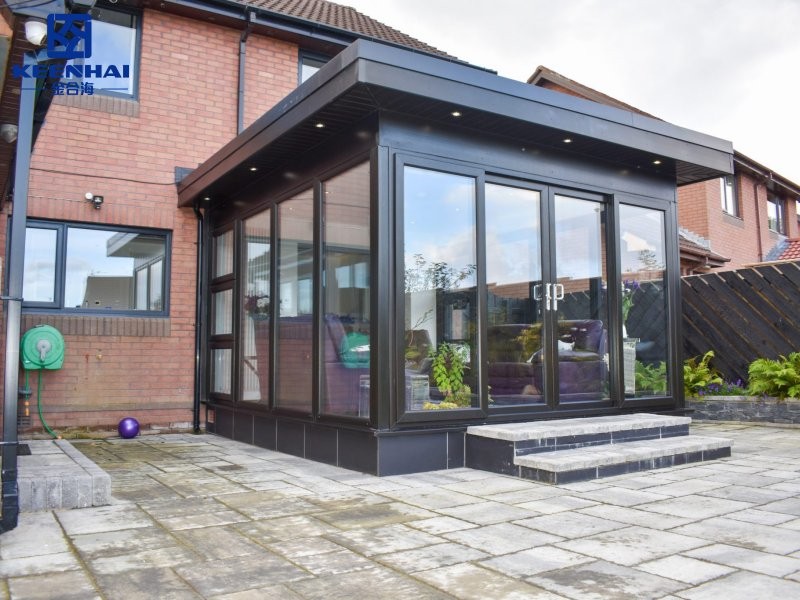
Assemble the frame methodically, connecting posts, beams, and roof supports according to manufacturer guidelines. Mount walls and glazing panels carefully, ensuring proper alignment and sealing all joints. Use recommended fasteners and weatherproofing materials to maintain energy efficiency and protect against leaks. Following these installation practices creates a visually appealing and structurally sound sunroom, transforming your backyard into a year-round usable living space.
1. Planning Your Aluminum Sunroom Project
Start by treating planning as the most important phase — it saves time, money, and headaches later. If you're thinking about an Aluminum Sunroom In Backyard, make that a measured decision: site conditions, sunlight, and access determine layout and costs. Good planning sets a realistic budget and prevents scope creep. Below are focused, practical steps to get you from idea to a buildable plan.
1.1 Assessing Backyard Size and Layout
Measure everything precisely: width, length, setbacks to property lines, and any fixed obstructions like sheds or big roots. Note the sun path across the seasons so you can place the main glazing toward morning or afternoon light as you prefer. Follow these steps:
-
Measure and mark the proposed footprint with stakes and string.
-
Check slope with a 4-foot level or laser; note slopes over 1 inch per 8 feet — they need correction.
-
Sketch access routes and transitions to the house (doorways, steps, decking).
| Layout Scenario | Why it matters | Quick fix |
|---|---|---|
| Sloped yard | Can cause water pooling & framing stress | Add retaining or raised deck base |
| Tight side yard | Limits width and furniture layout | Use narrow rectangular design |
| Open backyard | Best for multi-zone sunrooms | Consider L-shape or larger footprint |
Practical tip: leave 18–24 inches around the structure for maintenance access and gutters. This keeps your build serviceable and long-lasting.
1.2 Choosing Aluminum Frame and Roof Type
Frame choice and roof style drive durability and comfort. Powder-coated aluminum frames resist corrosion and keep maintenance low — pick thicker alloy sections (≥1.2 mm) for larger spans. For roofs, decide between polycarbonate (lightweight, cheaper) and insulated glass (better thermal performance). Use this rule of thumb:
-
Choose powder-coated frames for coastal or humid climates.
-
Pick insulated glass if you want year-round comfort and sound reduction.
-
Use polycarbonate when weight or budget is the primary constraint.
a properly specified insulated-glass roof can cut heating bills and condensation risk compared with single-pane options. Match your frame finish to the home trim to avoid a patched-on look — coordinated aesthetics help resale value.
1.3 Budgeting for Materials and Tools
Start with a clear breakdown so you know where money goes and where you can save. Typical DIY vs. custom cost ranges vary widely, so allocate funds like this:
-
Structure & glazing — frame, roof panels, glass: biggest share (≈50–65%).
-
Foundation & site prep — slab or deck base, drainage: critical (≈10–20%).
-
Tools & hardware — drills, levels, sealants (one-time buys or rentals).
-
Finishes & extras — flooring, electrical, HVAC, trim (variable).
Plan a 10–15% contingency for surprises (uneven footing, extra brackets). If you want to compare kits vs custom, get at least three quotes: one prefab kit, one contractor-installed kit, and one custom builder. That comparison usually reveals the real savings vs hidden costs.
2. Gathering Tools and Materials
Before you start cutting or drilling, make sure your workspace and tools are ready. A well-prepared setup means fewer mistakes and faster progress. Think of this stage as laying the groundwork for a professional-grade result, even if it’s your first time working with metal framing.
2.1 Essential Tools for DIY Construction
For a backyard aluminum sunroom kit, accuracy is everything. Gather your core tools first — not all power tools are optional here:
-
Cordless drill (with adjustable torque)
-
Laser level or long bubble level for frame alignment
-
Miter saw or circular saw with aluminum-cutting blade
-
Rubber mallet, clamps, and square for frame joints
-
Sealant gun, silicone, and weather tape for glazing and sealing
keep a small digital angle finder to measure exact roof pitch — most DIY builders miss that step.
A builder in Arizona reported saving 3 hours of rework just by double-checking his frame slope before fixing glass panels. That’s how real precision saves money.
2.2 Recommended Aluminum Sunroom Kits
If you're choosing between a custom aluminum sunroom design and a prefab system, understand the specs before buying. Prefab kits usually include pre-cut beams, connectors, glazing panels, and fasteners. You’ll just need tools and time. For most homeowners, the Aluminum Sunroom In Backyard kit is a balanced option — strong structure, clean look, and simplified installation for first-time DIYers.
| Type | Main Benefit | DIY Difficulty | Average Cost (USD/sqft) |
|---|---|---|---|
| Prefab aluminum kit | Fast assembly, less cutting | ★★☆☆☆ | $35–$50 |
| Custom-built | Flexible design, premium quality | ★★★★☆ | $60–$90 |
| Modular hybrid | Mix of prefab & custom sections | ★★★☆☆ | $45–$70 |
Rule of thumb: prefab kits are ideal for 10×12 ft or smaller projects; anything larger benefits from a semi-custom setup for stability and aesthetics.
2.3 Estimating Material Quantities Accurately
Before ordering, calculate materials by actual coverage, not guesswork. Follow these steps:
-
Measure the total floor area (length × width).
-
Add 5–8% extra material for cutting loss and mistakes.
-
Frame posts: one per 4–6 ft of wall length.
-
Roof panels: divide roof width by panel width (usually 24").
-
Sealant & screws: 1 cartridge per 10 linear ft of joint, 1 lb screws per 100 sq ft.
Keep a spreadsheet of dimensions and order quantities — you’ll thank yourself later. It’s much cheaper to have one spare aluminum beam on-site than to wait a week for a replacement. Every accurate estimate reduces downtime and waste.
3. Preparing the Site and Foundation
Proper site preparation determines how long your sunroom will actually last. Even the best aluminum frame won’t perform well if the ground beneath it isn’t level or stable. This step is all about getting your foundation solid before any structural parts go up.
3.1 Clearing, Leveling, and Marking the Area
Start by clearing every inch of grass, roots, and debris from the designated zone. Use marking paint or string lines to outline the exact perimeter of your planned structure. For most residential builds, a minimum of 2 feet clearance around the layout helps with movement and tool access during installation.
Next, check the ground level using a laser level or water level — even a small ½-inch slope can cause misalignment when installing aluminum framing. Compact the soil using a plate compactor, and if the area has soft patches, reinforce them with crushed gravel before pouring any base. Perfect leveling now means zero warping later.
3.2 Laying the Concrete Slab or Deck Base
Once the site is leveled, it’s time to decide whether to go with a concrete slab foundation or a raised deck base.
Concrete slabs offer higher stability and long-term strength, ideal for year-round sunrooms. Deck bases, however, work better on sloped or uneven backyards where full excavation isn’t practical.
| Base Type | Pros | Cons | Best For |
|---|---|---|---|
| Concrete Slab | Strong, weatherproof, low maintenance | Costly, permanent | Permanent sunrooms |
| Deck Base | Quick install, flexible height | Requires extra support | Temporary or sloped sites |
When pouring concrete, ensure at least 4 inches thickness with reinforcement mesh for structural support. Let the concrete cure for a full 72 hours before any frame installation — premature loading often leads to cracks or settling issues that are hard to fix later.
3.3 Setting Up Drainage and Ground Support
Good drainage isn’t optional — it’s what keeps your foundation from shifting or freezing. Create a gentle 1–2% slope away from the base so rainwater naturally runs off. Install gravel trenches or PVC drain pipes along the perimeter if you live in heavy rainfall areas.
In addition, add ground anchors or post brackets along key stress points to stabilize the structure. These prevent uplift during strong winds and reduce long-term shifting.
Don’t skip waterproof membrane layers between the foundation and frame base — it acts as a moisture barrier, protecting both the aluminum structure and interior flooring. This is what separates a 2-year DIY project from a 20-year durable one.
4. Assembling the Aluminum Frame Structure
Building the aluminum frame is one of the most critical phases of installing a four-season sunroom. This stage determines the structure’s long-term stability and weather resistance. Precision, patience, and proper anchoring are key to a flawless outcome.
4.1 Connecting Frame Components Securely
Begin by laying out all pre-cut aluminum frame components according to the manufacturer’s instructions. Use corrosion-resistant fasteners and corner brackets to connect beams and posts. Double-check the alignment of each connection before tightening bolts—this prevents warping or uneven gaps later. For extra durability, apply a thin layer of sealant at key joints to reduce water penetration and thermal movement.
4.2 Anchoring Posts and Beams to the Base
Position each post precisely on the pre-marked anchor points of the concrete slab or deck base. Use stainless steel anchors or expansion bolts for maximum hold, ensuring each post is perfectly plumb. When securing the horizontal beams, keep a level handy to confirm that all frame lines are straight and uniform. A misaligned base will cause roof panels or glass walls to fit poorly, increasing stress on the structure.
4.3 Ensuring Alignment and Frame Stability
Once the frame is fully assembled, verify that all corners form true 90-degree angles. Tighten every joint gradually, alternating between sides to balance structural tension. Use temporary bracing if needed to prevent movement during final tightening. Before proceeding to the glazing or wall installation phase, recheck that the frame is square and stable under moderate pressure.
5. Installing Roof, Walls, and Glazing Panels
This phase transforms your frame into a fully functional aluminum sunroom. Proper installation ensures durability, energy efficiency, and comfort year-round. Careful attention to panel selection, alignment, and sealing is essential.
5.1 Choosing Between Glass and Polycarbonate Panels
Decide on glazing based on insulation, light transmission, and budget. Single, double, or triple-pane glass provides excellent thermal performance, while polycarbonate panels offer lighter weight and impact resistance. For example, double-pane glass can reduce heat loss by up to 40% compared with single-pane, making it ideal for colder climates. Polycarbonate may be preferable in areas with hail or frequent debris impact. Consider UV protection coatings to prevent fading of interior furnishings.
5.2 Mounting Roof Sections and Wall Frames
Install roof panels sequentially, starting from the lowest point to the peak. Use manufacturer-recommended fasteners, ensuring each panel overlaps correctly to prevent water intrusion. For wall frames, fit the panels into the aluminum channels and secure them with the appropriate brackets. Always check that panels sit flush with the frame and maintain a uniform gap for expansion. A laser level or straight edge is helpful for keeping everything aligned.
5.3 Sealing Joints for Weatherproof Protection
Weatherproofing is crucial for long-term performance. Apply high-quality silicone or rubber gaskets along all seams between roof panels, walls, and corners. Pay special attention to roof-wall junctions, where water infiltration is most likely. Check for small gaps, and if necessary, use a secondary bead of sealant. Proper sealing not only prevents leaks but also improves energy efficiency by reducing drafts and heat loss.
Wrapping up your DIY project, a well-planned Aluminum Sunroom In Backyard not only elevates your outdoor living space but also adds lasting value to your home. By carefully following each step—from planning and site prep to frame assembly and glazing—you ensure a sturdy, energy-efficient, and stylish sunroom. With attention to detail and quality materials, your backyard transforms into a comfortable retreat you’ll enjoy year-round.