

1. Planning Your DIY Pergola Installation
Successfully installing a motorized louvered pergola starts with careful planning and preparation. Before you touch any tools, you need to focus on location, measurements, materials, and motor options. These factors directly impact the pergola’s durability, functionality, and overall experience. Proper planning ensures a smooth installation whether you are setting it up in a backyard patio, a hotel terrace, or a rooftop lounge.
1.1 Choosing the Right Location
1.Assess sunlight and shade throughout the day: Observe how sunlight moves across the area to ensure your pergola provides shade during peak sun hours but still allows winter sunlight.
2.Check surrounding structures: Make sure the pergola won’t be blocked by trees, walls, or other obstacles, which can interfere with the louver movement and future maintenance.
3.Evaluate ground stability: A flat, firm surface is essential. For soft garden areas, pour a concrete pad or install reinforced anchors to secure your Aluminum motorized pergola properly.
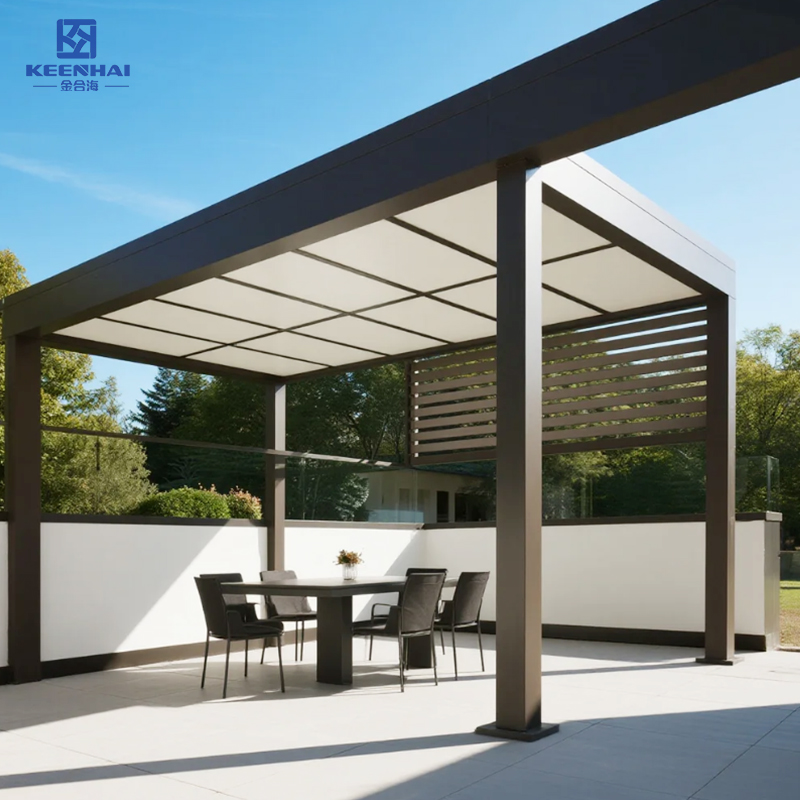
Scene example: In a residential backyard, positioning the pergola near a pool area provides both shade and a central gathering spot for outdoor relaxation.
1.2 Measuring and Site Preparation
-
Measure the area precisely: Use a tape measure to mark the length, width, and height. Ensure the pergola fits perfectly, leaving enough space for louver operation.
-
Mark anchor points: Outline the support post positions on the ground to guarantee correct alignment.
-
Prepare the foundation: Select appropriate anchoring methods based on surface type. For concrete, use M12 expansion bolts; for soft ground, pour concrete footings to support the structure.
-
Check clearances: Ensure electrical conduits, drainage pipes, or other obstacles won’t interfere with the pergola’s installation or function.
example: On a hotel terrace, measure around railings, lighting, and drainage to prevent conflicts with the motorized louvers.
1.3 Selecting Materials and Motor Options
-
Choose the frame material: Aluminum is ideal for a Aluminum electric pergola frame because it is lightweight, corrosion-resistant, and requires minimal maintenance. Wood and steel are alternatives but need extra care or rust protection.
-
Pick louver type: Decide between fixed or adjustable louvers. For motorized systems, lightweight aluminum louvers make it easier for the motor to operate and extend lifespan.
-
Select motor specifications: Match the motor power to your pergola size. A 100–250W motor suits medium-sized pergolas (around 3–4 meters wide), while larger structures may require 350W motors.
-
Consider automation options: Decide if you want remote control, Wi-Fi connectivity, or sunlight sensors for automatic louver adjustment.
| Material Type | Weight | Durability | Maintenance | Best Use Scenario |
|---|---|---|---|---|
| Aluminum | 15–20 kg/m² | High | Low | Residential patio, rooftop terrace |
| Wood | 25–30 kg/m² | Medium | High | Rustic backyard, garden |
| Steel | 30–35 kg/m² | Very High | Medium | Commercial terrace, hotel lobby |
Scene example: On a rooftop lounge, aluminum frames with motorized louvers reduce weight and structural load while ensuring long-lasting performance and smooth operation.
2. Tools and Materials Required
Before you start assembling your motorized louvered pergola, gathering the right tools and materials is critical to ensure a smooth installation. Using proper tools reduces errors, saves time, and prevents damage to the pergola components. Whether you're installing on a residential patio, hotel terrace, or rooftop lounge, preparation makes all the difference.
2.1 Essential Hand Tools
-
Tape Measure – Accurately measure distances and check alignment for posts and beams.
-
Level – Ensure every post and beam is perfectly vertical and horizontal, preventing tilt or uneven louver movement.
-
Rubber Mallet – Safely tap components into place without scratching the aluminum frame.
-
Screwdrivers (Phillips and Flathead) – Essential for securing smaller hardware like brackets and louver connectors.
-
Wrenches / Spanners – Tighten bolts on support posts, crossbeams, and motor mounts effectively.
example: On a backyard patio installation, a level and tape measure guarantee that the pergola frame sits squarely, ensuring smooth operation of motorized louvers.
2.2 Power Tools for Assembly
-
Cordless Drill – Speeds up drilling and fastening screws; use variable speed for precise control.
-
Impact Driver – Ideal for securing large bolts, especially for posts anchored in concrete.
-
Angle Grinder (Optional) – Useful for minor adjustments to aluminum or steel components.
-
Circular Saw with Non-Ferrous Blade – Only required if cutting custom-size aluminum or wood beams.
example: For a hotel terrace installation, using a cordless drill and impact driver allows technicians to assemble the frame quickly while minimizing disruption to guests.
2.3 Hardware and Motor Components
-
Support Post Anchors – Typically M12 expansion bolts for concrete, or custom footings for soft ground.
-
Crossbeam and Rafter Brackets – Ensure strong structural connections.
-
Louver Tracks and Mounting Brackets – Guide the motorized louvers smoothly along the pergola roof.
-
Motor Unit – Match the motor size to pergola width (100–250W for medium, 350W+ for larger structures).
-
Switches, Remote, or Smart Controls – Install according to your desired automation level.
-
Screws, Nuts, and Washers – High-quality, rust-resistant hardware ensures long-term stability.
| Component | Material | Quantity (typical 3x4m pergola) | Notes |
|---|---|---|---|
| Support post anchors | Stainless steel | 4–6 | Secure posts on concrete or footings |
| Crossbeam brackets | Aluminum | 6–8 | Ensure frame alignment |
| Louver tracks | Aluminum | 2 | For motorized louver guidance |
| Motor unit | Electric | 1 | Power matches pergola width |
| Screws/nuts/washers | Stainless steel | 50–70 | Corrosion-resistant for outdoor use |
example: On a rooftop lounge, using corrosion-resistant aluminum brackets and high-quality stainless hardware ensures smooth operation and long-term durability, even in harsh weather conditions.
3. Assembling the Pergola Frame
Once you have your tools and materials ready, the next step is assembling the pergola frame. This stage is crucial because a perfectly aligned frame ensures smooth operation of the motorized louvers and long-term stability. Proper planning during the previous steps makes assembly much easier, whether you’re working on a residential patio, a hotel terrace, or a rooftop platform.
3.1 Installing Support Posts
-
Position the posts: Place each support post at the marked anchor points. Ensure spacing matches the pergola design.
-
Secure posts to the foundation: Use M12 expansion bolts for concrete or pre-poured footings for soft ground. Tighten each bolt gradually to avoid tilting.
-
Check vertical alignment: Use a spirit level to confirm each post stands perfectly upright. Adjust as necessary before moving to the next post.
-
Temporary bracing: If needed, install temporary supports to hold the posts steady during crossbeam installation.
example: On a rooftop lounge, securing aluminum posts with expansion bolts ensures the Aluminum motorized pergola frame can handle wind loads and motorized louver movement safely.
3.2 Securing Crossbeams and Rafters
-
Attach crossbeam brackets: Align each crossbeam with the support posts and secure using corrosion-resistant screws and bolts.
-
Install rafters: Lay rafters along the crossbeams, ensuring equal spacing as per design specifications.
-
Tighten all connections gradually: This prevents twisting or misalignment.
-
Verify spacing: Check that the gaps between rafters accommodate the louver tracks for smooth motor operation.
example: On a residential backyard patio, properly spaced crossbeams and rafters allow motorized louvers to slide effortlessly, creating adjustable shade without resistance.
3.3 Ensuring Frame Alignment and Leveling
-
Final check for alignment: Walk around the pergola and inspect all posts, beams, and rafters. Ensure everything is square and level.
-
Adjust where necessary: Minor adjustments now prevent serious problems during louver installation.
-
Secure temporary braces or supports: Once confirmed, remove any temporary bracing after the frame is stable.
-
Double-check diagonals: Measure diagonal distances to ensure the frame is not skewed.
| Component | Key Checkpoints | Tools Recommended |
|---|---|---|
| Support posts | Vertical alignment | Level, tape measure |
| Crossbeams & rafters | Even spacing & secure attachment | Wrench, screwdriver |
| Frame overall | Diagonal measurements & level | Tape measure, spirit level |
4. Installing the Louvered Roof System
With the pergola frame fully assembled, the next step is installing the louvered roof system. This stage is critical for ensuring smooth motorized operation and precise shading control. Careful installation now saves adjustments later and guarantees longevity, whether your pergola is on a residential patio, hotel terrace, or rooftop lounge.
4.1 Mounting Louvers on Tracks
-
Position the louver tracks: Secure the tracks onto the rafters using the provided brackets and screws. Make sure they are perfectly parallel to ensure smooth movement.
-
Install each louver: Slide the aluminum louvers carefully into the tracks. Ensure the edges align evenly to prevent binding.
-
Check spacing: Maintain equal gaps between louvers for proper drainage and optimal sunlight control.
-
Test manual movement: Before connecting the motor, move each louver slightly to ensure free sliding without obstruction.
example: On a residential backyard patio, properly mounted louvers glide smoothly along tracks, giving instant shade adjustments for afternoon sun.
4.2 Connecting the Motorized Mechanism
-
Attach the motor unit: Mount the motor securely to the designated support bracket according to the pergola’s width and louver weight.
-
Connect the drive cable: Ensure the cable links the motor to the louvers’ rotation system without slack or tension.
-
Wire the motor to switches or remote: Follow the manufacturer instructions for power connections, keeping wires organized and protected from weather.
-
Test motor function: Run the motor briefly to confirm all louvers rotate smoothly and the system responds to the control unit.
example: On a hotel terrace, connecting the motorized system allows staff to adjust louvers quickly via remote, creating comfortable shade for outdoor dining areas.
4.3 Adjusting Louver Rotation
-
Set the rotation limits: Adjust the stops on the motor unit so louvers open and close to the desired angles.
-
Fine-tune alignment: Check that all louvers are parallel when fully closed to ensure complete shade coverage.
-
Synchronize motor with remote or smart control: Make sure all louvers respond consistently when using automated features.
-
Perform a final operational test: Run several open-close cycles to confirm smooth rotation and no binding.
| Step | Key Actions | Tools Recommended |
|---|---|---|
| Mounting louvers | Slide louvers into tracks, check alignment | Screwdriver, level |
| Motor connection | Secure motor, connect drive cable | Wrench, cordless drill |
| Adjust rotation | Set rotation stops, synchronize remote | Level, hands-on adjustment |
example: On a rooftop lounge, fine-tuning louver rotation ensures optimal shade during peak sun hours and smooth operation even during frequent use.
5. Electrical and Automation Setup
Once the louvered roof system is in place, the next step is setting up the electrical connections and automation features. Proper wiring and control integration ensure smooth motor operation, safety, and convenience. Whether your pergola is on a residential patio, hotel terrace, or rooftop lounge, following precise electrical setup procedures is essential for long-term performance.
5.1 Wiring the Motor and Switches
-
Turn off the main power: Always start by cutting off electricity to prevent any hazards during installation.
-
Connect the motor wires: Follow the manufacturer’s wiring diagram to connect power, ground, and control lines. Ensure all connections are tight and insulated.
-
Install the wall switches: Mount switches near a convenient location, making sure the wiring is hidden or protected from weather exposure.
-
Secure cables along beams and posts: Use cable clips or conduits to keep wiring neat and safe.
-
Perform initial power-on test: Turn on the circuit briefly to verify that the motor responds correctly to the switches.
example: On a hotel terrace, neatly routed wiring and accessible switches allow staff to operate the pergola safely without interfering with guest areas.
5.2 Integrating Remote or Smart Controls
-
Install the remote control receiver: Connect it to the motor unit as per manufacturer instructions.
-
Pair the remote or smart device: Follow the programming steps to link your smartphone app, remote, or home automation system with the motorized louvers.
-
Check signal coverage: Ensure the remote or app controls the pergola from all intended areas without delays.
-
Label and document settings: Note channel assignments and programming details for future reference.
example: On a residential backyard patio, integrating smart controls allows homeowners to adjust Aluminum electric pergola louvers from their phone, adding convenience during outdoor gatherings.
5.3 Testing Automated Functions
-
Cycle the louvers multiple times: Open and close fully to ensure smooth operation without binding.
-
Test partial rotations: Adjust louvers to intermediate angles to verify precise shading control.
-
Verify all control options: Check wall switches, remote control, and app integration to confirm consistent response.
-
Inspect safety features: Ensure any motor overload protection or obstruction sensors function correctly.
| Test Step | Key Actions | Recommended Checkpoints |
|---|---|---|
| Full cycle operation | Open and close louvers | Smooth movement, no binding |
| Partial rotation | Adjust louvers to desired angle | Accurate alignment, consistent shading |
| Control verification | Test all switches, remote, and smart app | Immediate response, no delay |
| Safety check | Inspect sensors and motor protection | Proper shutoff on obstruction |
Installing a motorized louvered pergola transforms your outdoor space, giving you full control over sunlight and shade. By carefully planning, assembling a sturdy frame, mounting the louvers, and setting up automation, you ensure smooth operation and long-lasting durability. Whether it’s a residential patio, hotel terrace, or rooftop lounge, following this guide makes your DIY installation efficient, precise, and professional. Once complete, you can enjoy adjustable shade, stylish design, and effortless motorized functionality every day.example: On a rooftop lounge, testing automated functions ensures that motorized louvers respond reliably to remote control, maintaining comfort for guests during peak sunlight hours.