

1.Preparing for Installation
Before starting the installation of a motorized louvered pergola, it’s crucial to prepare the site and gather all necessary materials to ensure a smooth process. A well-prepared foundation not only makes assembly faster but also improves the stability and longevity of your pergola, whether it’s installed in a backyard patio or a commercial hotel terrace.
1.1Tools and Materials Needed
-
Measuring tape, level, and chalk line – Essential for marking the exact position of support posts and ensuring the structure is perfectly aligned.
-
Power drill and screwdriver set – For attaching beams, brackets, and motor components securely.
-
Concrete mix or anchor bolts – Depending on whether you’re installing on soil or a hard surface, these secure the posts firmly.
-
Safety equipment – Gloves, safety goggles, and a hard hat for personal protection during installation.
-
Louvered panels and motor kit – If you choose an Aluminum motorized pergola, make sure the motor and louvers are compatible and tested before assembly.
If you want, here’s a quick reference table comparing materials for different installation surfaces:
| Installation Surface | Recommended Anchoring | Notes |
|---|---|---|
| Concrete patio | Expansion bolts | Fast, stable, minimal ground prep |
| Wooden deck | Lag screws + brackets | Pre-drill to prevent splitting |
| Soil/Garden | Concrete footings | Requires curing time for stability |
1.2Measuring and Site Selection
1: Evaluate the space. Measure the intended area carefully and consider surrounding structures like walls, fences, or trees. Make sure there’s enough clearance for louvers to fully open and rotate without obstruction.
2: Check sunlight and drainage. A Louvres Pergola performs best when positioned to optimize shade in summer and allow sunlight in winter. Ensure water drainage paths are clear to prevent puddles near the posts.
3: Mark post positions. Use a chalk line to outline where the support posts will stand. Double-check all measurements with a level to ensure your pergola won’t be slanted after installation.
4: Verify access for tools and materials. If you’re installing a large motorized pergola in a commercial patio or hotel terrace, make sure power tools and motor kits can reach the site easily. This avoids unnecessary delays and reduces risk of damage during assembly.
By following these steps and preparing the correct tools, materials, and site layout, you set a solid foundation for a seamless motorized louvered pergola installation, whether it’s for a backyard lounge or a rooftop terrace. Proper preparation saves time, ensures stability, and guarantees your pergola functions perfectly for years to come.
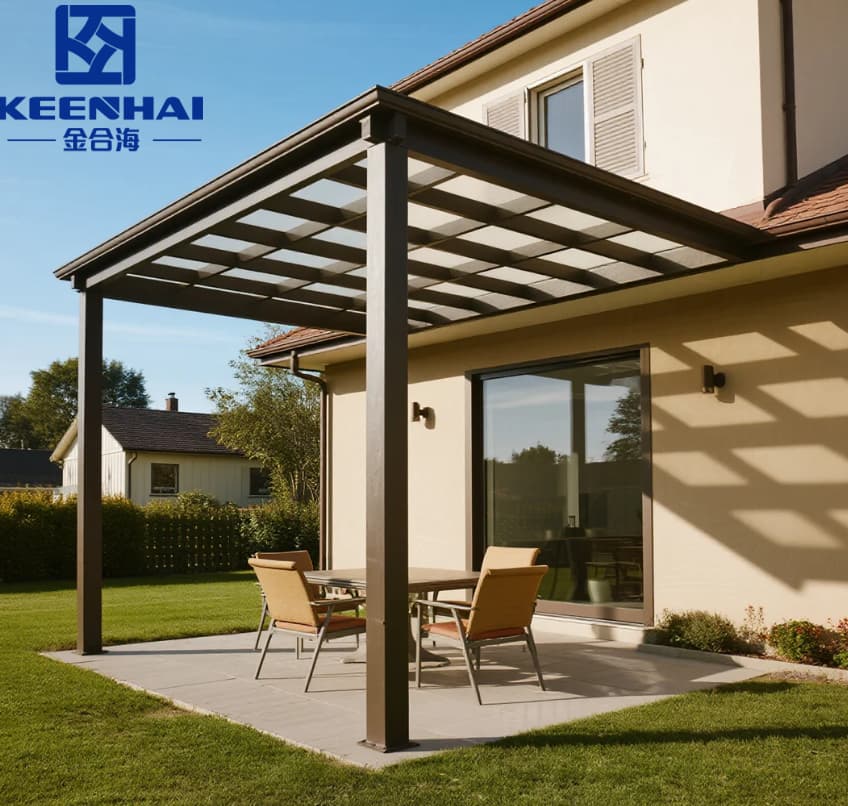
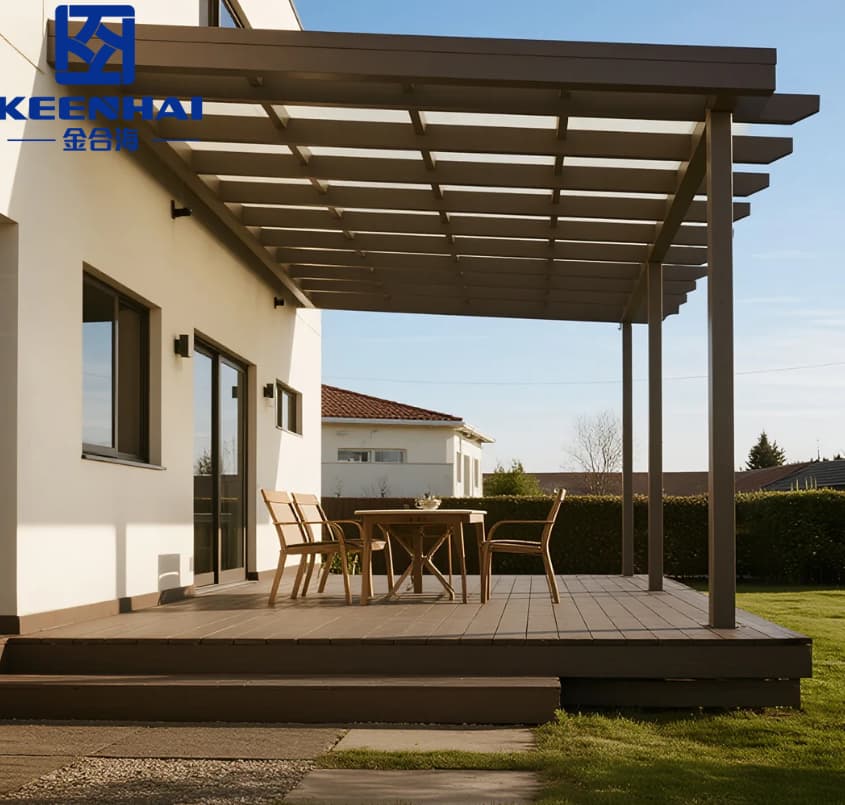
2.Assembling the Pergola Frame
Assembling the pergola frame is a critical step to guarantee stability, perfect louver movement, and long-term durability. A properly constructed frame ensures even weight distribution, prevents wobbling, and supports motorized louvered panels in both residential patios and commercial terraces.
2. 1Installing Support Posts
Determine Post Depth and Placement
-
For soil installations, dig concrete footings 60–80 cm deep to resist strong winds.
-
On concrete patios, use M12 stainless steel expansion bolts. Pre-drill holes 10 mm larger than bolt diameter for a snug fit.
-
Check post spacing carefully. A misalignment of just 1–2 cm can affect louver rotation and roof balance.
Secure Posts Vertically
-
Position each post according to the layout from the “Preparing for Installation” step.
-
Use a laser level or plumb line to verify vertical alignment.
-
Temporarily brace posts, then pour concrete or tighten anchor bolts securely.
-
Allow concrete footings to cure 24–48 hours before adding crossbeams for maximum stability.
2.2Securing Crossbeams and Rafters
Install Crossbeams
-
Lift crossbeams into place; most Aluminum motorized pergolas use 80–100 mm thick aluminum beams for optimal strength without excessive weight.
-
Secure beams with corrosion-resistant stainless steel brackets and bolts. Tighten bolts in a crisscross pattern to ensure even load distribution.
Attach Rafters
-
Space rafters 50–60 cm apart for proper support of louvers.
-
Fasten with self-tapping screws with anti-corrosion coating.
-
Confirm alignment and squareness using a level and diagonal measurements.
Final Frame Check
-
Inspect the frame for level, plumb, and square alignment.
-
Verify stability by gently shaking posts and crossbeams.
-
Proper assembly ensures your pergola frame is ready for smooth motorized louver installation.
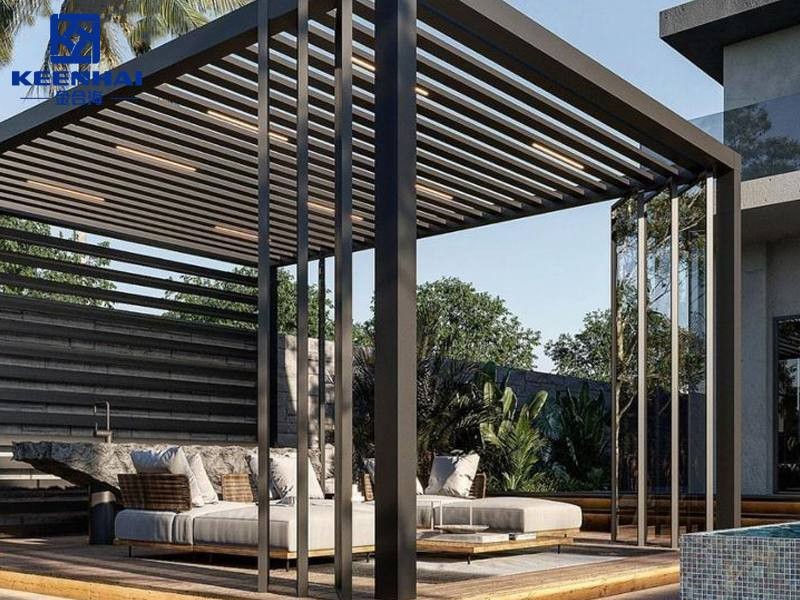
3.Installing the Louvered Roof System
The louvered roof system is the centerpiece of a motorized louvered pergola. Proper installation ensures smooth rotation, precise shading control, and long-term durability, whether it’s mounted on a residential patio or a commercial rooftop terrace.
3. 1Mounting Louvers on Tracks
Prepare the Tracks
-
Verify that crossbeams are perfectly level; any misalignment greater than 2 mm can cause louver binding.
-
Use a measuring tape and level to mark exact positions for track placement.
-
Most aluminum louvers are 120–150 mm wide and weigh 7–10 kg per linear meter, so handle with care.
Install Louvers
-
Slide each louver carefully into the track. Ensure that the end caps and spacing clips are correctly positioned to prevent rattling.
-
Check spacing with a tape measure; maintain a 5 mm clearance between louvers for smooth rotation.
-
Secure the first and last louvers with brackets to lock them in place.
Verify Alignment
-
Manually rotate louvers to confirm smooth movement across the full span.
-
Adjust clips or brackets if any resistance is felt.
-
This step ensures that the pergola operates silently and efficiently once motorized.
3.2Connecting the Motorized Mechanism (if applicable)
Position the Motor
-
For an Aluminum motorized pergola, position the motor centrally to evenly distribute torque.
-
Use the manufacturer’s torque specifications; most motors require 3–5 Nm per louver segment for smooth operation.
Wiring and Controls
-
Connect the motor to a dedicated 110–240V power supply, ensuring proper grounding.
-
Integrate the switch, remote control, or smart home system. Most motors support Wi-Fi or RF remote control, allowing louver adjustment from any location.
-
Test the system by running 5–10 complete open/close cycles. Adjust limit stops as needed to prevent over-rotation or stress on the motor.
Final Check
-
Inspect all connections, louvers, and tracks.
-
Ensure there is no wobble or binding, and that the louvers rotate uniformly.
-
A correctly installed roof system guarantees years of hassle-free adjustable shade and ventilation.
4.Electrical and Automation Setup
Setting up the electrical system and automation is critical for a motorized louvered pergola to function reliably. Proper wiring and smart control integration ensure smooth louver operation, energy efficiency, and long-term safety, whether installed on a residential backyard patio or a hotel terrace.
4. 1Wiring the Motor and Switches
Plan the Electrical Layout
-
Identify a dedicated 110–240V power supply close to the pergola. Ensure the line can handle 2–5 A current, depending on motor specifications.
-
Use weatherproof conduit and junction boxes for outdoor wiring to prevent moisture ingress.
Connect the Motor
-
Turn off the main power supply before starting any connections.
-
Connect live, neutral, and ground wires according to the motor’s wiring diagram.
-
Secure all terminals tightly to prevent arcing, and verify insulation integrity.
-
Test the motor briefly with a single rotation cycle to confirm correct wiring.
4. 2Integrating Remote or Smart Controls
Install the Control System
-
Mount the wall switch or control panel at a convenient height.
-
For remote control operation, pair the motor with RF or Wi-Fi enabled remotes. Most modern motors allow up to 5–10 remote devices to control the same pergola.
Smart Home Integration
-
Connect the motor to your smart home hub if supported (e.g., Alexa, Google Home).
-
Configure routines for automated louver adjustment based on sun position, time of day, or weather sensors.
-
Test multiple open/close cycles using the app or voice commands to ensure consistent response.
Safety and Verification
-
Confirm that all wires are insulated and protected from rain or sun exposure.
-
Ensure louvers stop smoothly at limit positions to prevent motor overload.
-
A correctly installed electrical and automation system provides years of reliable, hassle-free operation, enhancing comfort and usability in both residential and commercial settings.