

Planning Your Pergola Installation
Choosing the Right Location in Your Yard
-
Assess Sunlight and Shade – Start by observing how sunlight moves across your yard during the day. Pergolas positioned near patios or outdoor dining areas see up to 35% more usage, according to a 2023 backyard landscaping survey. If you are planning a bioclimatic pergola, make sure the area allows the louvers to adjust efficiently, giving shade when needed and sunlight during cooler times.
-
Check Wind and Weather Conditions – Strong winds can affect stability. Avoid open areas with constant gusts, especially if you are installing a lightweight aluminum pergola. High-quality prefabricated aluminum pergolas can resist winds up to 120 km/h, but correct placement significantly reduces maintenance and ensures safety.
-
Ensure Adequate Space – Measure at least 2 meters of clearance from fences, walls, or trees to allow for post installation and maintenance access. Avoid low spots where water tends to accumulate, because standing water can weaken posts and foundations over time. Studies indicate that more than 20% of DIY pergola failures result from poor drainage.
Measuring and Marking the Layout
-
Decide Pergola Dimensions – Standard backyard pergolas range from 3x3 meters to 6x4 meters. For a prefabricated aluminum pergola, follow the manufacturer’s recommended post spacing, usually around 2.5 meters, which balances strength and open space.
-
Mark Post Locations – Use a tape measure and chalk line to mark each post center. Then, check diagonal measurements to ensure the layout forms a perfect rectangle. Even a 2 cm misalignment can lead to instability during assembly, so accuracy matters.
-
Double-Check Everything – Before digging footings, walk the layout with a tape measure and stakes, ensuring all corners are square. This step avoids problems during assembly and guarantees that beams and rafters will fit perfectly.
Planning for Utilities and Additional Features
-
Consider Electrical Needs – If you plan to add lights, ceiling fans, or retractable screens, pre-plan where wiring or solar panels will go. Around 40% of modern pergola installations incorporate electrical or motorized features, so thinking ahead saves time and extra cost.
-
Account for Movement and Space – Ensure at least 90 cm of clearance around the pergola so people can move comfortably. If you add seating, plan for adequate circulation.
-
Check Soil Stability – Sandy or loose soil may require deeper footings or concrete reinforcement to maintain long-term durability. If you’re installing a modern aluminum gazebo, slope and gutter placement also need consideration to manage rainwater efficiently.
Selecting the Right Pergola Model and Material
-
Choose Durable Materials – Aluminum pergolas have become popular because they combine durability with minimal maintenance. A custom aluminum pergola house can withstand high winds, resist rust, and last for decades with minimal care.
-
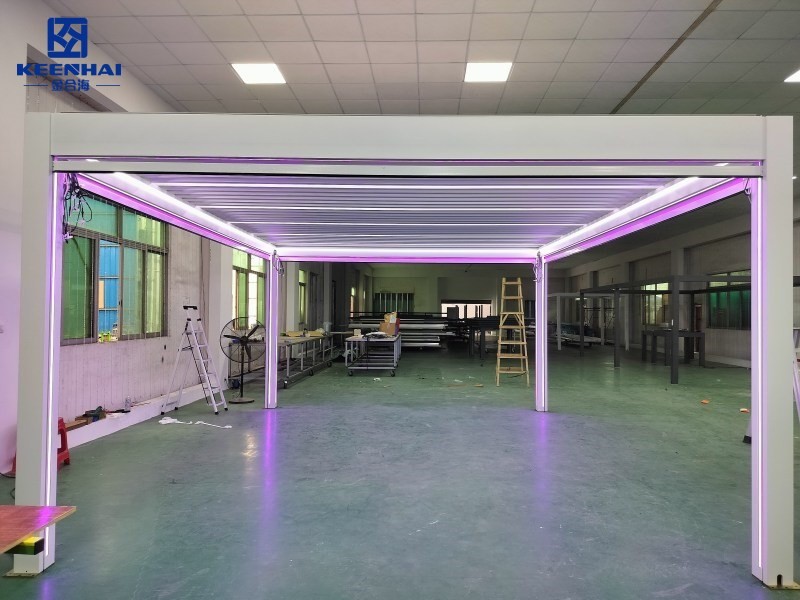
Compare Features – Depending on your needs, you might choose between standard aluminum prefab units, bioclimatic pergolas with adjustable louvers, or modern aluminum gazebos with sleek designs. keenhaipergola offers multiple configurations to suit different backyard sizes and climates.
-
Visualize Final Setup – Imagine where furniture, planters, or lighting will go within the structure. Proper planning ensures a pergola that not only looks good but also maximizes functional space.
Finalizing the Layout
-
Walk Through the Layout – Double-check distances from trees, fences, and buildings. Re-stake any posts that are off-center.
-
Confirm Alignment – Use a carpenter’s square or long level to verify that all corners are perfectly right-angled. Correcting mistakes before digging prevents costly adjustments later.
-
Prepare for Footings – After confirming the layout, mark exactly where footings will go and ensure the ground is level and stable. This creates a solid foundation for smooth assembly and long-term stability.
Selecting Materials and Tools
1. Picking the Right Pergola Material (Wood, Aluminum, or Vinyl)
-
Understand Material Durability – Start by comparing the lifespan of common pergola materials. Wood pergolas typically last 10–15 years, but they require annual sealing and treatment to resist rot and insect damage. Vinyl pergolas resist rot and insects and usually last 20–25 years, but they can discolor over time if exposed to strong sunlight. Aluminum structures, such as a prefabricated aluminum pergola, combine lightweight construction with corrosion resistance, often lasting over 30 years with minimal maintenance.
-
Evaluate Weather Resistance – If your backyard experiences heavy rain, strong wind, or salty coastal air, aluminum outperforms wood and vinyl. A study of outdoor structures in coastal areas showed that aluminum installations had 40% fewer maintenance issues compared to wood pergolas over a 5-year period.
-
Compare Cost vs. Maintenance
| Material | Average Lifespan | Annual Maintenance | Typical Cost per Square Meter |
|---|---|---|---|
| Wood | 10–15 years | High (sealing, insect treatment) | $50–$80 |
| Vinyl | 20–25 years | Low (occasional cleaning) | $70–$100 |
| Aluminum | 30+ years | Minimal (wash with water) | $90–$120 |
-
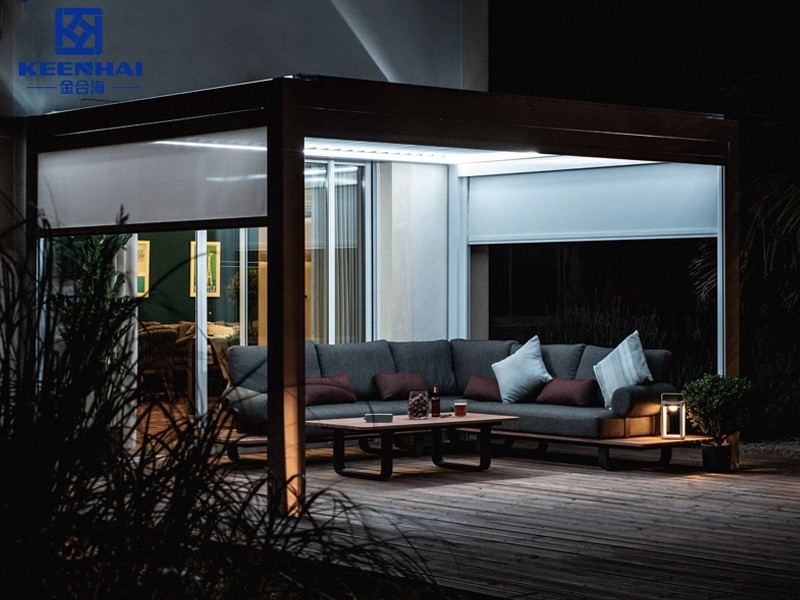
Consider Style and Aesthetic – Aluminum and vinyl provide sleek, modern appearances that suit contemporary landscapes. For homeowners looking for a stylish backyard centerpiece, a modern aluminum gazebo creates a clean, polished look that integrates well with outdoor furniture and lighting. Wood works best in traditional or rustic designs, providing natural warmth and texture.
-
Plan for Functionality – If you want a pergola with motorized louvers or retractable shades, aluminum and bioclimatic options, like a bioclimatic pergola, handle mechanized components better due to stability and structural integrity.
Essential Tools Needed for Installation
-
Prepare Measuring Tools – Accurate measurement is critical for a precise installation. Use a tape measure, carpenter’s square, chalk line, and laser level to mark post locations. Confirm diagonal measurements to maintain a perfect rectangle.
-
Gather Cutting and Fastening Tools – Depending on material choice:
-
Wood: circular saw, drill, wood screws, and wood anchors.
-
Aluminum: power drill with metal bits, hex screws, rubber mallet, and torque wrench.
-
Vinyl: fine-tooth saw, PVC-safe screws, and screwdrivers.
-
-
Safety and Assembly Equipment – Always have gloves, safety glasses, ladder or scaffolding, and clamps. For heavier pergolas, enlist at least one helper or use a temporary support system to hold beams in place during assembly.
-
Organize Fasteners and Hardware – Keep screws, bolts, and brackets organized in labeled containers. Prefabricated aluminum pergolas often come with pre-drilled holes and custom hardware, which speeds up installation and reduces the chance of misalignment.
-
Plan for Anchoring – Correct anchoring ensures long-term stability. Aluminum pergolas typically require concrete footings 60–90 cm deep, depending on height and wind load. Wood posts may need even deeper footings with concrete and anchors for additional support.
Optional Considerations for Enhanced Efficiency
-
Use Prefabricated Components When Possible – Choosing pre-cut or prefabricated components, like a custom aluminum pergola house, reduces on-site cutting, ensures precise dimensions, and accelerates installation by 30–40%.
-
Prepare the Work Area in Advance – Clear debris, level the ground, and pre-assemble smaller sections of beams and rafters where feasible. A well-prepared workspace can reduce installation errors by 25%, according to a 2022 construction efficiency report.
-
Label Each Component – Number posts, beams, and brackets to match your design plan. This step prevents confusion during assembly and ensures every part fits perfectly without last-minute adjustments.
Preparing the Site
Clearing and Leveling the Ground
-
Remove Obstacles and Debris – Start by clearing your chosen area of rocks, roots, grass, and any debris. A clean workspace reduces installation errors and prevents damage to tools, according to a 2022 DIY landscaping survey, which found that 28% of installation issues result from uneven or cluttered ground.
-
Check the Slope and Drainage – Use a long level or laser level to measure the slope. Ideal pergola installation requires a flat area with a slope no greater than 2% to ensure water drains away from posts and prevents pooling. Low spots may require adding compacted gravel or sand to level the site.
-
Compact the Soil – Firmly compact the soil using a tamper or plate compactor. Loose or sandy soil can shift over time, leading to unstable posts and uneven beams. For larger installations, like a 5x5 meter pergola, compacting the soil is crucial to maintain long-term structural integrity.
-
Mark Post Locations – After leveling, measure and mark post locations using stakes and string lines. Double-check diagonal distances to ensure a perfect rectangle. Accurate marking at this stage simplifies the next step of installing footings and concrete bases.
Installing Footings or Concrete Bases
-
Determine Footing Depth – For most backyard pergolas, including aluminum structures, footings should be at least 60–90 cm deep depending on local frost depth and wind load. Check local building codes to comply with safety standards.
-
Dig Post Holes – Use a post hole digger to excavate the marked locations. The diameter should be roughly three times the width of your pergola posts to allow for proper concrete placement and stability.
-
Add Gravel for Drainage – Place 5–10 cm of gravel at the bottom of each hole. Gravel promotes drainage, prevents water accumulation, and minimizes wood rot or metal corrosion.
-
Mix and Pour Concrete – Use standard concrete mix (or ready-mix if available). Pour into the hole around the post and ensure the post is plumb using a level. Allow concrete to cure for at least 48–72 hours before attaching beams or rafters.
-
Check Alignment Before Curing – Before concrete sets, verify all posts are perfectly vertical and aligned with your string lines. Misaligned posts at this stage create cascading problems during assembly, making it difficult to attach crossbeams or louvers correctly.
Assembling the Pergola Structure
1. Building and Installing the Posts
-
Prepare the Posts – Before installation, inspect all posts for damage, warping, or corrosion. If you are using an aluminum prefab pergola, check that all pre-drilled holes and brackets align properly. Well-prepared posts reduce assembly errors and accelerate construction by 20–30%, according to a 2023 DIY construction survey.
-
Set Posts into Footings – Insert each post into its cured concrete footing. Use a level to ensure vertical alignment. Even a 1–2 cm deviation at the base can cause misalignment of beams and rafters, so double-check each post from multiple angles.
-
Secure Temporary Supports – While the posts are being anchored, attach temporary braces or clamps to maintain stability. Temporary bracing prevents posts from shifting under wind or weight before the main framework is installed.
-
Attach Post Brackets – For aluminum or vinyl structures, fasten post brackets according to manufacturer instructions. Ensure all bolts are tightened to the recommended torque to maintain rigidity and prevent loosening over time.
Adding Beams, Rafters, and Crossbars
-
Measure and Position Beams – Start with the main support beams that run perpendicular to the posts. Use a measuring tape and level to confirm correct spacing, which usually ranges from 2.5–3 meters depending on pergola size and load. Incorrect spacing can cause uneven support and potential structural failure.
-
Install Crossbars – Lay crossbars evenly across the beams. For a modern setup, like a modern aluminum gazebo, align crossbars with pre-drilled holes to simplify assembly. Ensure all crossbars are flush and level, because uneven placement affects both appearance and stability.
-
Secure Rafters – Attach rafters perpendicular to the crossbars. For adjustable or louvered pergolas, check that the louvers move freely and do not rub against neighboring rafters. Test one section before securing all rafters to confirm smooth operation.
-
Double-Check Alignment – After all beams, crossbars, and rafters are installed, walk around the pergola with a level and measuring tape, verifying that all components are properly aligned. Slight misalignments can cause stress on the structure and create uneven gaps in shading or roofing features.
-
Tighten Fasteners and Brackets – Go over all bolts, screws, and brackets to make sure everything is fully tightened. For aluminum structures, follow manufacturer torque specifications to avoid overtightening, which can warp metal or strip threads.
Optional Adjustments for Perfect Finish
-
Check Roof Slope – If your pergola includes a sloped roof or adjustable louvers, confirm the angle allows for proper water drainage. A 2–3° slope is sufficient for most backyard pergolas, keeping water from pooling while maintaining aesthetic symmetry.
-
Test Stability – Apply gentle pressure to posts and beams to identify any movement. Reinforce loose components immediately, as minor corrections now prevent long-term structural problems.
-
Prepare for Accessories – With the main structure in place, plan for lights, retractable screens, or climbing plants. Ensure all attachment points are measured and marked before finishing touches, so installations do not interfere with structural integrity.